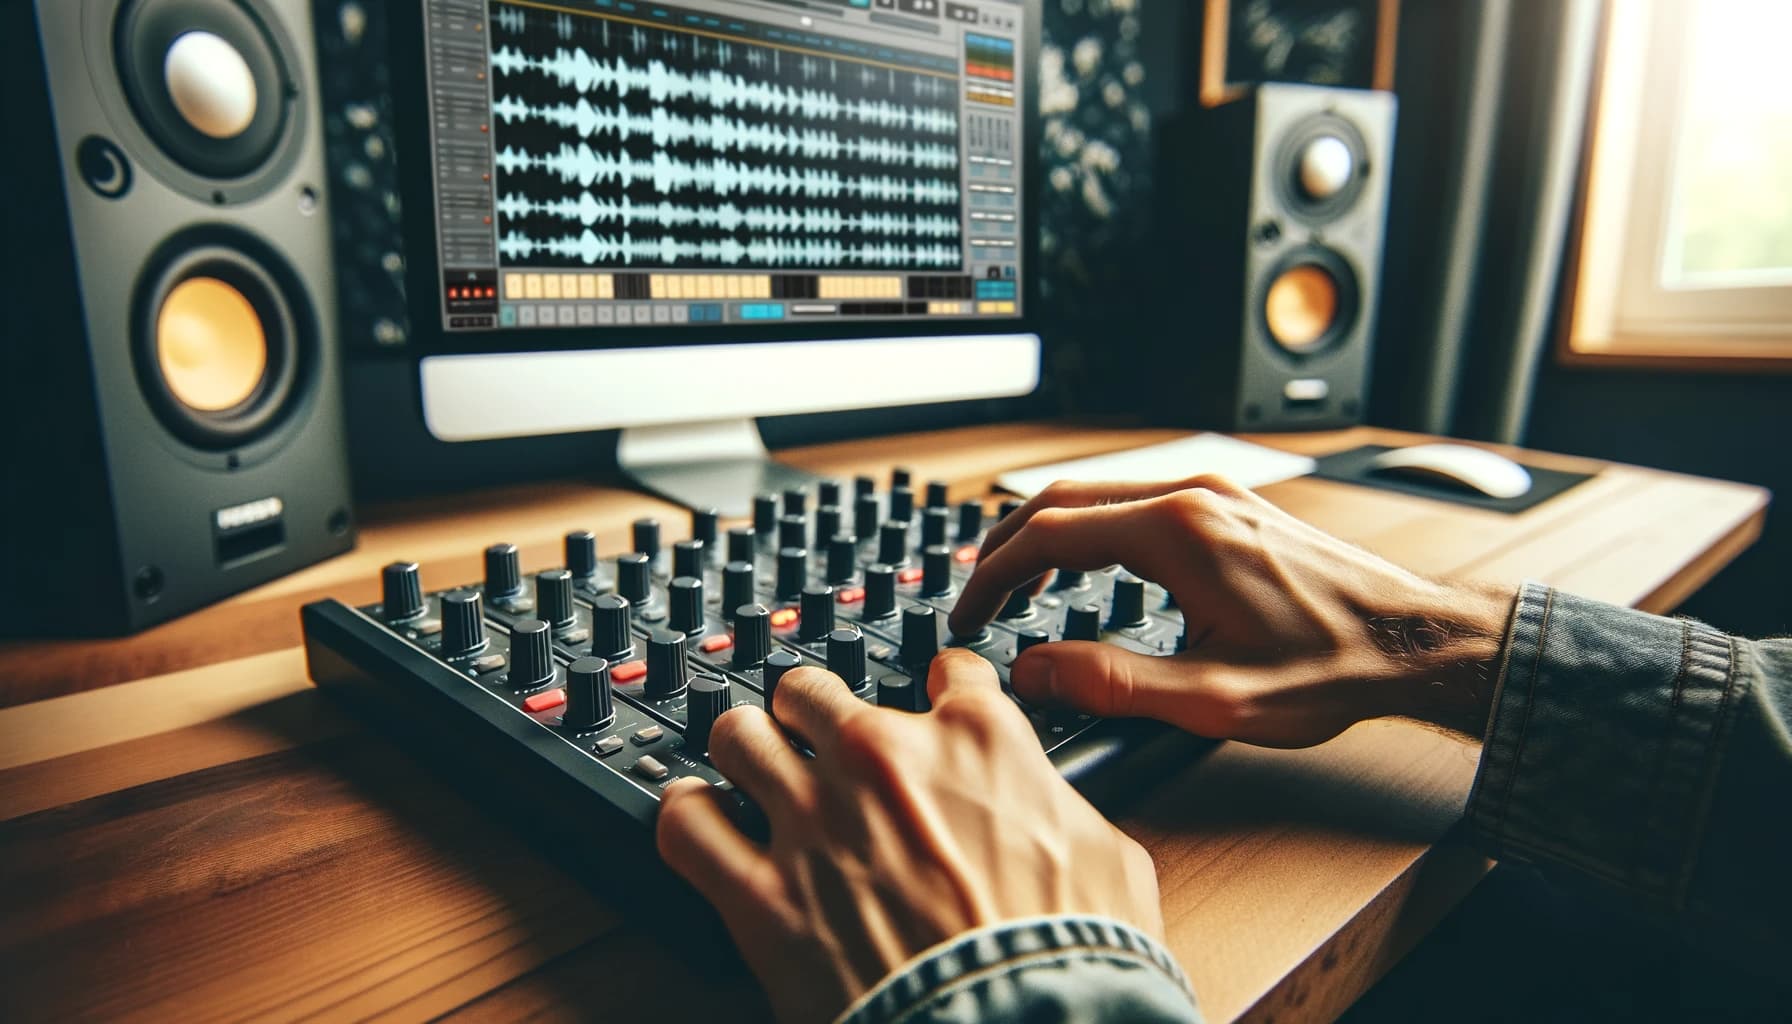
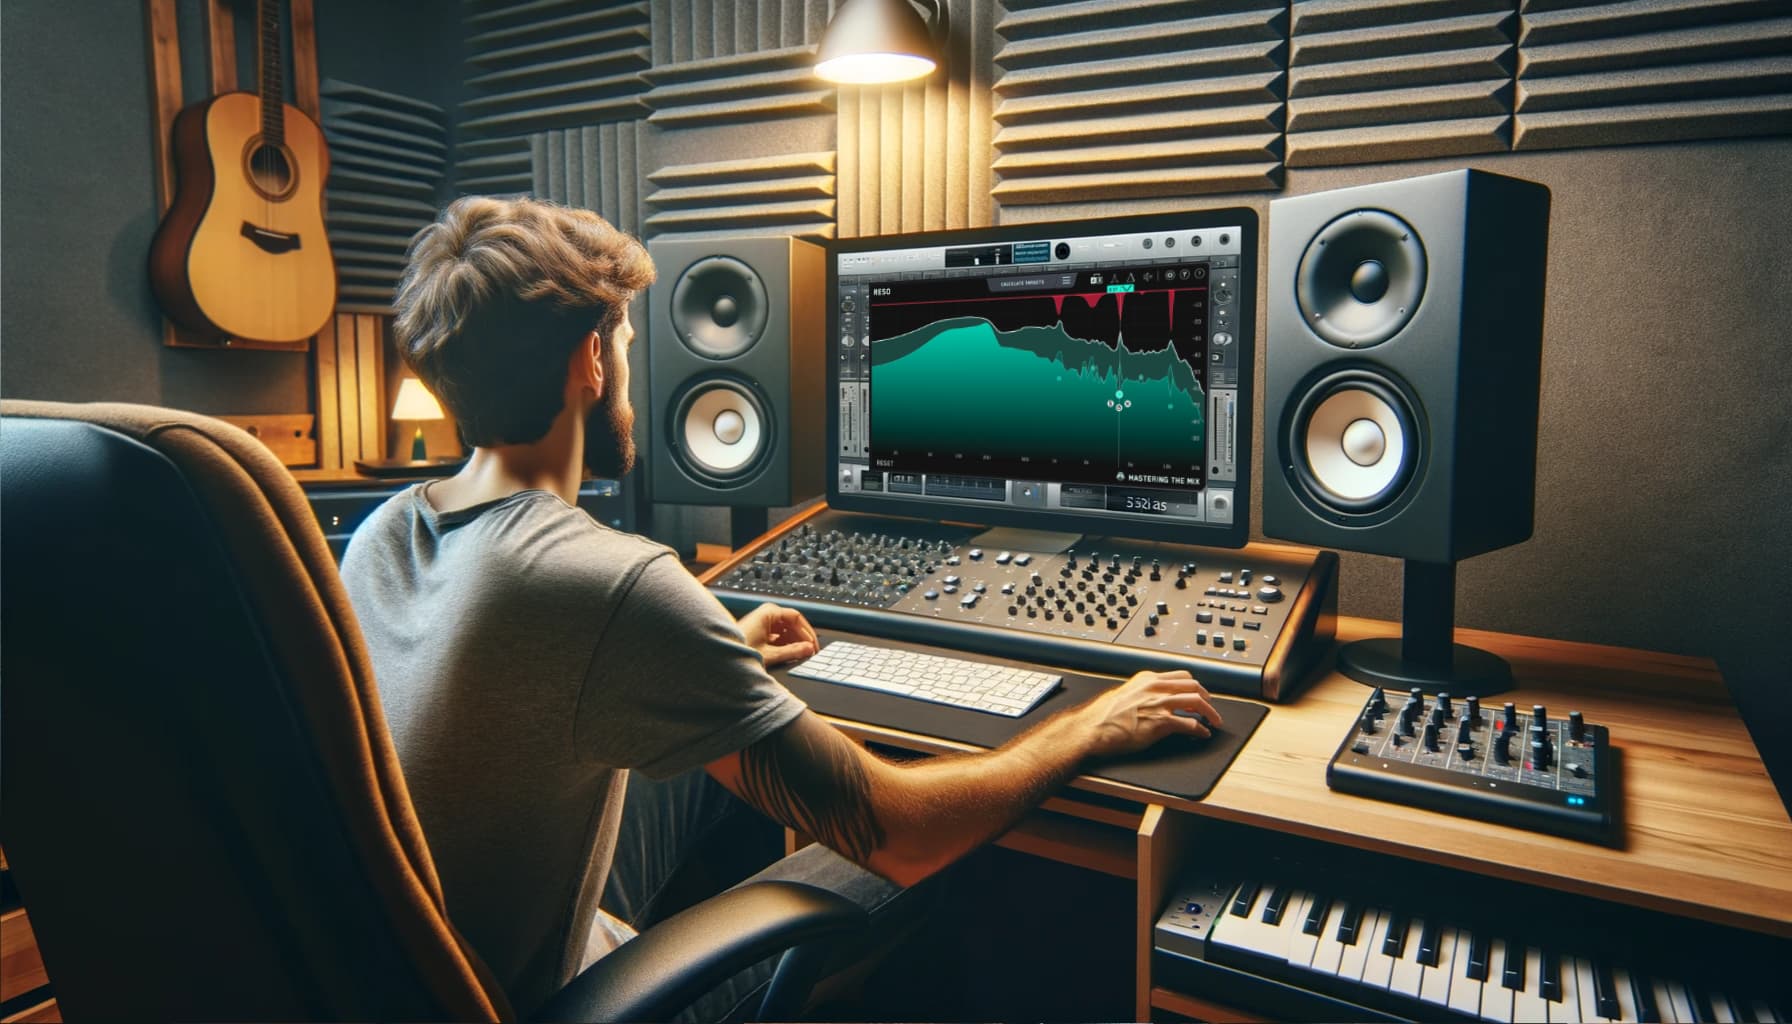
- Unpredictable Acoustics: Home studio environments often come with non-ideal acoustic characteristics, making it hard to trust the bass response you hear.
- Translation across Systems: Ensuring your track's low-end translates well across various listening systems—from club sound systems to smartphone speakers—is a common trial.
The goal is not merely to achieve a powerful bass but one that integrates seamlessly with the totality of the track. BASSROOM enters here as an essential tool, crafted to empower producers to finalize their mixes with confidence, especially when working within the constraints of a non-treated home studio.
Precise Low-End Mixing with BASSROOM
Why is precision so crucial when it comes to the low-end? At face value, we might think it's all about that guttural punch and warmth. However, the truth is much more nuanced. BASSROOM, with its smart EQ adjustments, provides the precision necessary to achieve a clear, well-defined, and balanced bass that supports the whole mix.
Whether one is dealing with the depth of a kick drum or the subtlety of a baseline, BASSROOM helps to ensure that these crucial mix elements find their rightful place within the auditory space of your track. It's not just about making the bass 'louder'; it's about sculpting the low-end to contribute effectively to the overall sonic profile of your production.
As we proceed, we'll delve deeper into how to maximize the value of BASSROOM to tackle these low-end challenges head-on and ensure that your pre-master is not just good, but great.
Getting to Know BASSROOM
BASSROOM is a final mix and mastering EQ that’s taking the low-end game to a new level. This sophisticated plugin is not just another equalizer – it's a targeted tool designed specifically for addressing the complexities of bass frequency tonal balance.
What sets BASSROOM apart? It's the melding of simplicity with advanced functionality to provide:
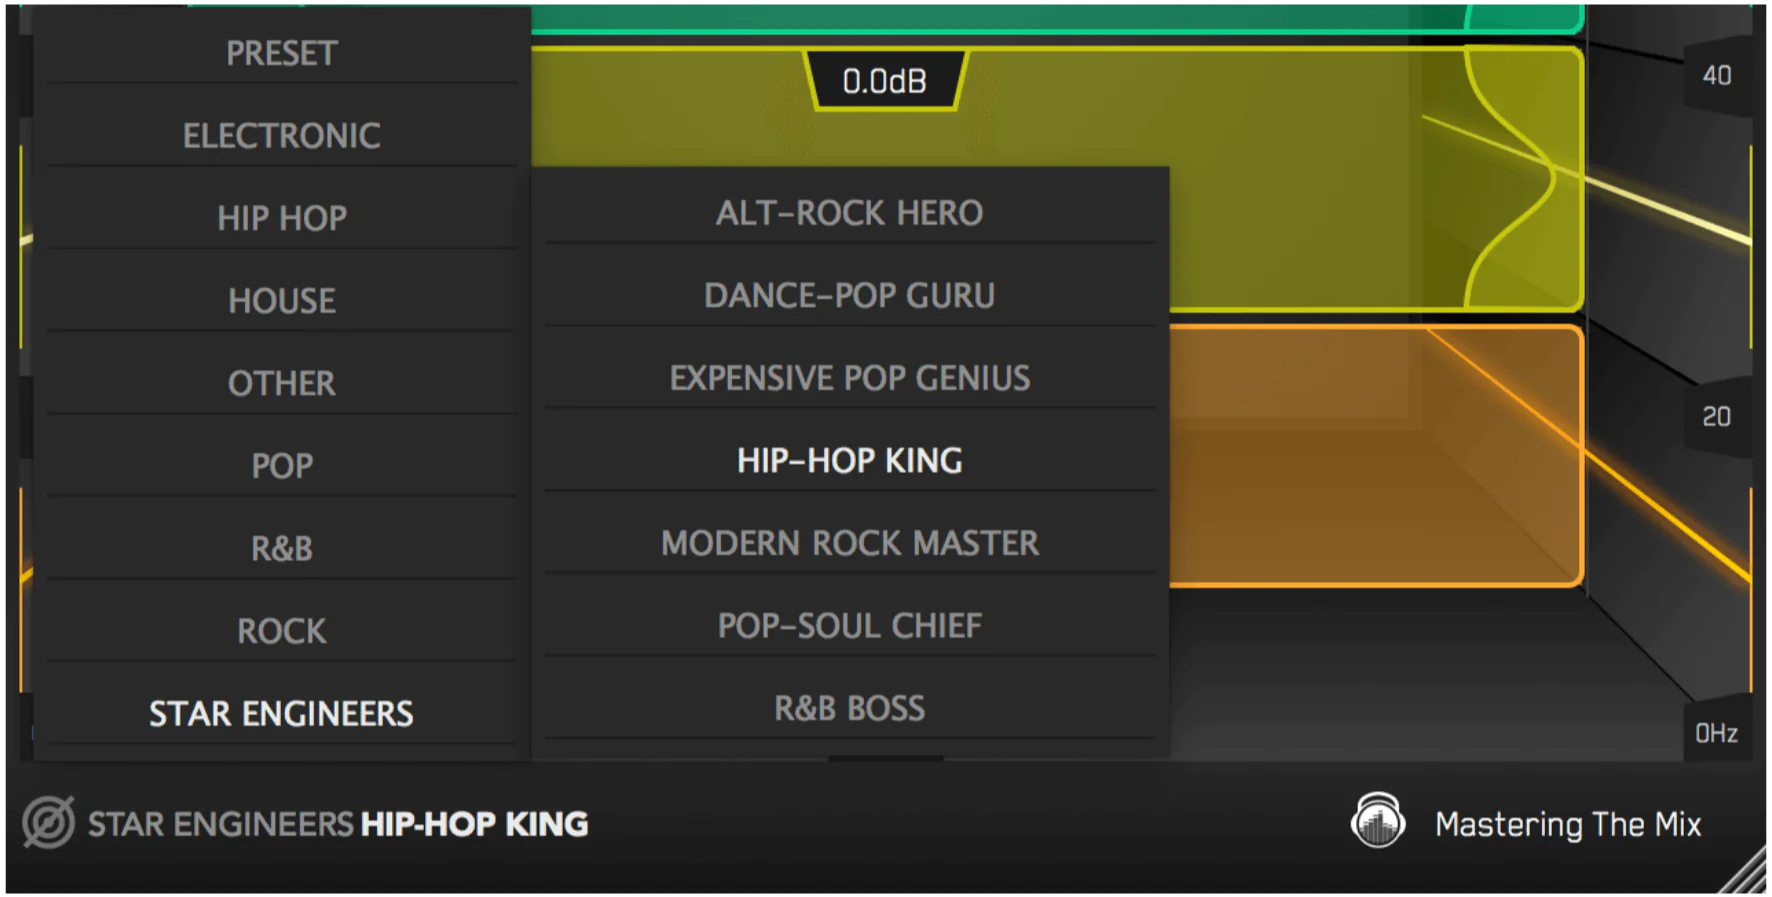
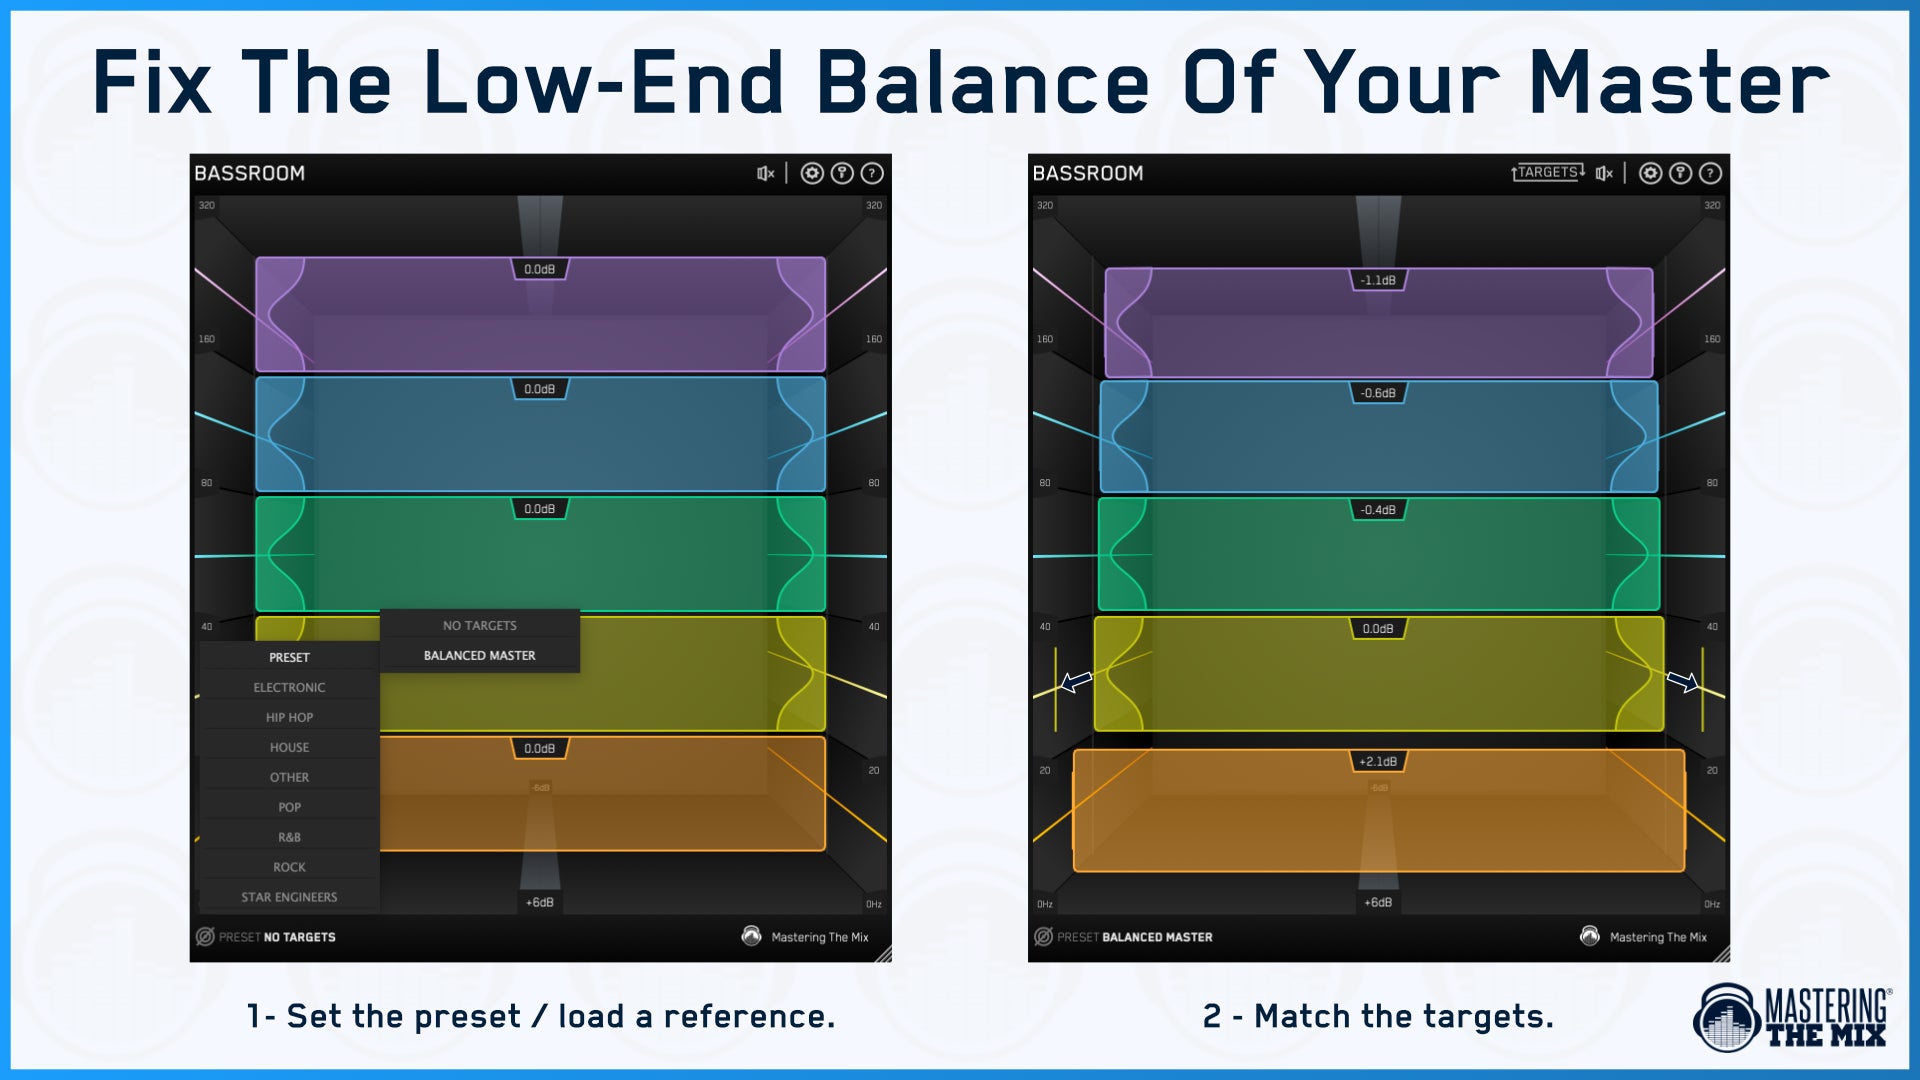
- Genre-Specific Profiles: Preloaded with settings to help producers start with a solid foundation based on the style of music they are mixing or mastering.
- Transparent Corrections: Designed to make EQ adjustments without altering the essence of the original mix, ensuring the low-end energy remains intact.
- 3D Interface: A futuristic display that illustrates how changes in EQ settings impact your sound, offering an intuitive understanding of your adjustments.
BASSROOM excels in its ability to suggest genre-specific adjustments, which gives producers a starting point that is musically relevant. This foundation can then be refined to suit the unique character of their mix.
Here’s a quick look at the features to familiarize before diving in:
- Presets: A range of built-in presets tailored to different genres to get you in the ballpark of a great sounding mix.
- Customizable Bands: Five bands of EQ that can be precisely shaped to fit the contours of your bass frequencies.
- Match EQ Feature: An ingenious option that allows you to import reference tracks and guides your EQ decisions to match professional standards.
What truly makes BASSROOM invaluable is not just its technical prowess but its educational capability. By providing visual feedback and guiding adjustments, it serves as a teaching tool, honing the producers' instincts for what great low-end should sound like. In the upcoming sections, we will break down how to unleash the full potential of BASSROOM in your mix.

Setting Up BASSROOM in Your Mix
The proper setup of BASSROOM within your mixing or mastering session can greatly enhance its effectiveness. Here’s how to ensure that you’re well-prepared to make the most of this essential low-end tool.
Initial Steps to Integrate BASSROOM
Integration of BASSROOM into your Digital Audio Workstation (DAW) is the first crucial step. Follow these initial set-up actions:
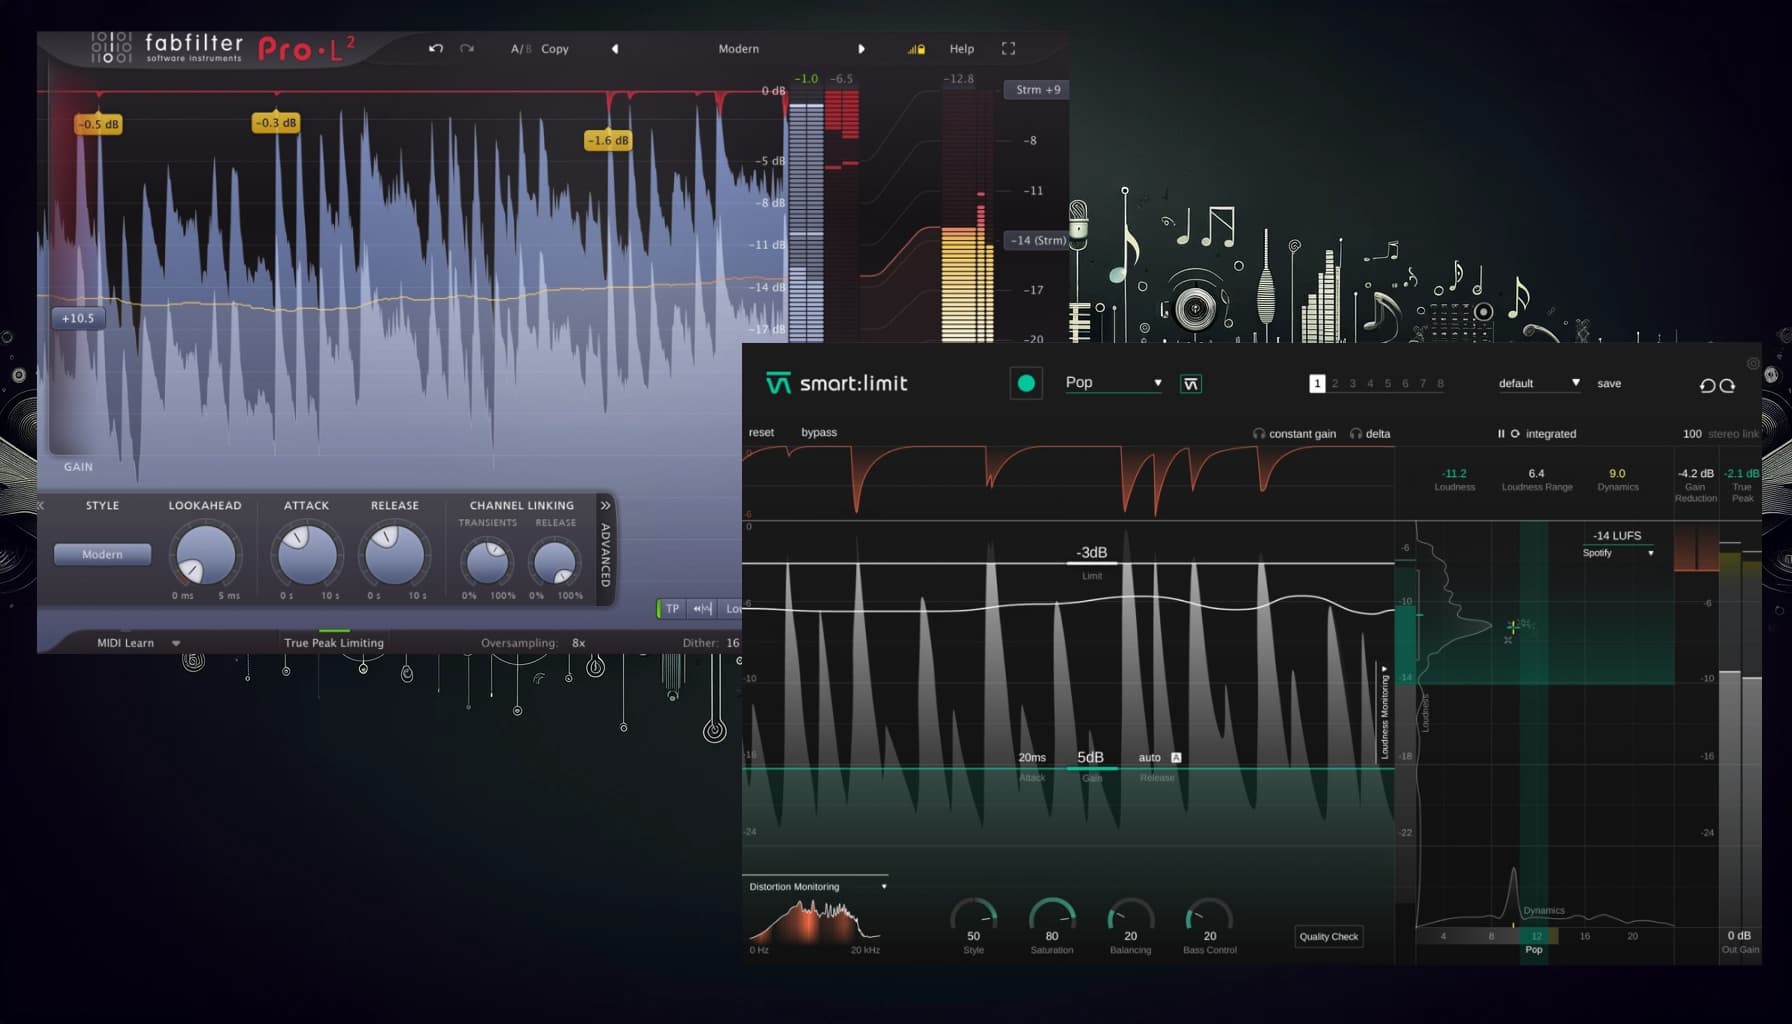
- Load BASSROOM: On your master channel as the last plugin on your master output. (When mastering it can go before your limiter)
- Considering Headroom: Ensure that you’ve left adequate headroom in the mix to allow for clear adjustments without the risk of clipping.

Understanding BASSROOM's Interface
Take a moment to orient yourself with the interface:
- Select a Preset: Start by selecting a preset that closely matches the genre you’re working within.
- Analyze the Track: Play the loudest section of your mix and observe how BASSROOM's targets guide you to cut or boost the 5 low-frequency bands.
With these steps, you'll have effectively set the stage for BASSROOM to work its magic. The visual feedback will become a powerful guide as you explore the depth of your mix's low-end.
Calibrating Your System
Before making any adjustments, ensure your monitoring system is as transparent and flat as possible:
- Trusted Monitors: Use the most reliable speakers or headphones available to you, familiarize yourself with their frequency response.
- Reference Tracks: Play a few well-mixed tracks that you're familiar with to understand how the low end translates in your workspace.
With BASSROOM now properly set up and integrated into your DAW, and with a calibrated monitoring environment, you're ready to commence finessing the low-end of your tracks. The next section will guide you through the process of fine-tuning your mix's bass frequencies to achieve a masterful balance and translatability.
Fine-Tuning the Low-End with BASSROOM
Once BASSROOM is in place and your monitoring system is set, it's time to dive into achieving a clean, powerful, and well-balanced low-end. This section will illuminate each step of the process, ensuring that you can wield BASSROOM with both surgical precision and artistic finesse.
Step-by-Step Guide to Low-End Mastery
Adjusting the low frequencies requires a thoughtful approach:
- Choose the Correct Preset: Start with a preset that suits your track's style.
- Identify Key Frequencies: Use BASSROOM to reveal which frequencies are prominent in your mix's bass elements.
- Set the Bands: Adjust the EQ bands in BASSROOM to either boost the desired lows or cut the unnecessary rumble.
Genre and Artistic Considerations
Consider the genre and artistic intent of your music when making EQ adjustments:
- Electronic Music: Pay attention to the kick and bass relationship. A slight boost at the fundamental frequency can add punch.
- Rock and Acoustic Genres: Aim for clarity rather than overpowering bass, lightly sculpting bass guitar frequencies for a warm undertone.
Remember, the key to BASSROOM is not just what you're hearing, but what you're not hearing. A well-tuned low-end will not be overly assertive but will fill out the sonic landscape and provide the necessary foundation for the rest of your mix.
Final Touches
The final touches can often make the most significant difference. After applying your EQ settings:
- A/B Testing: Constantly compare the processed and unprocessed signals to maintain the integrity of the original sound.
- Repeat Listening: Take breaks and revisit the mix with fresh ears to ensure your adjustments are beneficial and enhance the overall mix.
These detail-oriented steps will help ensure your low-end is not only heard but felt in its desired form. With BASSROOM as part of your mixing arsenal, you're now equipped to finalize your mix's low-end with confidence and precision, setting the stage for a robust and impactful master.
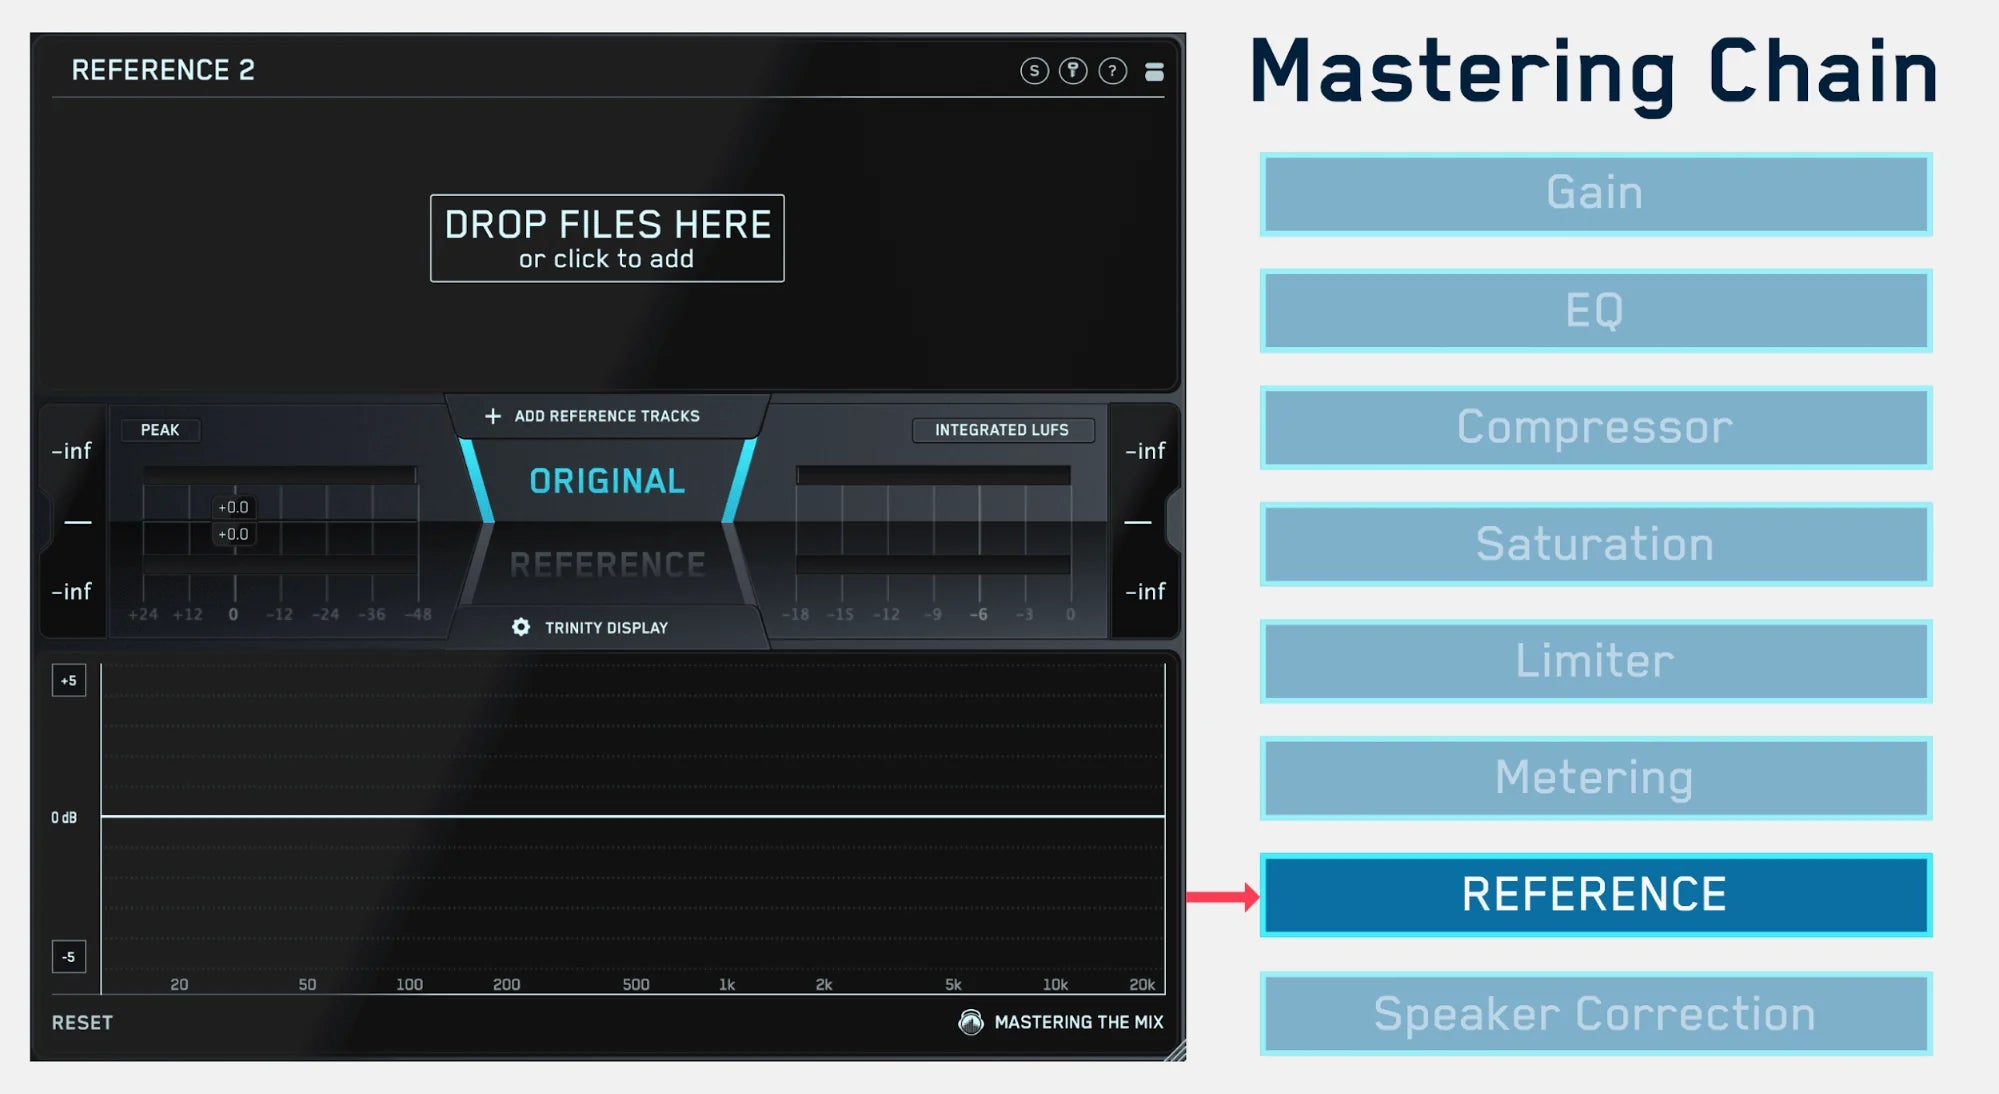
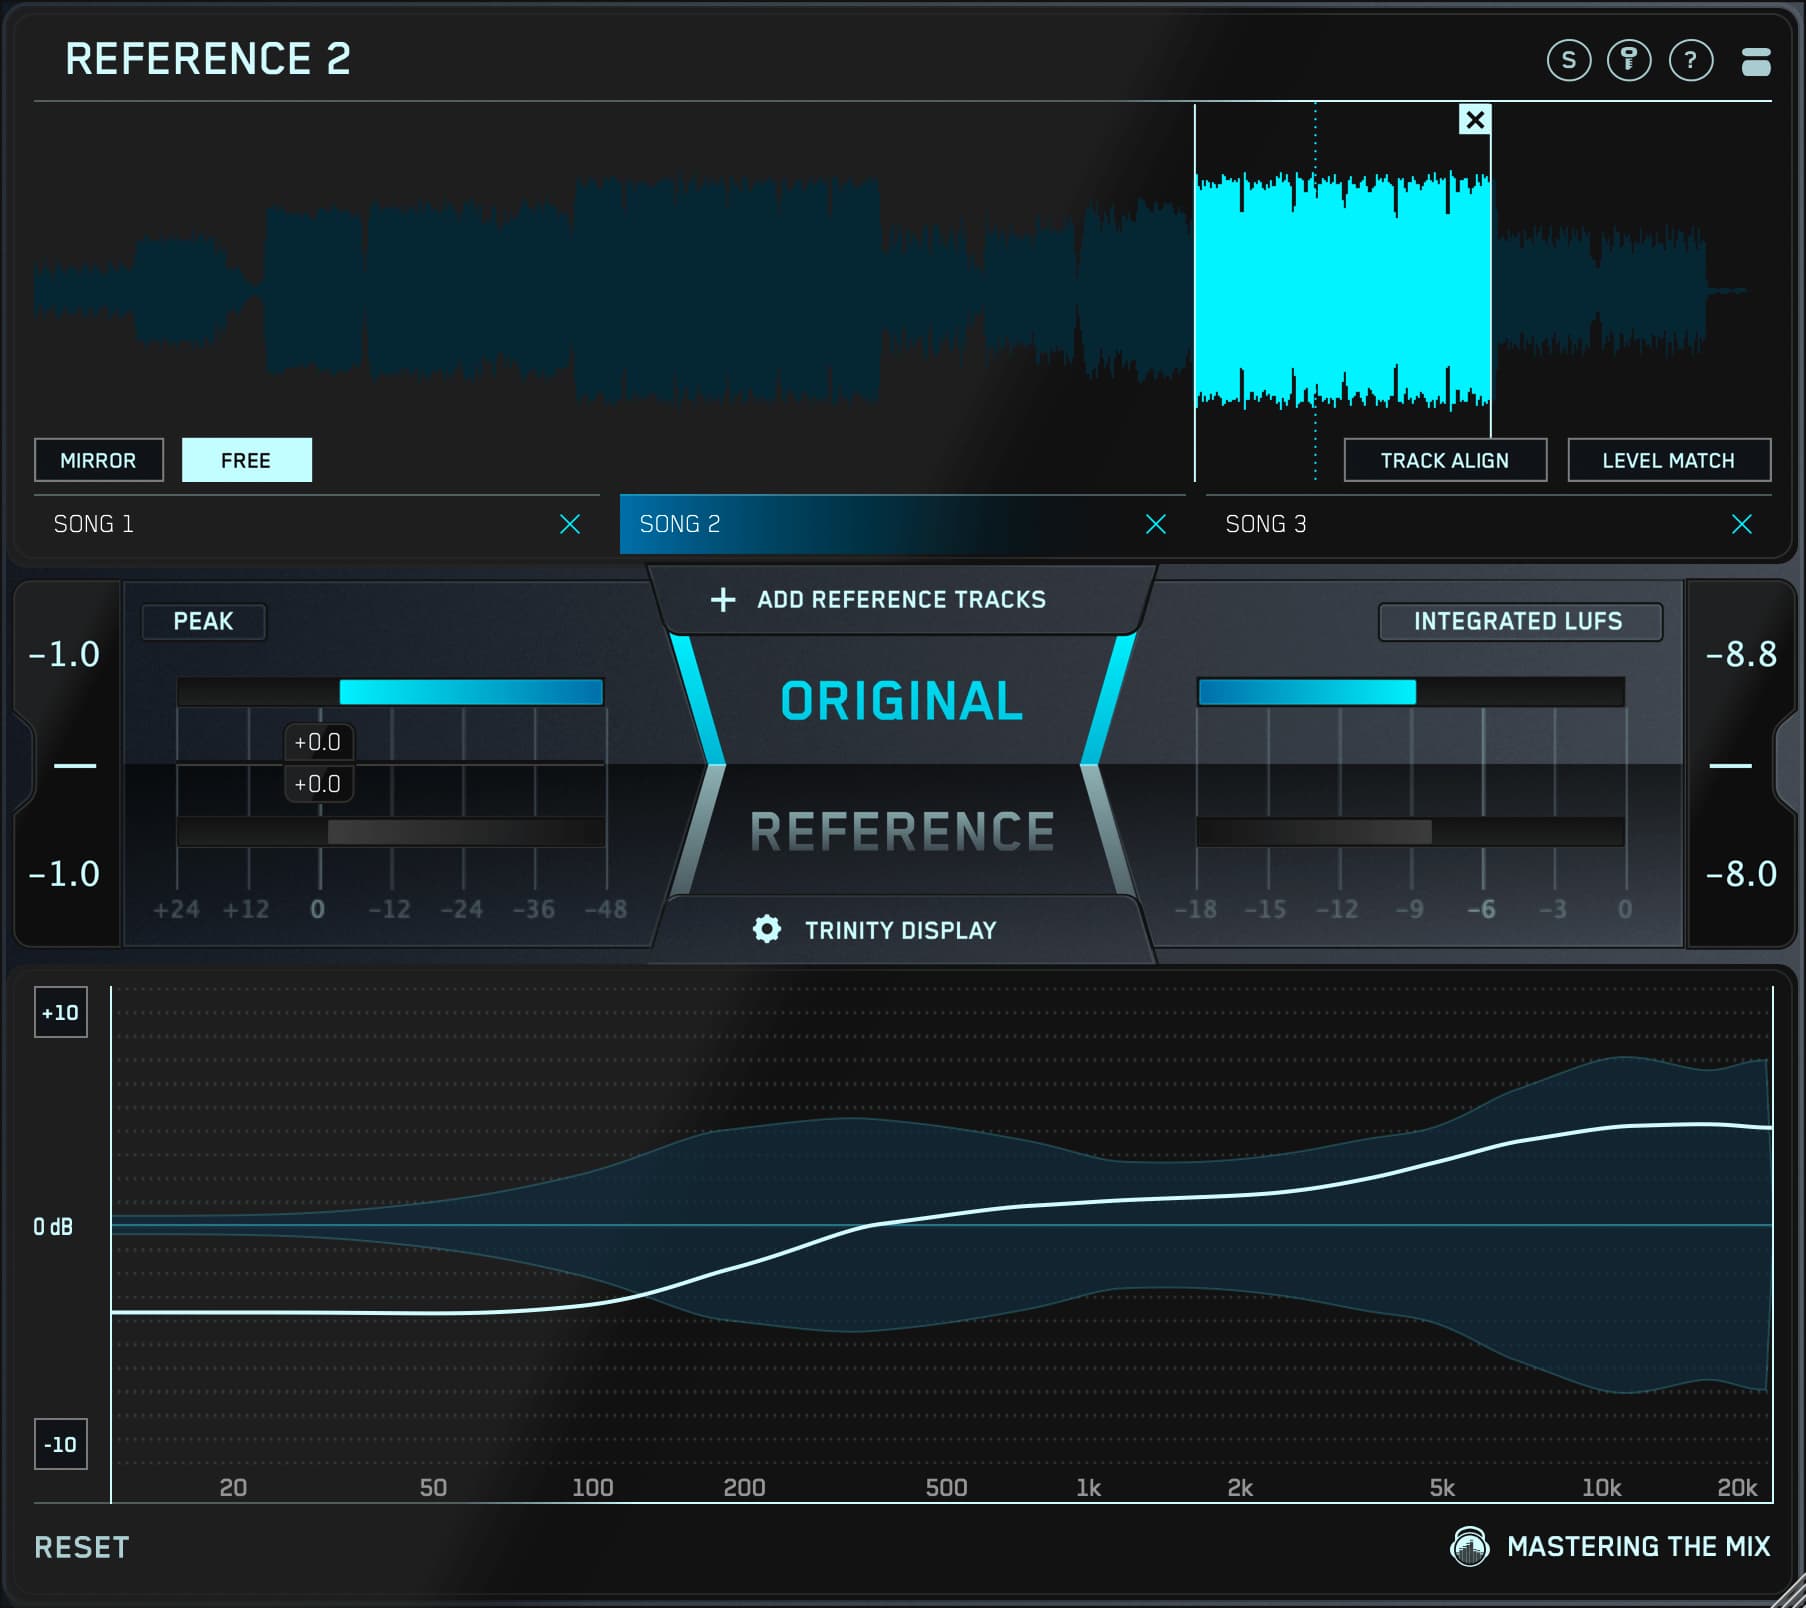
Advanced Results
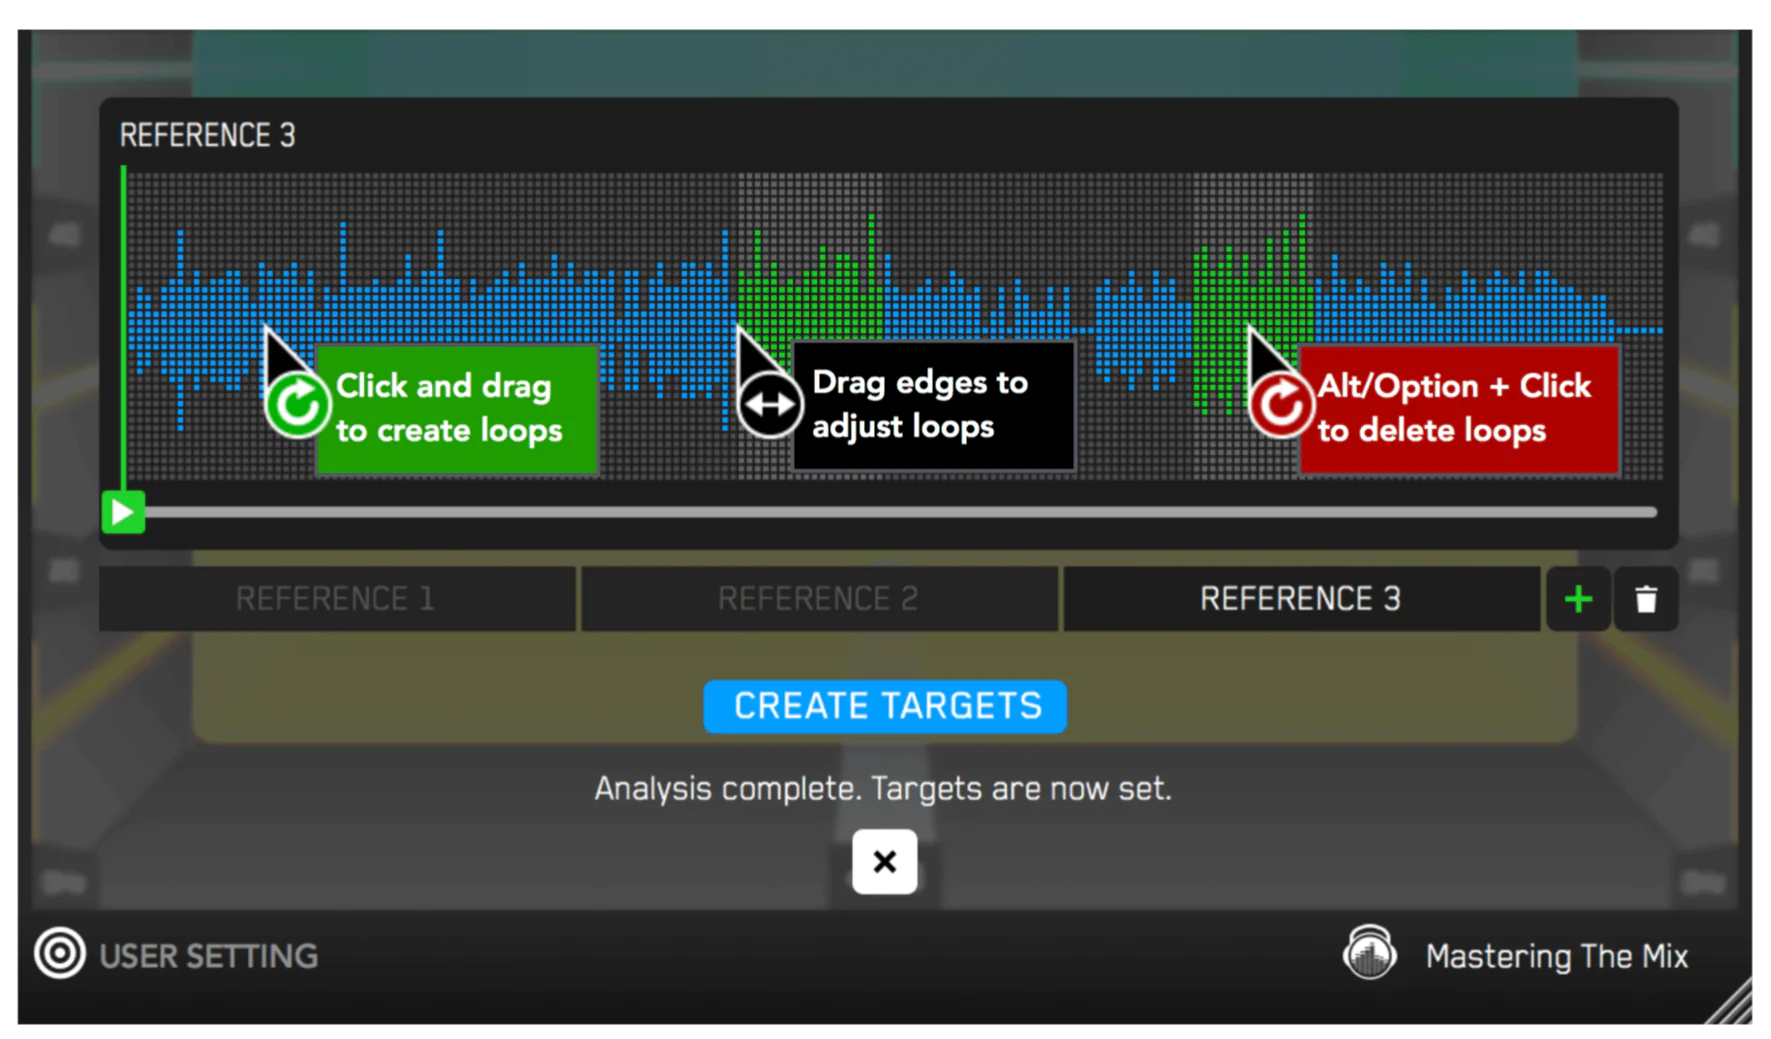
To elevate the results, you can create your own target values by clicking the target icon in the bottom left corner and importing reference tracks.
If you’re creating targets, we recommend clicking and dragging on the waveform to select the drop or chorus for the analysis, as this is usually the material with the best representation of the bass in the track.
You can load multiple reference tracks and BASSROOM will create targets based on the average tonal balance of all the tracks loaded into the analysis window.
Troubleshooting Common BASSROOM Challenges
Even with a tool as robust as BASSROOM, producers may encounter hurdles. Let’s address some typical issues and share tips to circumvent them effectively.
Overcoming Obstacles with BASSROOM
Producers might face situations where BASSROOM doesn’t seem to be delivering the expected results. Here’s how to troubleshoot:
-
Muddy Mixes: If your mix still sounds muddy after adjustments:
- Re-evaluate the high-pass filters on non-bass elements to ensure unnecessary low frequencies are rolled off.
- Double-check the input levels to ensure BASSROOM isn’t receiving a signal that’s too hot, which could sound distorted regardless of BASSROOMs settings.
-
Lack of Definition: For bass that lacks definition and presence:
- Experiment with moderate boosts at harmonic frequencies to help the bass cut through the mix.
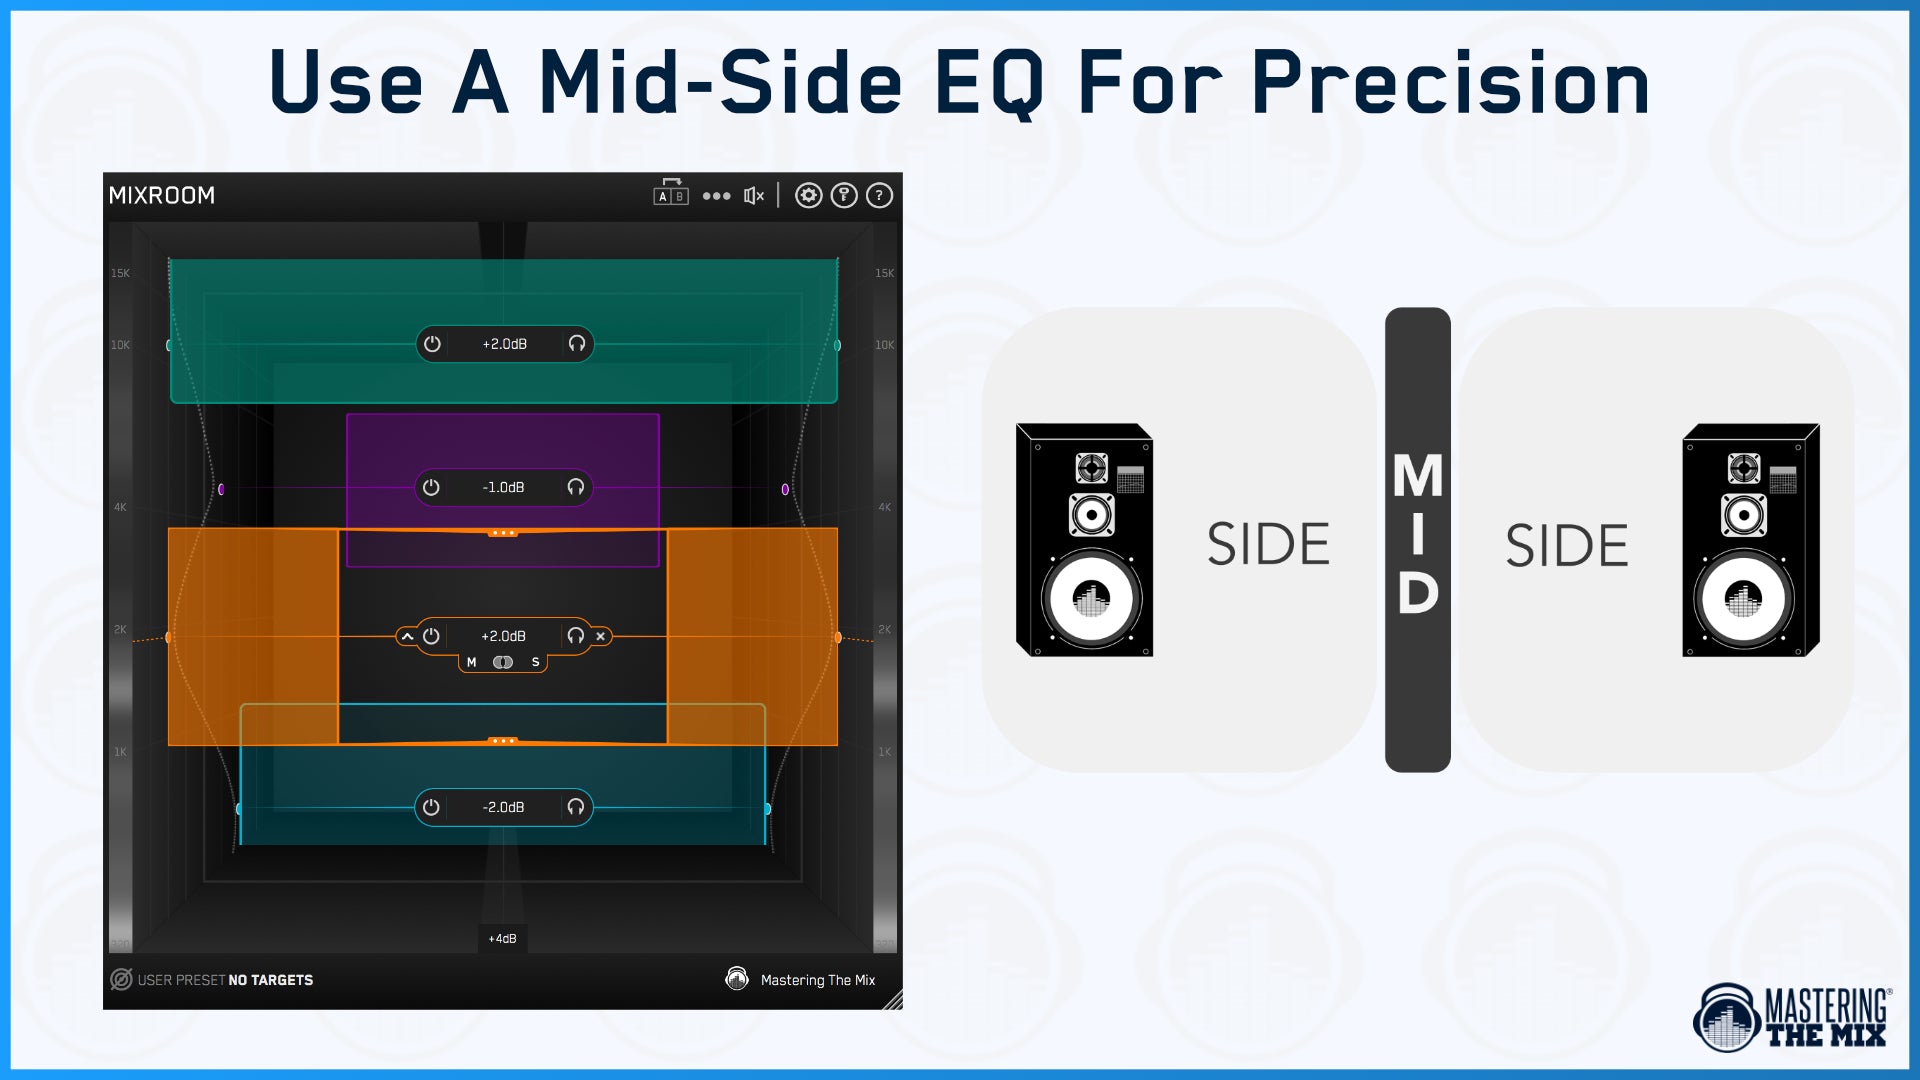
- Consider the stereo width of your low frequencies. Often, a more centered low-end provides a focused, punchier sound.
-
Overpowering Low-End: If the low-end is too dominant:
- Make small cuts in the EQ bands where the bass is overwhelming.
- Adjust the overall output gain to balance the bass with the mix's full frequency spectrum.

BASSROOM and Home Studios
Many music producers work in non-ideal mixing environments, particularly home studios that lack proper acoustic treatment. In such spaces, mixing the low-end can be especially perilous due to inaccurate acoustic feedback. BASSROOM comes to the rescue in these situations, offering a solution to help producers overcome these obstacles.
The Acoustic Limitations of Home Studios
In home studios, reflections, room modes, and standing waves can color the sound, particularly in the low-end, leading to poor mix decisions. Here's how BASSROOM can help:
- Visual Feedback: The plugin's visual analysis bypasses unreliable room acoustics, allowing producers to make informed decisions based on visual cues, not just what they hear.
- Genre Profiles: Use BASSROOM's profiles to achieve a good starting point for EQ settings that comply with genre-specific mixing conventions.
- Reference Matching: The Match EQ feature provides an objective reference for low-end balance, especially useful in acoustically untreated rooms.

Achieving Reliable Low-End Translation
Mixes created in home studios must translate well on various playback systems. BASSROOM facilitates this universality:
- Consistent Foundation: By solidifying the bass's foundation, BASSROOM ensures the mix's low-end translates consistently across different systems.
- Minimization of Room Influence: Relying on visual EQ adjustments minimizes the misleading effects that the room's acoustics may have on the sound.
Producers working in home studios will find BASSROOM invaluable not only for its technical capabilities but also for the way it empowers them to trust their mixes. Even in less-than-ideal mixing environments, BASSROOM creates a pathway to professional-quality sound, making it a crucial component in the modern producer's toolkit.

The Value of Fully Understanding BASSROOM
Mastering any tool requires both practice and understanding of its full potential. BASSROOM is no exception, and its value in the music production process extends far beyond simple EQ tweaks. This final mix and mastering EQ provides a significant edge in crafting professional-level sound, especially concerning the low-end spectrum.
Longevity in Your Production Arsenal
Fully mastering BASSROOM brings with it numerous long-term benefits:
- Time Efficiency: As you become adept at navigating BASSROOM, you'll find your workflow speeding up, allowing you to achieve desired results more quickly.
- Consistent Quality: Usage over time helps create a consistent benchmark for quality in your mixes, establishing a signature sound that listeners can come to recognize and appreciate.
- Adaptability: The skills you develop while mastering BASSROOM are transferable, enhancing your overall mixing and mastering abilities independent of the technology.
Staying Competitive with BASSROOM
In an ever-changing music industry, staying relevant is crucial:
- Industry Standards: BASSROOM helps you deliver mixes that meet current industry loudness and clarity standards, which is vital for streaming services and radio play.
- Innovative Edge: Continuously updating your techniques with tools like BASSROOM ensures you're at the forefront of mixing and mastering technology.
Integrating BASSROOM into your mixing and mastering sessions not only polishes the low-end of your tracks but also elevates the overall calibre of your productions. With its focus on education and visualization, BASSROOM encourages producers to listen critically, act confidently, and refine artistically. Leverage the power of BASSROOM, and ensure that your music not only sounds good but feels right in any environment.
]]>


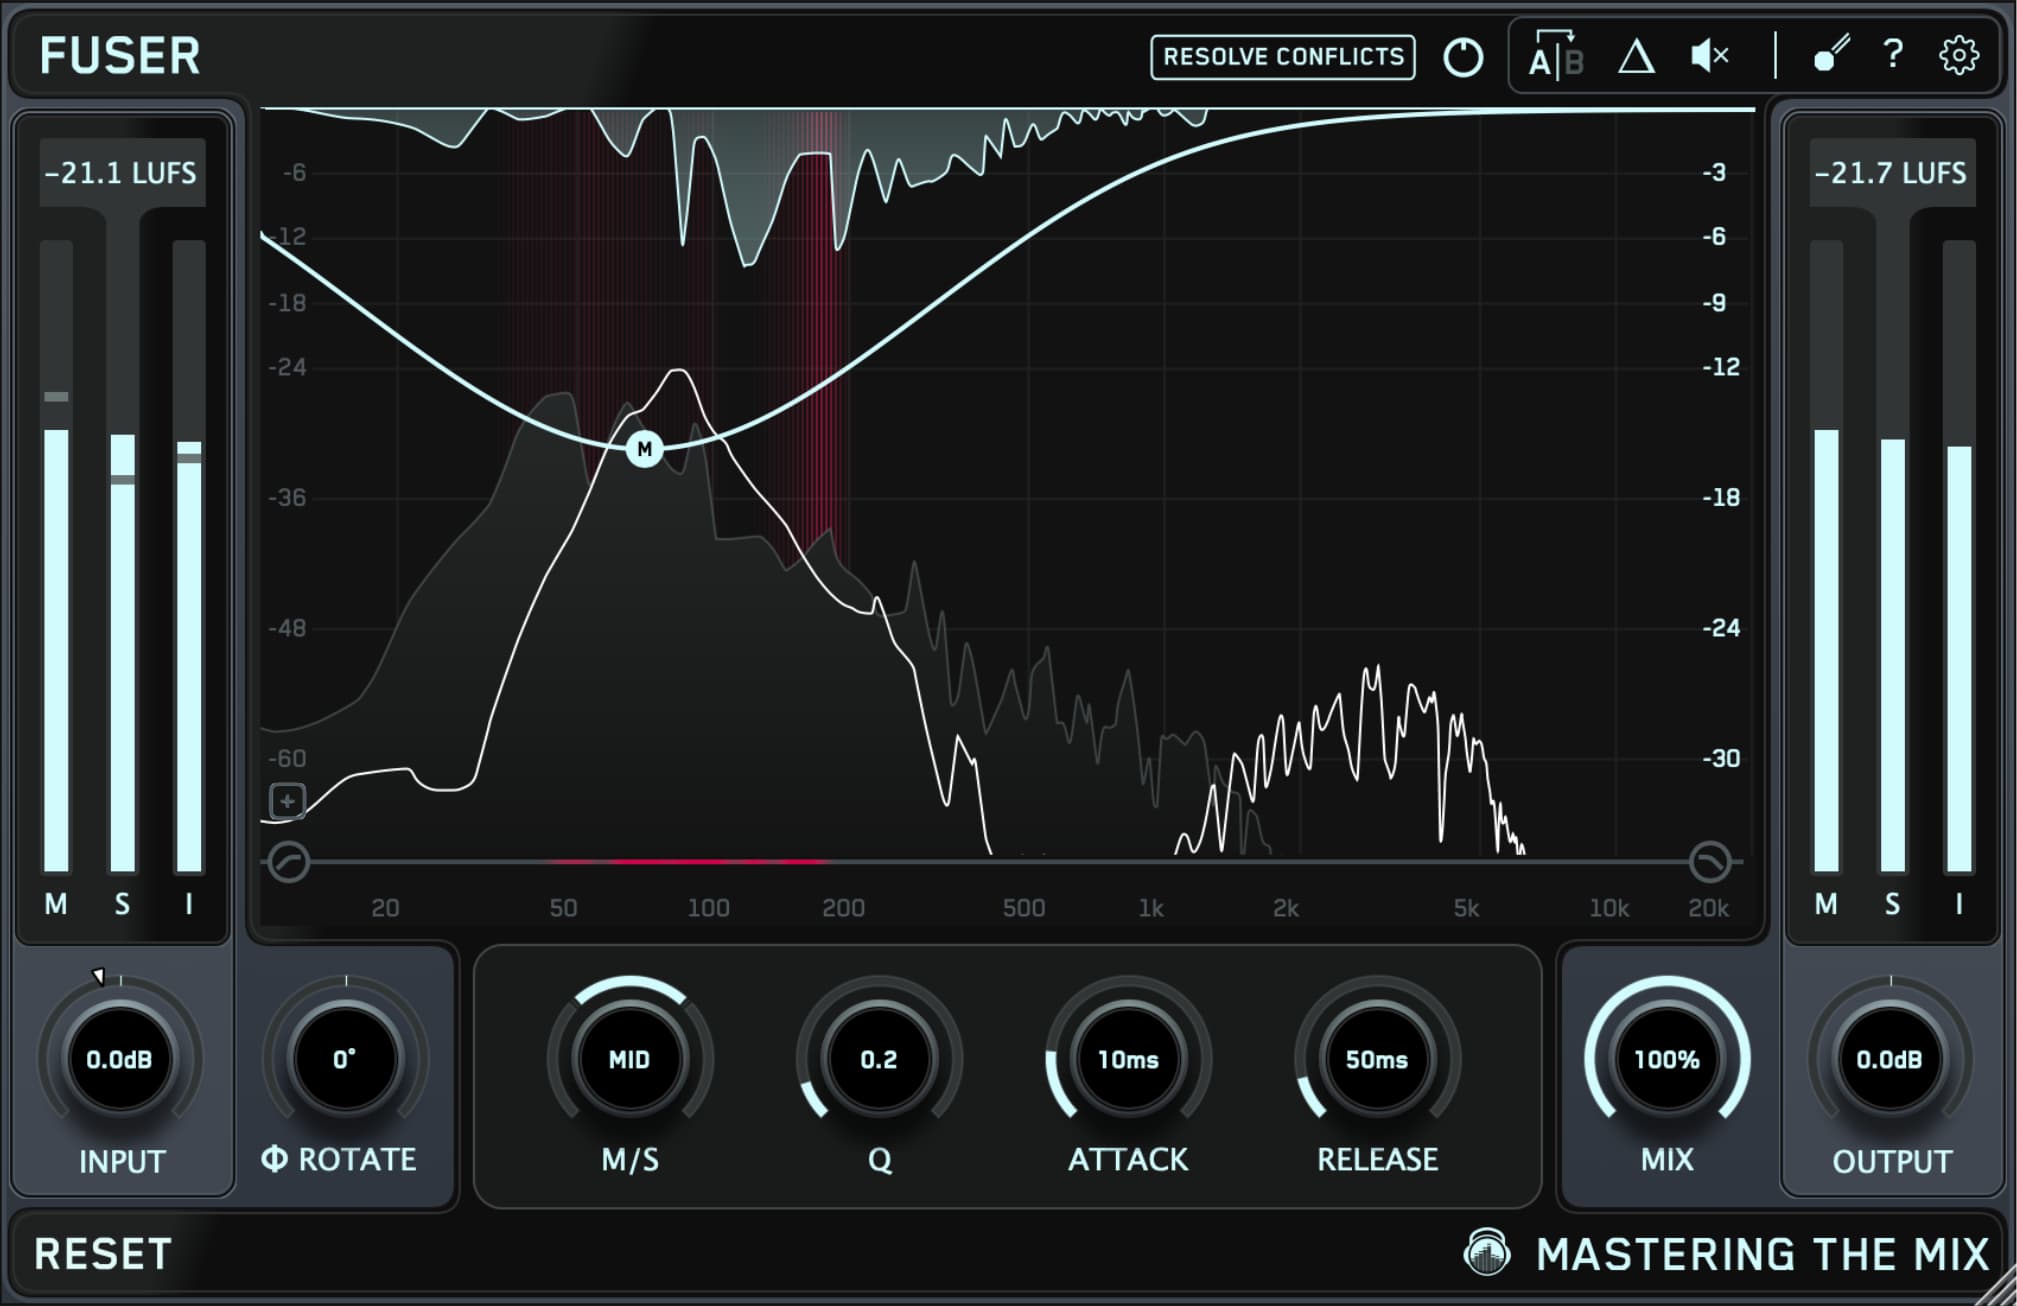


 This feature is a guideline for balancing two channels equally. In this circumstance, where we want the rhythm guitar to sit behind the lead guitar, we’d need to set the gain slightly lower than the pointer. Anything around 1-3dB lower than the pointer will be a good supporting gain range. You certainly don’t want the gain to be above the pointer, as this means the rhythm is louder than the lead and will drown it out.

 The cutting-edge Phase Analyze function focuses on the integrated signal from both the primary and layered guitar tracks, examining every phase rotation from -180 to +180°.