After you've finished recording your individual tracks, your project is ready for mixing. Mixing is when you adjust and combine individual tracks into a stereo or multichannel format, a.k.a. the mix.
Mixing is a broad and complex topic, and different engineers develop their own methods for getting the job done. That said, there are still what we'd refer to as "best practices."
This post will explore seven tried-and-true ways that are guaranteed to elevate the quality of your mixes.

#1 — Mix in a Treated Room
If you've ever auditioned one of your mixes in a professional studio, you likely noticed a huge step up in sound quality. You experienced balanced frequencies, exquisite detail, and rock-solid imaging.
While high-end gear plays a part in the sound of a pro-level studio, the biggest factor is its well-tuned acoustics. While it's nearly impossible to make most rooms in typical residential housing sound as amazing as a purpose-built space, you can, with the right acoustic treatment, get pretty close.
Most home studios are built inside of a spare bedroom or similar space. Since these rooms are typically square or rectangular, they suffer from two common sonic deficits:
#1 — Flutter Echo
Because square and rectangular rooms contain an abundance of parallel surfaces, they're teeming with flutter echo and slapback. If you hear a high-pitched, reverberant ring when you clap your hands, flutter echo and slapback are the reasons.
Flutter echo lends a hollow, tube-like sound to the room that will greatly affect your mixing decisions.
#2 — Standing Waves
A second common problem created by the parallel surfaces in your room are standing waves. Standing waves occur at frequencies where the distance between any two surfaces is equal to one half of its wavelength.
Standing waves reinforce and attenuate different frequencies in your room. In other words, you'll perceive some frequencies as louder than they actually are, while others will be perceived as quieter than they actually are.
To hear this for yourself, play back your mix while walking around your room. You'll hear frequencies — especially bass frequencies — get louder and softer depending on where you're standing.
Sometimes your bass will even disappear! Can you imagine how out-of-whack your mix will sound when it's played back in a room without these same acoustic shortcomings?
So, what can you do about these issues? After all, you're not going to remodel your house!
The answer is acoustic treatment.
There are three basic types of acoustic treatment:
#1 — Absorption
Absorption panels are typically made of foam or fabric, and they attach to your walls with either adhesive, nails, or tacks. These panels are tailor-made for — and effective at — alleviating flutter echo and slapback.
After you install absorption panels, you'll be amazed at the improvement in the clarity of your playback system's high frequencies, as well as in your perception of imaging and timing.
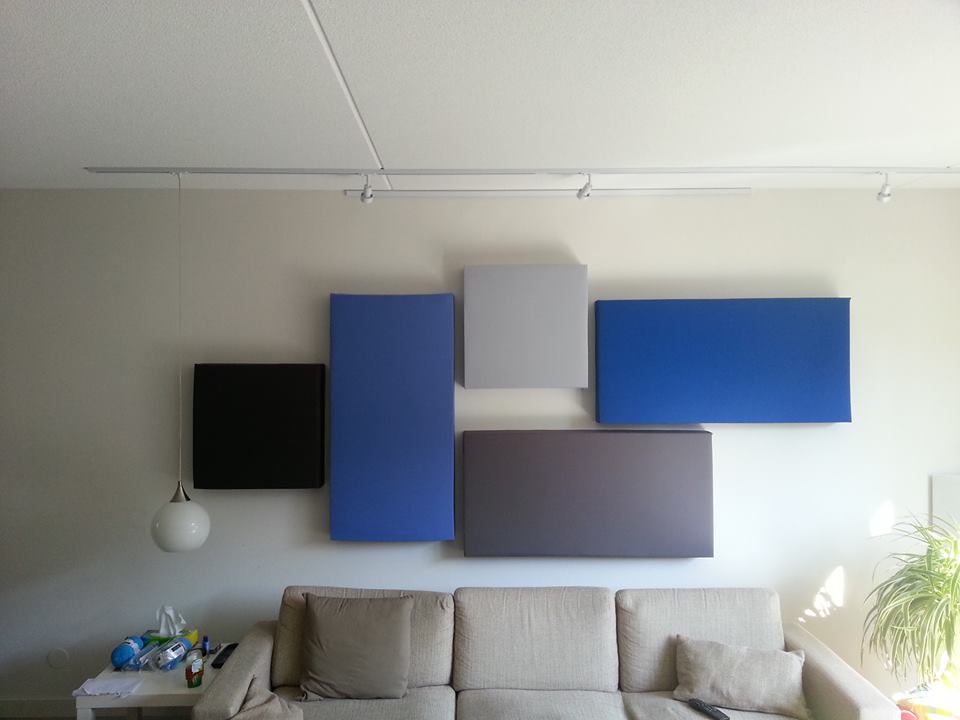
#2 — Diffusion
Diffusion panels look somewhat unusual, thanks to their uneven, blocky appearance. Regardless of how these panels appear, however, they're a great way to transform the acoustics of your room — especially if you’re mixing in a smaller space.
Diffusion works by preventing the buildup of standing waves, which, as we noted previously, are the cause of artificially boosted and attenuated frequencies. Diffusion also disrupts flutter echo, but rather than removing rowdy frequencies like absorption does, it scatters them.
Using diffusion will correct sonic deficiencies without altering the acoustic energy in your room or changing the frequency content of your mixes. Best of all, diffusion can also make small rooms sound much larger.

How To Build A Diffuser - Soundpaper.
#3 — Bass Traps
Low frequencies are typically the most bothersome to deal with in an untreated space. This is largely due to the phenomenon of bass collecting in the corners of your room, which leads to an artificial, boomy sound.
If your mixes sound balanced in your mix space but are lacking bass if you play them anywhere else, your room's low end needs an adjustment. That's where bass traps come in.
Bass traps are purpose-designed low-frequency absorption devices. Installing these in the corners of your room is the most effective way to smooth out its low-end frequency response.

It's vital that you use a balanced combination of acoustic treatment to make your mix space sound its best. The most basic solution is to purchase a complete room system from companies like Primacoustic, Auralex, and ProSoCoustic.
That said, since every room has its own specific strengths and shortcomings, there aren't really any one-size-fits-all treatment solutions. A great way to get a personal recommendation tailored specifically to your space is with Auralex's free room analysis.
#2 — Position and Calibrate Your Speakers Properly
Whether your room's acoustics are up to par or not, it's important that you position your studio monitors correctly. Otherwise, you won't be able to perceive your mixes truthfully.
To start with, place your studio monitors along a short wall to increase the distance acoustic reflections must travel to get back to your ears. This will minimize the volume of the reflections and maximize the accuracy of your monitors.
Avoid placing your speakers too close to the wall to avoid sonic reflections, which can cause low-frequency anomalies. This is perceived as a nasty-sounding dip, notch, or null in the low-frequency response of your speakers.
Also make sure that sound isn't reflecting off nearby hard surfaces — you don't want anything to affect what happens between the speakers and your ears.
Next, place your speakers in the shape of an equilateral triangle, where the length of each side of the triangle is the same. The speakers form two corners of the triangle, while your head forms the third.
The distance between the two speakers should be the same as the distance between each speaker and your head.
Beyond that, place the high-frequency drivers (tweeters) of your speakers at ear level. Because high frequencies are highly directional, this will allow you to hear your mixes accurately and consistently.
Lastly, you should monitor at a consistent — and safe — volume. The correct level for most small home studios below 42 cubic meters is around 73–76dB SPL (C weighted).
This will not only improve your mixes, but it will also minimize listening fatigue — and ultimately — hearing loss.
To learn more about proper monitoring levels, read our guide here.

#3 — Start with a Great Arrangement
It doesn't matter how great your gear or room is if you're trying to mix a poorly arranged song. Truth is, if a song's arrangement is too busy or off-kilter, you'll have great difficulty creating a balanced, engaging mix out of it.
The term "arrangement" refers to the setting of a musical composition. Arrangement involves, among other things, the way in which the elements of a piece of music are selected, performed, and assembled together.
Typically, arranging involves removing, adding, moving, or replacing elements not part of the original composition.
Luckily, today's digital audio workstations make arranging fast and easy. In fact, most DAWs include an "arrange" window — a timeline where you select your instruments, edit your clips and loops, and move your project's elements around to create your final song.
One common arrangement mistake is to try to shine the sonic spotlight on everything all at once, which leads to a busy, cluttered result. After all, if everything is the center of attention, then nothing is the center of attention — everything is just louder.
That's why it's essential to choose which element will be the focus of your mix at each given moment. Decide what you want to emphasize, then build everything else around it.
When you're building a musical arrangement, more is not always better. Whenever you add another element to a mix, you should ask yourself, "Does this really need to be here?"
Supporting elements should never overshadow your mix's focal points. So, if you mute a track and it doesn't sound like something is missing, the muted track probably doesn't need to be there; and if your mix sounds better without it, it definitely doesn't need to be there.

#4 — Re-record, or Replace Bad-sounding Tracks
If you're mixing poorly recorded tracks, you'll end up with a poor-sounding mix. If a source is recorded badly, no amount of compression or EQ is going to give you the studio-quality sound you're aiming for.
If you're dealing with a badly recorded track, the best solution is to re-record it. If this isn't possible (for example, you're mixing somebody else's project), you'll have to reach for other options.
For drums, you can use sample replacement. Sample replacement does exactly what its name suggests: it replaces the sounds on your track with professionally recorded samples.
Despite the term "sample replacement," you don't need to completely replace the original sound. Rather, you can blend the better-sounding samples with the original sounds to bolster the original track.
Subpar bass and synth tracks can sometimes be rescued with an audio-to-MIDI converter (many DAWs include this function). This is similar to the way in which drum replacement works.
After you've created a MIDI file, feed it into your virtual sampler of choice to re-create the track with studio-quality samples. Then, EQ the original track as best you can (our MIXROOM offers a near-foolproof solution), then blend the new track with the original track to maintain the track's intended sonic flavor.
If all else fails, and you're unable to re-record or replace an offensive track, you can try to clean it up with noise-reduction or audio-restoration software, such as iZotope RX.

#5 — Clean Up Mud and Unwanted Resonances
Similar to tip #4, if you're working with a muddy track or out-of-control resonant frequencies, you're going to have a muddy, unpleasant mix. That's why you should eliminate low-frequency mud and unwanted resonances from your tracks before you even start your mix.
Jettisoning low-frequency mud is a breeze. Just fire up your favorite EQ plug-in and apply a highpass filter to each track.
For bass-heavy tracks, start with your EQ's lowest cutoff frequency and a slope around 12dB. For tracks with less low-frequency content, you can start with a higher cutoff frequency, probably around 50–80Hz.
To deploy the filter, increase the cutoff frequency until your track sounds too thin, then decrease the frequency until it sounds right.
You'll also want to resolve any unpleasant resonances. Resonances are frequency buildups that not only steal dynamics and headroom, but they also lend weird sonic artifacts to your track.
Back in the day, we resolved unwanted resonances with a dynamic EQ. We'd create a large boost with a narrow Q bandwidth, sweep around the frequency spectrum and listen for any annoying frequencies, then lower the gain on the offending frequency band until the unpleasant artifact disappears.
A much easier method for getting rid of resonant frequencies is our RESO plug-in. RESO is not only an effective solution for ridding your track of unwanted resonances, but it also does it automatically — no time-consuming EQ sweeps required!
Just place the plug-in on your track, click the Calculate Targets button, and RESO does the rest. RESO not only provides you with Target Nodes for getting rid of the resonances, but it also provides you with useful setting suggestions for optimal results.

#6 — Use Reference Tracks
When you're mixing, it's easy to get lost in the sound of your own mix. That's why it's important to use reference sources.
A reference source is a finished commercial recording that you use as a "reality check." The goal is to try to match the sound of your mix to the sound of the reference mix.
When you're selecting a reference track, choose a song you're intimately familiar with, and one that falls within the same genre as the track you're working on. Not only does using reference tracks help your current mix, but you'll also find that it's a great way to learn how familiar material sounds on your studio monitors.
Our REFERENCE plug-in enables you to quickly compare your tracks with your favorite mixes to make sure you're headed in the right direction. Just instantiate REFERENCE on your mix bus, drag and drop your references into the main window, and engage the Level Match feature — it's that simple!
After that, you can toggle back and forth between your mix and your references. You even get detailed instructions on how to improve your mix!

#7 — Audition Your Mix
Once you've got your mix sounding the way you want it to, it's important that you don't rely solely on your studio monitors. Rather, you should audition your mixes on a variety of playback systems.
Most professional mix engineers keep at least one extra set of studio monitors on hand for auditioning their mixes on an alternate playback system. Avantone MixCubes are also commonly used to determine how a mix will sound on frequency-deficient playback devices, such as smartphones and miniature Bluetooth speakers.
Even if you don't want to purchase another set of monitors, you can still audition your mix on other playback systems. Try listening to your mix in your car, on your home stereo system, or on headphones or earbuds — it will be an ear-opening experience.
It's been said that Grammy-winning mix engineer Chris Lord-Alge keeps a vintage boombox in his studio for the express purpose of auditioning his mixes on a consumer-level playback device.

Bonus Tip: Prevent Headaches with Proper Gain-staging
If your tracks were recorded at different gain levels, it can make mixing very non-intuitive, as two tracks with faders in the same position will play back at different volumes.
The solution? Instantiate gain plug-ins on each track to ensure that they're not too loud, not too soft, and are all about the same volume — an RMS value of -18dBFS is a great all-around level.

Conclusion
These tips are based on decades of studio experience, and we're confident that they will get you well on the way to mastering the mix.
They merely scratch the surface, however, and the best teacher is hands-on experience. So, experiment, have fun, keep learning, and continue following our blog for more useful tips, tricks, and mix strategies!
Plugins Mentioned In This Post
Frequently Asked Questions
Why does room treatment matter for mixing?
Square and rectangular rooms suffer from flutter echo and standing waves that make some frequencies sound louder or quieter than they are. Absorption, diffusion and bass traps correct these issues so your mixing decisions are based on what is really there.
How should you position studio monitors?
Place monitors along a short wall, away from walls to avoid low-frequency anomalies, in an equilateral triangle with your head, and with the tweeters at ear level. Monitor at a consistent, safe level of around 73 to 76dB SPL C weighted.
Why does arrangement affect the mix?
A busy or off-kilter arrangement is hard to mix into something balanced. Choose one focal element at a time and build around it. If muting a track does not leave something missing, or the mix sounds better without it, it probably does not need to be there.
Why audition a mix on multiple systems?
Studio monitors alone do not reveal how a mix sounds everywhere. Check it in the car, on a home stereo, and on earbuds or frequency-limited speakers so you know it translates across the systems your listeners actually use.


