For today's music producers, the digital age has brought a plethora of mastering plugins, each offering unique features and capabilities.
However, with so many options, the challenge often lies in choosing the right ones and using them effectively.
In this comprehensive guide, we'll delve deep into the world of mastering plugins. We'll focus on how to build an effective mastering chain, highlighting when and how to use specific plugins to achieve the desired sonic quality.

Step 1: Setting the Stage with Gain and Headroom
Mastering a track is akin to sculpting a piece of art. Just as a sculptor needs a clean block of marble to start, a music producer requires the right amount of headroom in a track for effective mastering.
Headroom in audio mastering refers to the space between the highest peak in an audio signal and the maximum level of the digital system, often denoted as 0dBFS (decibels relative to full scale). This space is crucial for several reasons.

The Role of Headroom in Mastering
- Dynamic Range Preservation: Headroom ensures that the dynamic range of the track is preserved. It prevents the peaks from clipping and allows room for adding effects and processing during mastering.
- Quality Enhancement: Proper headroom enables better application of mastering effects like compression, EQ, and limiting, enhancing the overall quality of the final track.
- Translation Across Systems: Adequate headroom ensures that the track translates well across various playback systems, from high-end studio monitors to everyday headphones.
Adjusting Headroom with Gain Plugin
Adjusting headroom starts with analyzing the peaks of your track. The goal is to ensure the peaks do not hit 0dBFS, leaving enough room for subsequent processing. Here’s a step-by-step guide:
- Initial Analysis: Load your track into your Digital Audio Workstation (DAW) and analyze the peak levels. Tools like LEVELS by Mastering The Mix can be incredibly helpful for this.
- Gain Adjustment: Insert a Gain plugin at the beginning of your mastering chain. Adjust the gain to bring down the peak levels. A good practice is to aim for peaks between -3dB and -6dB.
- Monitoring: Continuously monitor the levels as you make adjustments. Ensure no part of the track is hitting the ceiling of 0dBFS.
- Re-check: After adjusting the gain, play through the track again to ensure the levels are consistent and the headroom is adequate.
Why Use LEVELS for Monitoring Headroom?
LEVELS by Mastering The Mix is a powerful tool for this task. It provides a clear visual representation of your track’s headroom, along with other essential mastering metrics. With its intuitive interface, you can easily identify parts of the track that need adjustment and ensure your headroom is set correctly before proceeding with further mastering steps.

Setting the right headroom is the foundation of a successful mastering process. It’s the first critical step in transforming your track from a rough mix to a polished masterpiece. With careful attention to headroom and the aid of tools like LEVELS, you're setting the stage for a master that stands out in clarity, dynamics, and overall sonic quality.
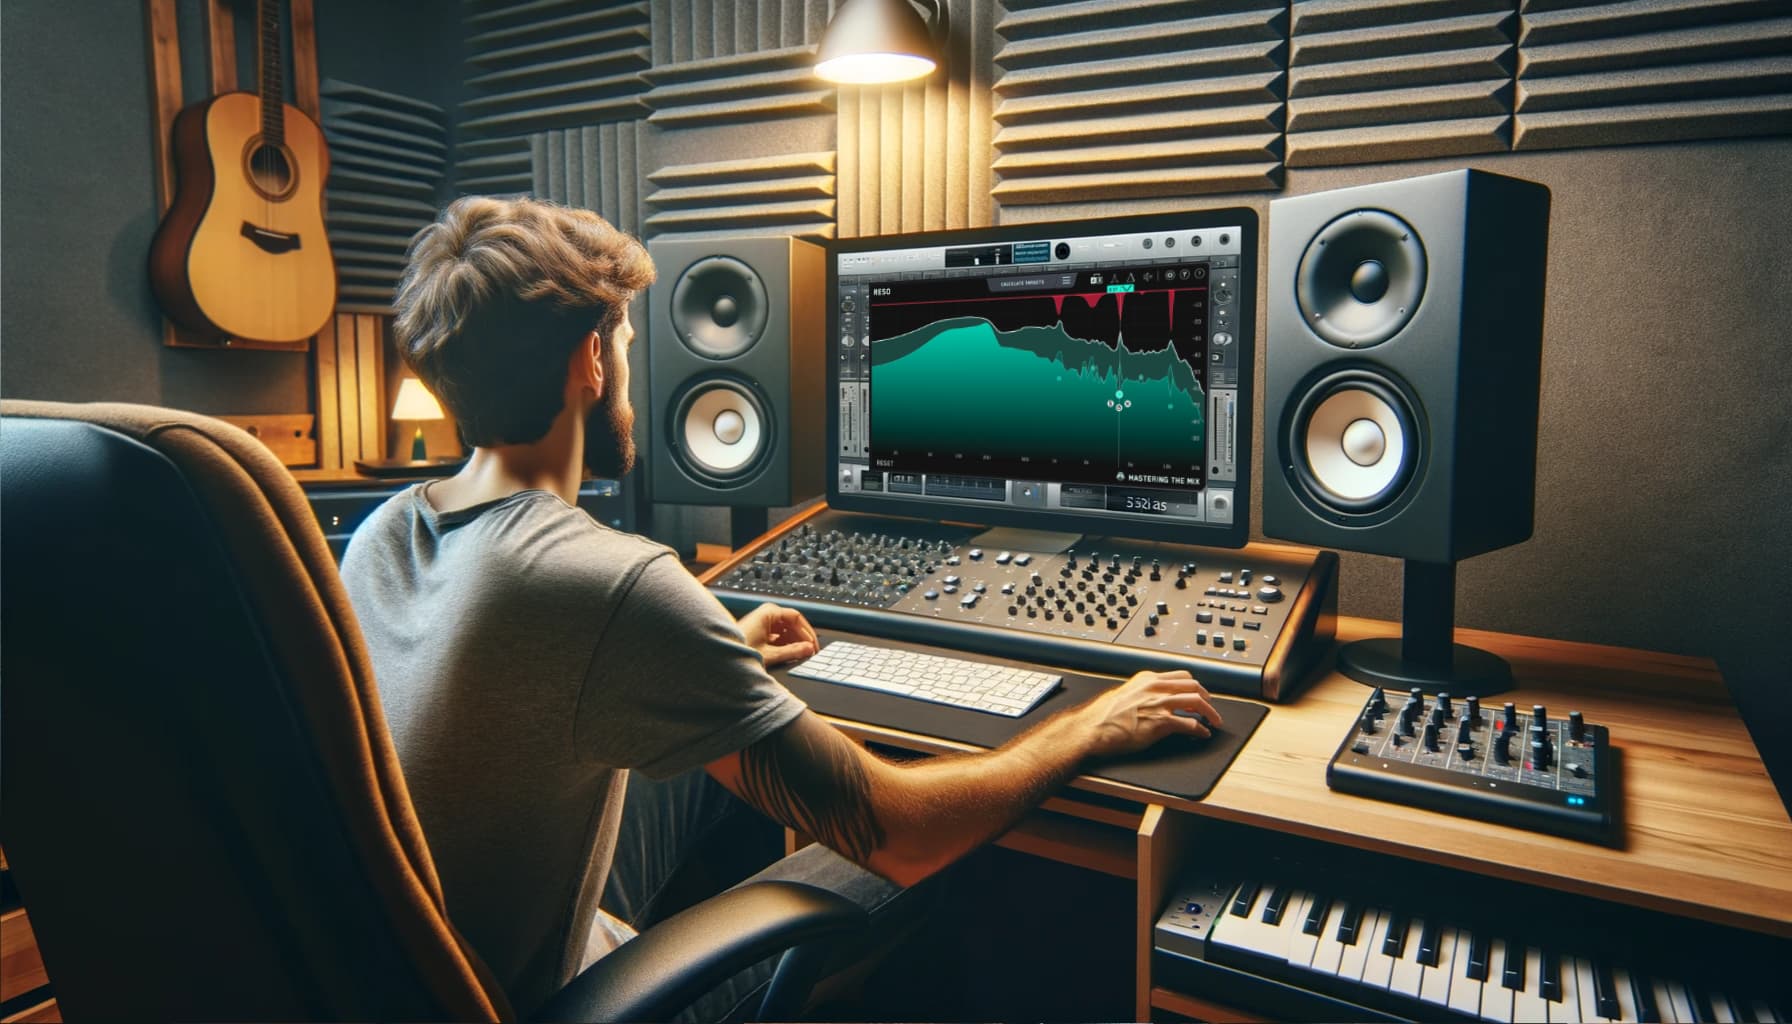
Step 2: Tackling Resonances with RESO
After establishing the right headroom, the next vital step in the mastering chain is to address and eliminate resonances. Resonances are prolonged or exaggerated frequencies that can muddy your mix, making it sound unbalanced or harsh. This is where RESO by Mastering The Mix becomes an indispensable tool in your mastering arsenal.
The Importance of Removing Resonances
- Clarity and Balance: Removing resonances ensures that no frequency overpowers others, leading to a clearer and more balanced sound.
- Enhanced Listening Experience: By tackling resonances, the final master becomes more pleasant and less fatiguing to the listener, especially on high-fidelity systems.
- Professional Sound: Addressing these issues is a hallmark of professional mastering, separating amateur productions from polished releases.
Utilizing RESO for Resonance Removal
RESO is designed to pinpoint and deal with problematic resonances efficiently. Here's how to use it effectively:
- Identify Resonances: Load RESO on your track and play the loudest section of your track with the widest range of frequencies. You can visually identify resonant frequencies that poke up through the display.
- Selective Targeting: Hold 'control', then using your mouse sweep around the interface to boost the frequencies of your mouse position. Double click to initiate a node wherever you hear a particularly resonant frequency.
- Adjustment and Fine-Tuning: The nodes apply dynamic attenuation to these frequencies. The goal is to reduce the resonance without negatively impacting the overall tonal balance of the track.
- A/B Testing: Regularly bypass the plugin to compare the processed and unprocessed signal. This step is crucial to ensure that your adjustments are enhancing the track.
RESO vs. Alternatives like Soothe 2
While RESO is a powerful tool for tackling resonances, it's worth noting alternatives like Soothe 2. Soothe 2 is another dynamic resonance suppressor, known for its frequency smoothing. Here’s a quick comparison:
Both RESO and Soothe are resonance suppression plugins, but they do it differently. RESO focuses on the individual resonances rather than broadly applying reduction. This means you ONLY get rid of the issues and leave the rest of the sound unprocessed, which gives a very transparent result. This makes RESO completely different from anything else currently available. RESO also has a number of unique features, such as Q optimization, automatic resonance detection, super-high quality filters, and frequency sweeping. If you have a few specific unpleasant resonances in your audio (and there often are), RESO is the tool you want.
Soothe2 identifies problematic resonances on the fly and applies broad matching reduction automatically. This results in a smoother, more balanced sound and saves you from having to notch out frequencies by hand.
Mastering with a focus on removing resonances is like polishing a gemstone - it removes the rough edges, revealing the true shine of your music. With tools like RESO, you can ensure that your track sounds its best, free from distracting and unwanted frequencies.

Step 3: Achieving Tonal Balance with Mixroom, Bassroom, and Fabfilter Pro Q3
Achieving a well-balanced tonal spectrum is critical in mastering. It ensures that all frequency ranges are properly represented, making your track sound harmonious and cohesive. Mastering The Mix’s Mixroom and Bassroom plugins, along with FabFilter's Pro Q 3 and other EQs, are excellent tools for shaping the tonal balance of your track.
Understanding Tonal Balance
Tonal balance refers to how various frequencies are distributed in your track. A balanced tonal spectrum ensures that no particular frequency range dominates or is underrepresented, leading to a more professional and pleasing sound.

Using Mixroom for Mid and High Frequencies
Mixroom specializes in shaping the mid and high frequencies, providing a clear and intuitive interface for making precise EQ adjustments.
- Importing Reference Tracks: Import a reference track with a tonal balance you aspire to achieve. Mixroom allows you to set this track as a sonic target.
- Analyzing and Adjusting: MIXROOM will show you the exact EQ changes needed to get your track sounding like your imported reference track. Use this visual guide to adjust the EQ of your track, or click 'add smart bands' to automatically initiate the suggested processing.
- Fine-Tuning: Make subtle adjustments and continuously A/B test against the reference track to ensure your changes enhance the overall sound.

Bassroom for Low-End Control
Bassroom is designed for perfecting the low-end of your mix.
- Setting the Target: Similar to Mixroom, import a reference track into Bassroom to set the low-end target for your track.
- EQ Adjustments: Bassroom will guide you on which frequencies need boosting or cutting. Its unique filters are optimized for mastering, ensuring transparency in the low-end.
- Listening and Refining: Trust your ears as you make adjustments, ensuring the low-end feels balanced and powerful without overpowering the mix.
FabFilter Pro Q 3 for Detailed Adjustments
Pro Q 3 is renowned for its surgical precision in EQ adjustments. It's particularly useful for tackling specific frequency issues or for adding finishing touches.
- Surgical EQ: Use Pro Q 3’s precise filters to address any specific frequency issues identified in Mixroom and Bassroom.
- Mid-Side Processing: Pro Q 3 allows for mid-side EQ adjustments, giving you control over the stereo spread of certain frequencies.
- Dynamic EQ: Utilize dynamic EQ bands to control frequencies that only occasionally cause issues, maintaining the naturalness of the track.

The Art of Tonal Balancing
Achieving the perfect tonal balance is an art. It requires a combination of visual tools like those offered by Mixroom and Bassroom, along with your auditory judgment. FabFilter's Pro Q 3 complements this process by providing additional precision and the dynamic option where needed.
Mastering tonal balance is about creating a track that sounds great on any system, from club speakers to earbuds. By using these plugins judiciously, you ensure your track not only meets professional standards but resonates well with your audience.
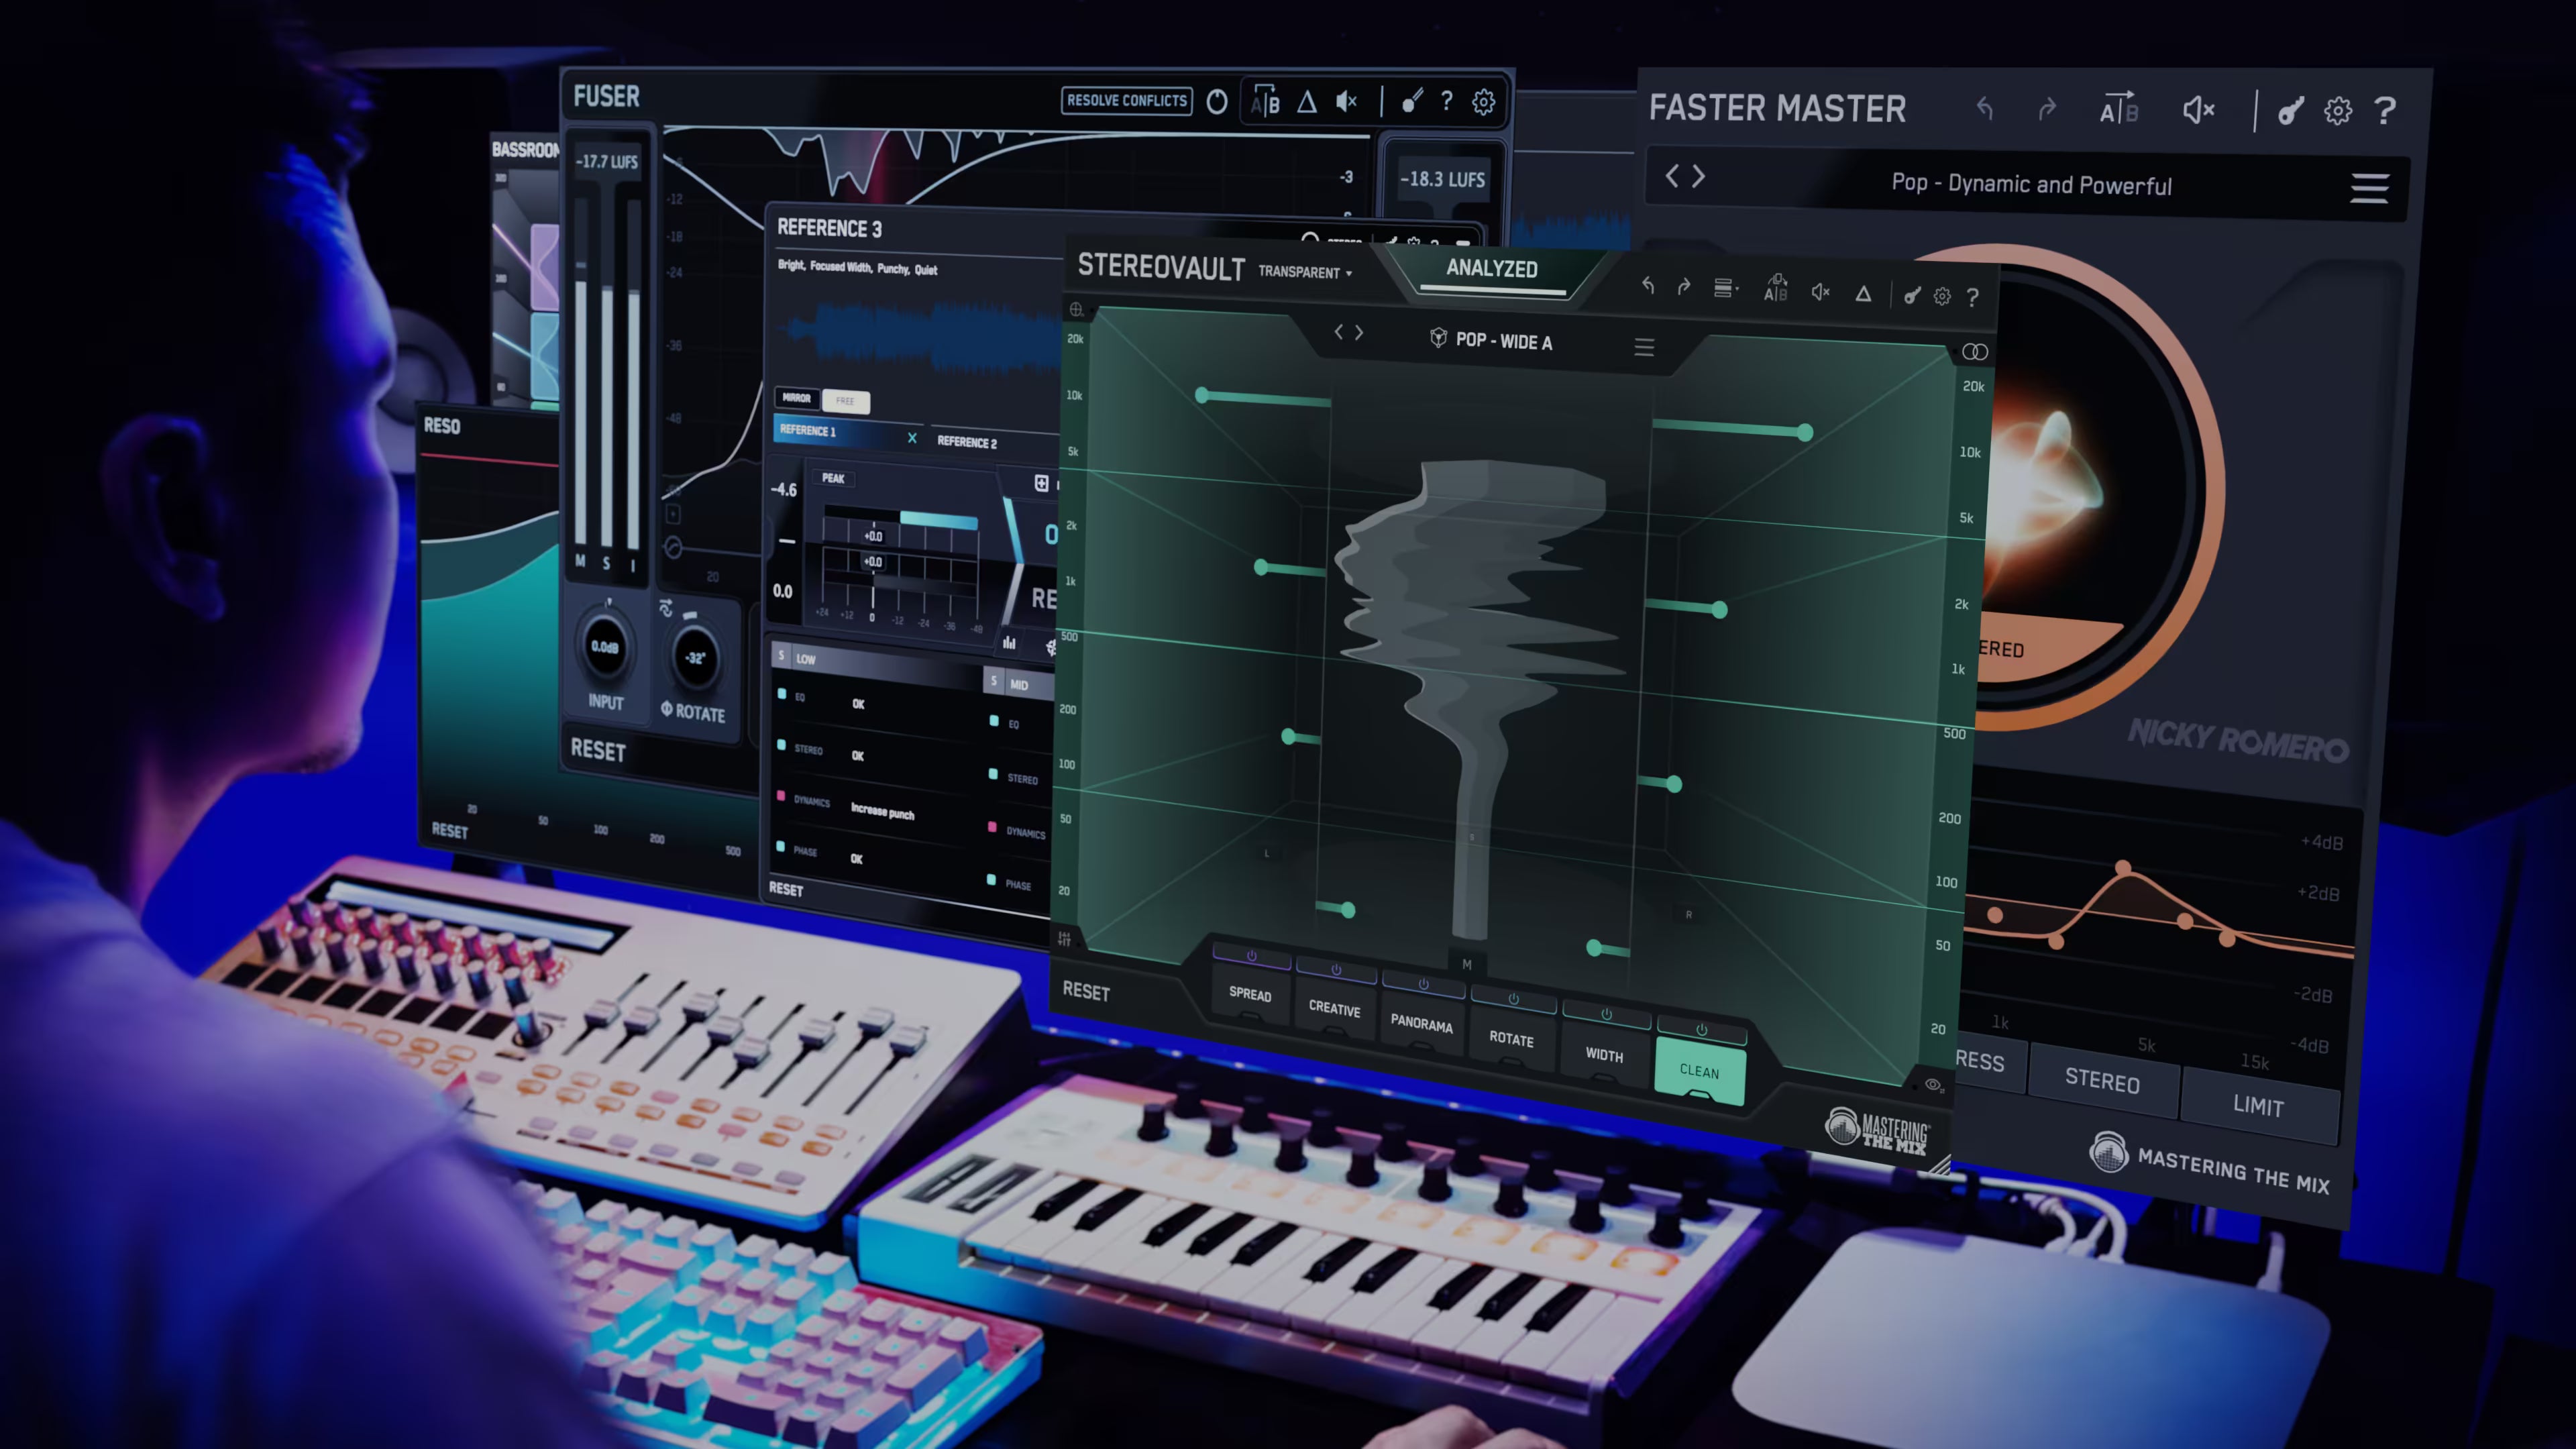
Step 4: Stereo Imaging and Width with REFERENCE 3 and iZotope Ozone Imager
Stereo imaging in mastering is a subtle yet powerful process. It involves adjusting the stereo width of your track to ensure a spacious yet coherent sound. Mastering The Mix’s REFERENCE 3 and iZotope’s Ozone Imager are excellent tools for this task, each serving a unique purpose in the stereo imaging process.
The Significance of Stereo Imaging
- Spatial Depth: Proper stereo imaging creates a sense of depth and space in the mix, making it feel more alive and immersive.
- Compatibility: It ensures that your track sounds good on various systems, including mono playback devices.
- Professional Sheen: Well-executed stereo imaging gives your track a polished, professional sound, distinguishing it from amateur productions.
Using REFERENCE 3 for Stereo Width Analysis
REFERENCE 3 by Mastering The Mix is a powerful tool for comparing your track’s stereo image with that of professionally mastered tracks.
- Comparative Analysis: Load a reference track in REFERENCE 3 that represents your desired stereo image — or let Smart Reference Tracks auto-suggest the best match from your library. Play your track and observe the stereo width visualization within the Mix Descriptors and Masterscope.
- Identifying Differences: Look for discrepancies between your track and the reference. The Masterscope will show the exact stereo width adjustments needed to match. The Match % score quantifies how close you are.
- Guided Adjustments: Use these insights as a guide for making stereo width adjustments, aiming for a similar stereo image to your reference track. Auto-looping locks onto the loudest section so you can A/B with no setup, and level matching is automatic.

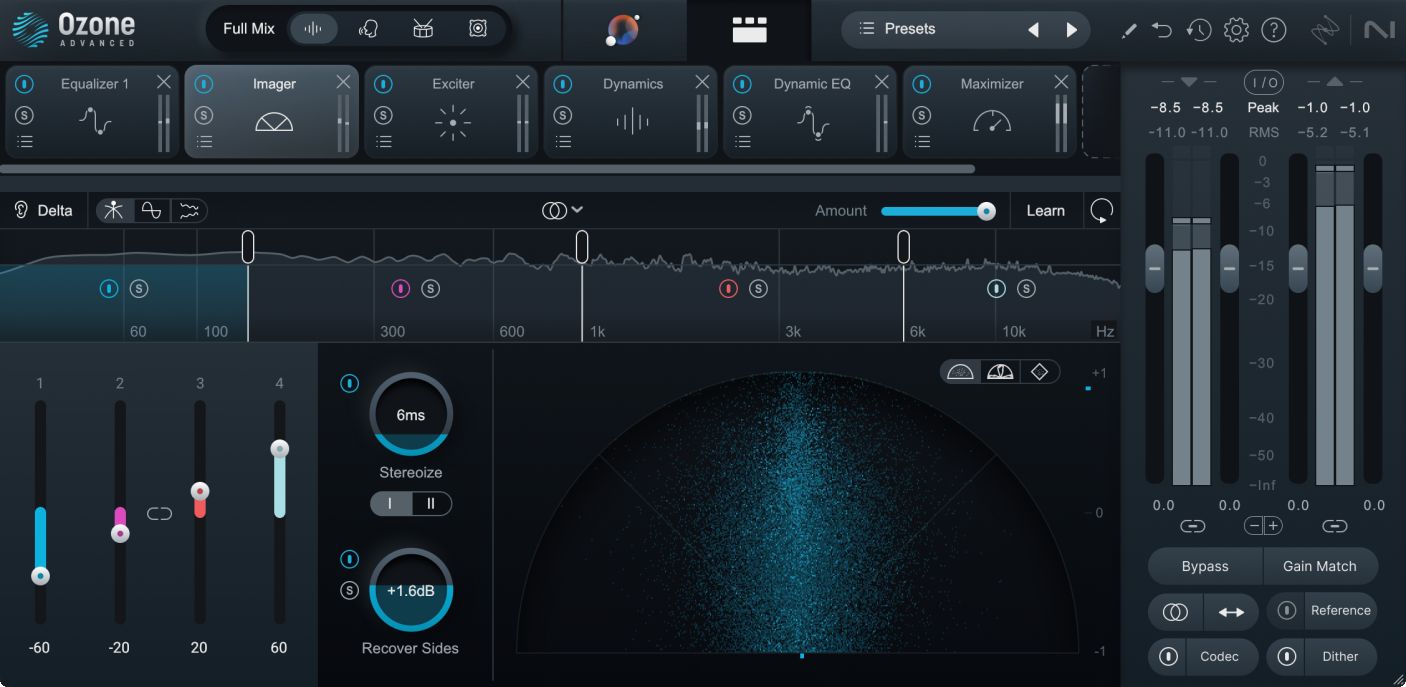
iZotope Ozone Imager for Adjustments
iZotope Ozone Imager provides the controls to make precise stereo width adjustments.
- Width Enhancement: Adjust the stereo width slider to increase or decrease the stereo spread. Focus on frequency ranges that need adjustments based on your analysis in REFERENCE 3.
- Mono Compatibility: Regularly check mono compatibility to ensure that the track doesn’t lose coherence in mono playback.
- Avoiding Over-processing: Be cautious not to overdo the widening, as it can lead to phase issues and a disjointed sound.
Mastering Stereo Imaging
Stereo imaging is not about making the widest possible mix but about finding the right balance that complements the track. A/B testing with REFERENCE 3 ensures that your adjustments are in line with professional standards. Meanwhile, Ozone Imager provides the necessary tools to fine-tune these adjustments for an optimal stereo image.
Mastering stereo imaging is a crucial step towards a sonically rich and professional-sounding track. With the right tools and techniques, you can create a master that not only sounds great on all systems but also provides an engaging listening experience.

Step 5: Final Touch - The LIMITER
The final stage of the mastering chain is often the application of a limiter. This crucial step is about controlling the loudness and ensuring that your track meets industry standards while retaining its dynamic quality. LIMITER by Mastering The Mix is an exceptional tool for this purpose, providing both precision and ease of use.
The Role of a Limiter in Mastering
- Loudness Control: The limiter ensures that your track achieves the desired loudness level without exceeding the digital ceiling of 0dBFS, thus preventing clipping. Modern best practice is to set the ceiling at -1 dBTP to prevent AAC codec clipping when streaming services re-encode your music.
- Preserving Dynamics: While increasing loudness, it's vital to maintain the track's dynamic range. A transparent tool like LIMITER balances loudness with dynamic preservation.
- Consistency Across Platforms: Different streaming platforms have their loudness standards (Spotify, Tidal, and Amazon Music target around -14 LUFS, Apple Music targets -16 LUFS). Using a limiter helps in optimizing your track for various platforms.
Using LIMITER for Optimal Results
LIMITER’s user-friendly interface and advanced algorithm make it a top choice for the final mastering stage.
- Analyzing the Track: Start by loading LIMITER on your master channel, then play the loudest section of your track and click 'Analyze'. The plugin will analyze your music for about 5 seconds and suggest the optimal settings for your specific track.
- Setting Targets: LIMITER provides target ranges for input gain, attack, and ceiling, making it easy to dial in the perfect settings for your track.
- Adjustments and Fine-Tuning: Set the gain slider within the suggested target range and adjust the attack, release, and ceiling as per the plugin's recommendations. This process ensures maximum transparency and minimal distortion.
- A/B Testing: Frequently bypass the limiter to compare the limited and unlimited versions of your track. This practice helps in ensuring that the limiter enhances rather than hinders your track's overall sound.

Comparing with Other Limiters
While LIMITER is an excellent tool, it’s worth mentioning alternatives like FabFilter’s Pro L2 and Sonible’s Smart Limit, which offer different features and controls.
- FabFilter Pro L2: Known for its precision and versatility, Pro L2 offers extensive metering and style options for various mastering needs.
- Sonible Smart Limit: This plugin is recognized for its intelligent algorithms that adapt to the music, offering a more automated approach to limiting.
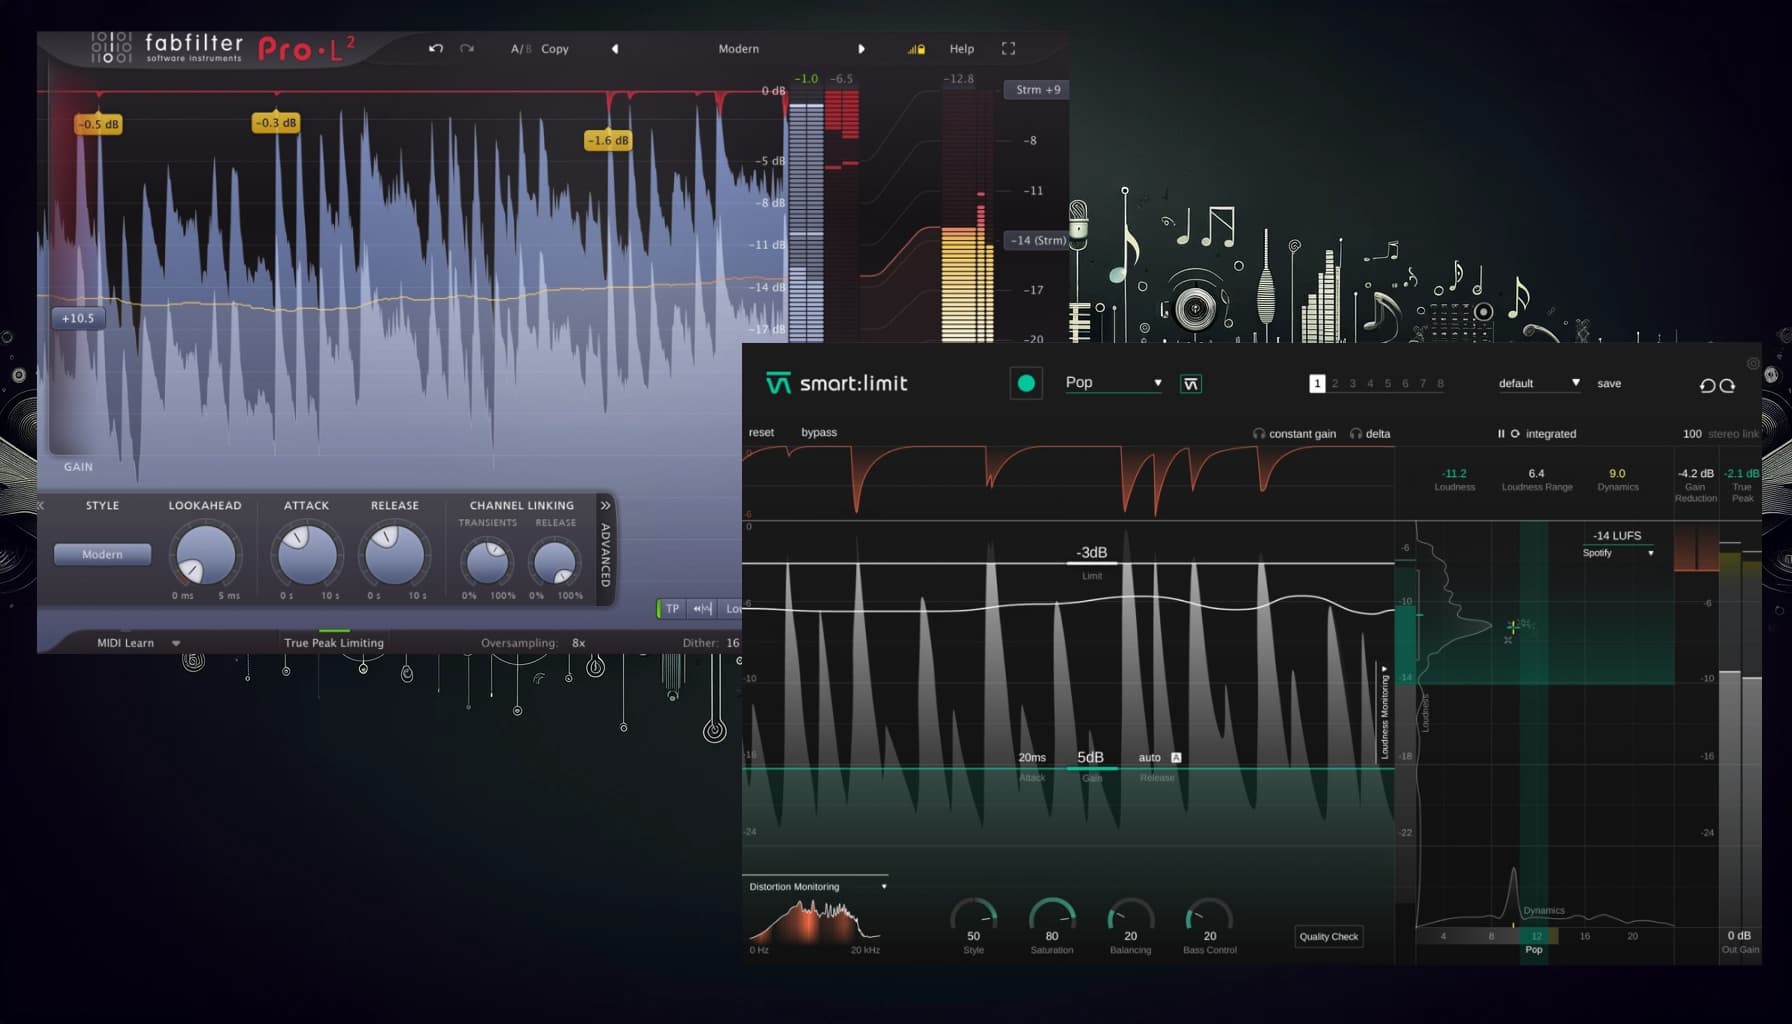
Each limiter has its unique strengths, and the choice largely depends on the specific requirements of your track and your personal preference as a mastering engineer.
In mastering, the limiter is not just a tool; it’s the final gatekeeper ensuring that your track sounds its best across all listening environments. With LIMITER by Mastering The Mix, you get the control you need to finalize your track confidently, ready for the world to hear.
Tips for Effective Mastering
Mastering is not just about using the right tools; it’s about applying them effectively to enhance the musicality of a track. In this section, we will explore practical applications and examples of how to use mastering plugins, providing insights into the thought process and techniques of professional mastering.
- Start with a Vision: Before applying any plugin, have a clear sonic goal. What does the final track need to sound like? Use reference tracks to guide your decisions.
- Subtlety is Key: Mastering is about making small, incremental changes. Avoid drastic adjustments that could alter the mix's core elements.
- Trust Your Ears: While visual tools are helpful, rely on your hearing to make the final judgment. If it sounds right, it likely is right.

Conclusion: Mastering Your Sound, Mastering Your Art
As we conclude our journey through the meticulous process of using mastering plugins effectively, it's clear that mastering is not just a final step in music production, but a form of artistry in itself. It requires a balance of technical skill, critical listening, and creative decision-making to bring out the best in a track.
Throughout this guide, we've explored various aspects of mastering, from setting the right headroom and removing resonances to achieving a balanced tonal spectrum and precise stereo imaging. Each plugin, whether it's LEVELS, RESO, MIXROOM, BASSROOM, REFERENCE 3, iZotope Ozone Imager, or LIMITER, has played a pivotal role in shaping the final sound.
Key Takeaways
- The Right Tools Matter: Mastering The Mix plugins, along with others like FabFilter's Pro Q 3, offer the precision and control needed for professional mastering.
- A Step-by-Step Approach: Mastering is a cumulative process where each step builds upon the previous one. A methodical approach ensures consistency and quality.
- Listening is Key: Trust your ears. Tools provide guidance, but the final judgment comes down to how the music feels and translates across various systems.
- Practice and Experimentation: Mastering is a skill honed over time. Experiment with different plugins and settings to find what works best for your music.
Frequently Asked Questions
What order should plugins go in a mastering chain?
A logical chain starts by setting gain and headroom, then removes problem resonances, then shapes tonal balance with EQ across the low, mid and high frequencies, then adjusts stereo imaging and width, and finally applies a limiter for loudness. Each step builds on the previous one for consistent, transparent results.
How much headroom should you leave before mastering?
Headroom is the space between your highest peak and 0dBFS, and it lets you add processing without clipping. A good practice is to insert a gain plugin at the start of the chain and bring the peaks down to between -3dB and -6dB, monitoring to ensure nothing hits the ceiling.
Why remove resonances early in the chain?
Resonances are prolonged or exaggerated frequencies that muddy a mix and make it sound harsh or unbalanced. Removing them early gives a clearer, more balanced foundation and a less fatiguing listen. Targeting only the individual problem frequencies keeps the rest of the sound untouched and transparent.
Why bypass and A/B test each plugin while mastering?
Frequently bypassing a plugin lets you compare the processed and unprocessed signal so you can confirm each move is genuinely improving the track. Since mastering is about small, cumulative changes, A/B testing and trusting your ears prevents drastic adjustments that could harm the mix's core elements.


