
Tackling the low end is probably the most difficult aspect of mastering, even if you're working in an acoustically treated room and on great-sounding studio monitors. That's why so many amateur mastering jobs either lack bass or have way too much low end.
In this post, we'll explore several tips and tricks for achieving clean low end in your masters, involving effective acoustic treatment and monitoring, proper gain staging, and well-placed EQ tweaks.

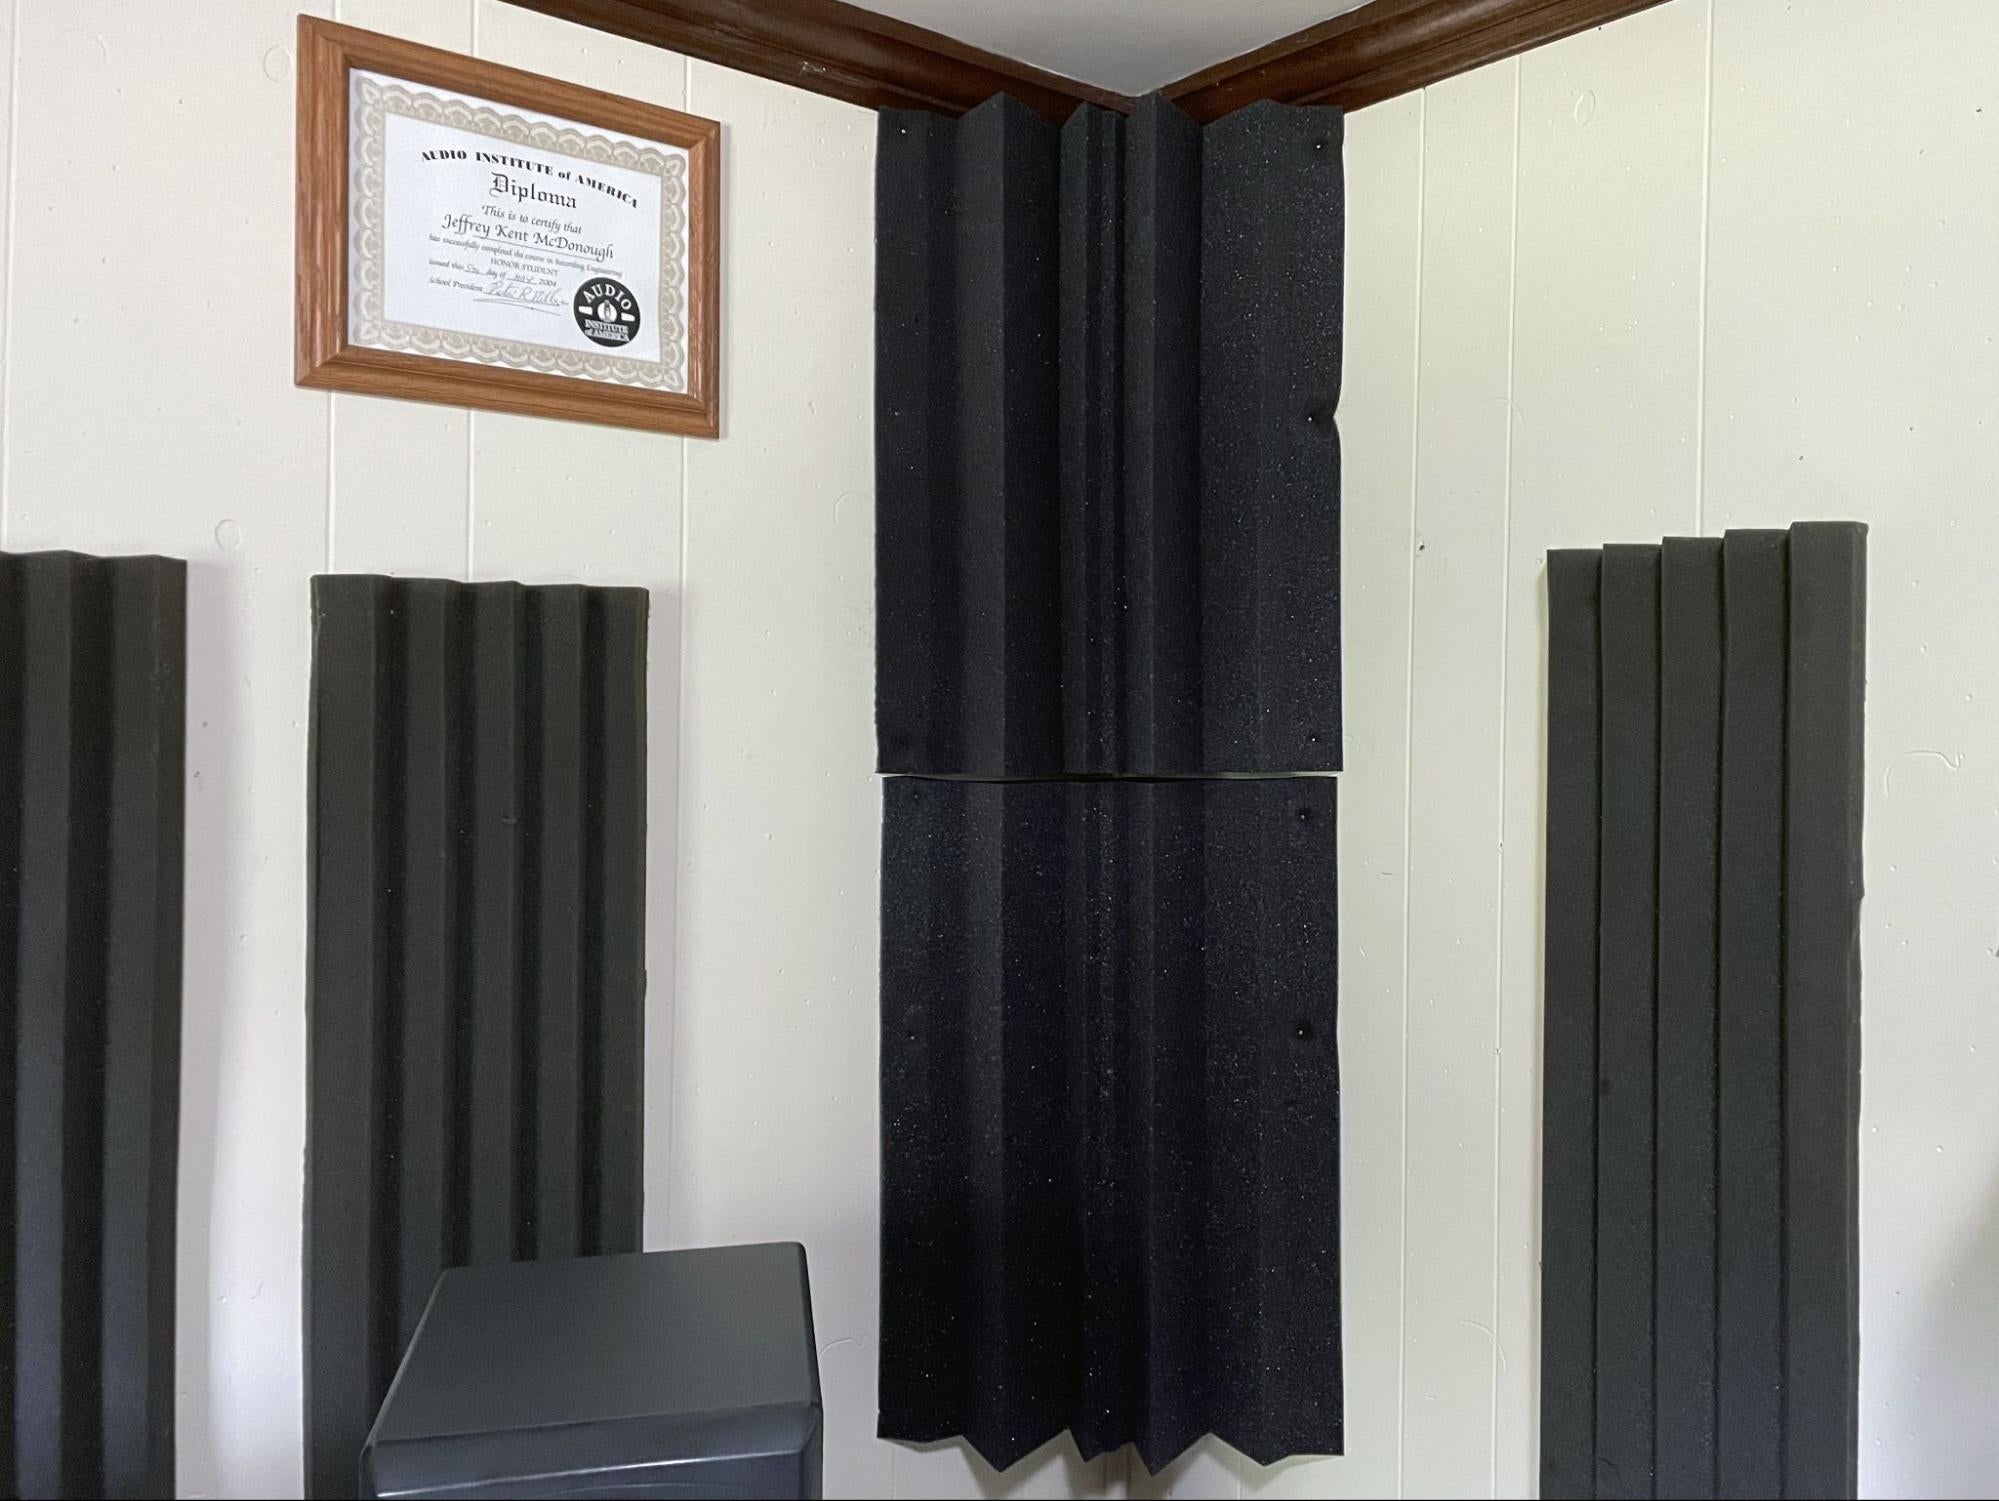
Install Bass Traps in Your Studio
No matter what type of music you're working on, your studio's acoustics will always impact your productions. Even if you use an in-the-box workflow, mixing and mastering in an acoustically inferior room will affect your production decisions and lead to unsatisfactory results.
When it comes to low frequencies, the most common acoustic culprit you'll encounter in an untreated production space is standing waves. Standing waves are to blame if, when you play back a mix in your space, you notice that some frequencies (most notably lower frequencies) sound louder than they actually are and other frequencies sound quieter than they actually are.
If you move around your room while a recording is playing, you'll really hear how standing waves distort your frequency perception. Depending on where you are, you'll notice that particular frequencies become louder or weaker.
Moreover, bass frequencies tend to collect in corners. This creates a perceived boominess in the room, which will cause your mixes and masters to sound balanced in your space but bass-deficient everywhere else.
To solve this issue, you'll want to invest in a set of bass traps, which are specially tailored low-frequency absorbers that you place in the corners of your room. After installing bass traps, your mixes and masters will translate much better, and you'll notice that your room's low-frequency response is considerably more accurate.
If you feel that most commercially available bass traps are out of your budget, Foam Factory offers a wide range of bass and broadband absorbers at a wallet-friendly price.
Level Up Your Monitoring
Accurate monitoring is one of the most important elements of audio production, second only to proper acoustics. After all, if you can't hear a mix correctly, how are you supposed to master it?
Your studio monitors should give you an accurate, uncolored picture of your mix or master. It's this accuracy that will help your projects translate properly on headphones, car stereos, earbuds, club systems, Bluetooth speakers, and anywhere else that folks will listen to your music.
When it comes to monitor size, bigger isn't necessarily better. Rather, the size of your speakers should be appropriate for the size of your production space.
Studio monitors with 5- or 6-inch woofers are usually sufficient for small, bedroom-sized spaces.
Worried that you can't hear low frequencies with a smaller studio monitor? Don't. Most well-designed speakers — even smaller ones — are more than capable of reproducing low frequencies.
If your speakers appear to lack bass, they may be placed too close to the wall behind them, which can produce low-frequency dips, notches, and nulls. Try moving your desk and speakers further away from the wall and see if this improves the frequency balance of your studio monitors.
Finally, if your studio monitors cause your desk or speaker stands to vibrate or resonate, try isolating them with acoustic decouplers, such as Auralex MoPADs, Primacoustic Recoil Stabilizers, or RAB Audio ProJax.

Make Room for Headroom
It's important to leave yourself -3dB to -6dB of headroom when you're mastering. This enables you to add EQ boosts and other forms of additive processing to your master without driving the subsequent plug-ins in your mastering chain too hard.
So, what's headroom? Simply put, headroom is the available level above your audio's peaks before clipping occurs.

In a modern DAW, clipping occurs at 0dBFS (decibels full scale). Once audio hits 0dB, you'll experience shrill, nasty-sounding digital distortion.
If your master suffers from clipping, it will be fatiguing and unpleasant to listen to. Placing a brickwall limiter at the end of your mastering signal chain will safeguard against clipping; however, if you drive a limiter too hard, it will lend a lifeless, overcompressed sound to your master and, at extreme settings, create distortion.
If you're dealing with a super-hot mix, the easiest way to cool it down is with a gain plug-in. Place the gain plug-in first in your mastering effects chain, then dial it in so that the peaks of your audio are hitting somewhere between -3dB and -6dB.

Sculpt Your Low End
An EQ is the primary tone-sculpting tool mastering engineers use to attain a super-clean low end. Our BASSROOM plug-in is tailor-made for this purpose; it not only sounds amazing, but it also suggests genre-specific EQ adjustments a mastering engineer in a world-class studio would make.

Using BASSROOM is simple. Instantiate it in front of your brickwall limiter in your master chain, choose a preset, or import a reference track, and the plug-in will handle it from there, giving you precise EQ target recommendations.

All you need to do at that point is match the bands to BASSROOM's EQ suggestions, then tweak them until you're satisfied with the sound.
BASSROOM doesn't employ generic presets either. Its intelligent algorithm actually listens to your music in much the same way that the human ear perceives sound.
This means that BASSROOM's suggestions are 100% unique to your music.
To top it off, BASSROOM's state-of-the-art filters are top shelf all the way; they're optimized specifically for low-frequency sound shaping, yielding hyper-transparent results with maximum punch and clarity.

BASSROOM in Action
Once you get BASSROOM up and running with the perfect preset or reference track, play back a bass-heavy section of the song you're working on. Targets will move to suggested EQ positions, intelligently selected by BASSROOM's algorithm based on the tonal balance of your mix.
Matching BASSROOM's EQ bands to the target suggestions will give your master a clear, well-defined low end that not only sounds great in isolation but also sounds balanced within the context of your entire production. Use the targets as a starting point, then use your ears to carry you the rest of the way.
BASSROOM includes five static frequency bands: 0–20Hz, 20–40Hz, 40–80Hz, 80–160Hz, and 160–320Hz. If you click on a band's gain adjustment readout, you'll be able to adjust it manually.
BASSROOM also allows you to adjust Q bandwidth by dragging the sides of each band. Dragging the Q bandwidth control towards the center of the box gives you a thinner Q; dragging the control towards the sides gives you a wider Q.

The first manual tweak many mastering engineers make with BASSROOM is to make a gentle 20Hz or 40Hz cut with a relatively wide Q setting. This will free up headroom, allowing you to tighten up the rest of your master's bass frequencies.
You can also make small 160Hz or 320Hz cuts to minimize boxiness, thereby bringing more clarity to your mix.
Dealing with a weak, thin-sounding mix? If so, a 320Hz boost will work wonders. Boost cautiously, however; the 160–320Hz region is notorious for adding muddiness to a mix.
You can also add warmth to a clinical-sounding mix with a gentle boost at 80Hz with a wide Q setting. Again, tread lightly; too big a boost at 80Hz will eat up your headroom quickly and can drive your limiter into distortion.

Conclusion
Every mastering engineer struggles with low end — even seasoned professionals. It's easily the most challenging aspect of mastering.
But, with effective acoustic treatment and monitoring, proper gain staging, and well-placed EQ tweaks (with BASSROOM in your plug-in arsenal), you'll be well on your way to achieving pro-level masters.
Keep following our blog for expert production tips, tricks, and techniques.
Frequently Asked Questions
Why is the low end so hard to master?
Even in a treated room on good monitors, the low end is the hardest part of mastering, which is why so many amateur masters lack bass or have too much. Standing waves and bass collecting in corners distort how you hear low frequencies.
Do you need large monitors to hear bass when mastering?
No. Match monitor size to the room, with 5 or 6 inch woofers usually fine for bedroom-sized spaces. Most well-designed speakers reproduce low frequencies. If bass seems lacking, the speakers may be too close to the wall behind them.
How much headroom should you leave when mastering?
Leave -3dB to -6dB of headroom so you can add EQ boosts and other processing without driving later plugins too hard. With a hot mix, place a gain plugin first and bring the peaks into that range.
What EQ moves clean up the low end?
A gentle wide 20Hz or 40Hz cut frees up headroom, small 160Hz or 320Hz cuts reduce boxiness, a cautious 320Hz boost helps a thin mix, and a gentle 80Hz boost adds warmth. The 160 to 320Hz region adds muddiness, so boost carefully.


