Sculpting the sound of your master can be difficult. But the truth is, a little bit of EQ can sonically transform a rough mix into a professional-sounding master in no time—if you know what to look for. In this blog, we’ll explain how to use EQ to sculpt your sound while mastering, and how plug-ins like compressors can affect the frequency balance too.
Use Reference Mixes to Set Sonic Goals
Before you reach for an EQ, it’s important to listen to a few reference tracks to get an idea of what you want your mix to sound like. Not only does it help tune your ears to the type of sound you want to achieve, but comparing your mix to reference tracks gives you a map of exactly what to change.
Load REFERENCE as the last plug-in on your mix bus and drop in a few of your favorite mixes. Engage the level match feature in the top right corner and toggle back and forth between your mix and the reference tracks. Use this to guide your EQ decisions while mastering.
For instance, if you notice that your mix sounds a little harsh compared to the reference mixes, check the Trinity Display to confirm what you’re hearing, and make a note to tame the high-mids and high-end in your track.
Pay special attention to the level balance between instruments, as this can be difficult to fix in the mastering stage. If possible, open up the mix session and adjust the stem levels before you begin mastering. If the track sounds balanced and you’re sure you can get great results from the mix, load up the rest of your mastering plug-ins and get to work!


Essential Plug-ins For Mastering
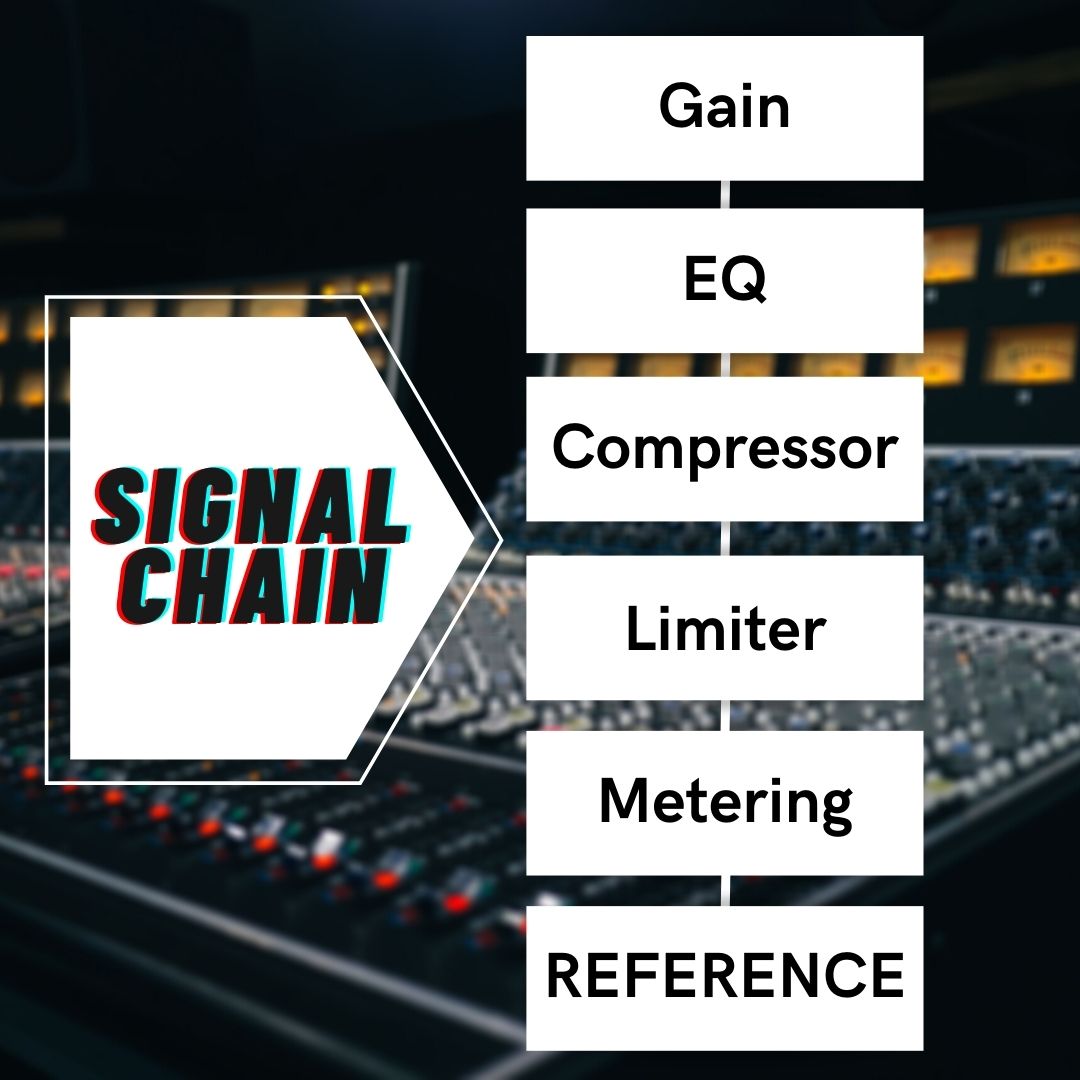
Everybody has their own secret recipe for which plug-ins they like to use on the master bus, but almost everyone uses some form of gain adjustment, EQ, compression, limiting and metering. There can be other types of plug-ins too, but these are the fundamentals.
At the beginning of every session, I’ll load up my favorite mastering chain. Each of the plug-ins start with very subtle settings, which I tweak and adjust to suit the needs of the track. I find it’s better to add the entire chain all at once rather than adding plug-ins one by one because each plug-in affects how the other plug-ins respond to the sound.
If I focused on adjusting the EQ first and then add a compressor, it could squash my sound, forcing me to move back a step and tweak the EQ to compensate. Or maybe I boost some frequencies with the EQ only to find out they become harsh when the limiter is added at the end.
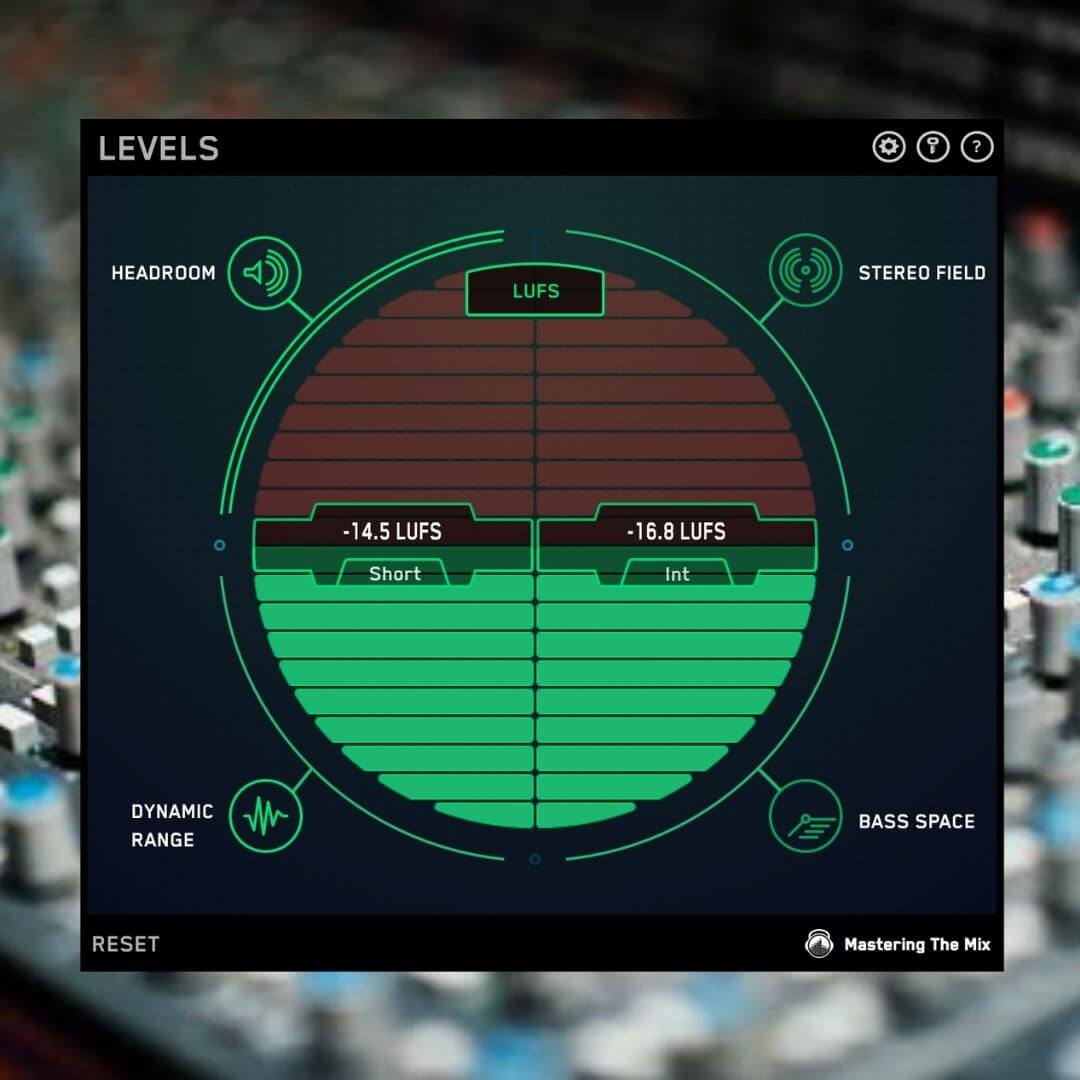
Set The Level
My first step is to set the loudness of the track to an appropriate level for release. Depending on where you plan to release your music, that might be -9 integrated LUFS for a CD or -14 LUFS if you want to optimise for Spotify and YouTube. You can read more about how I do this in this blog post. Once this is done I can proceed with shaping the track.

Sculpting The Low-End
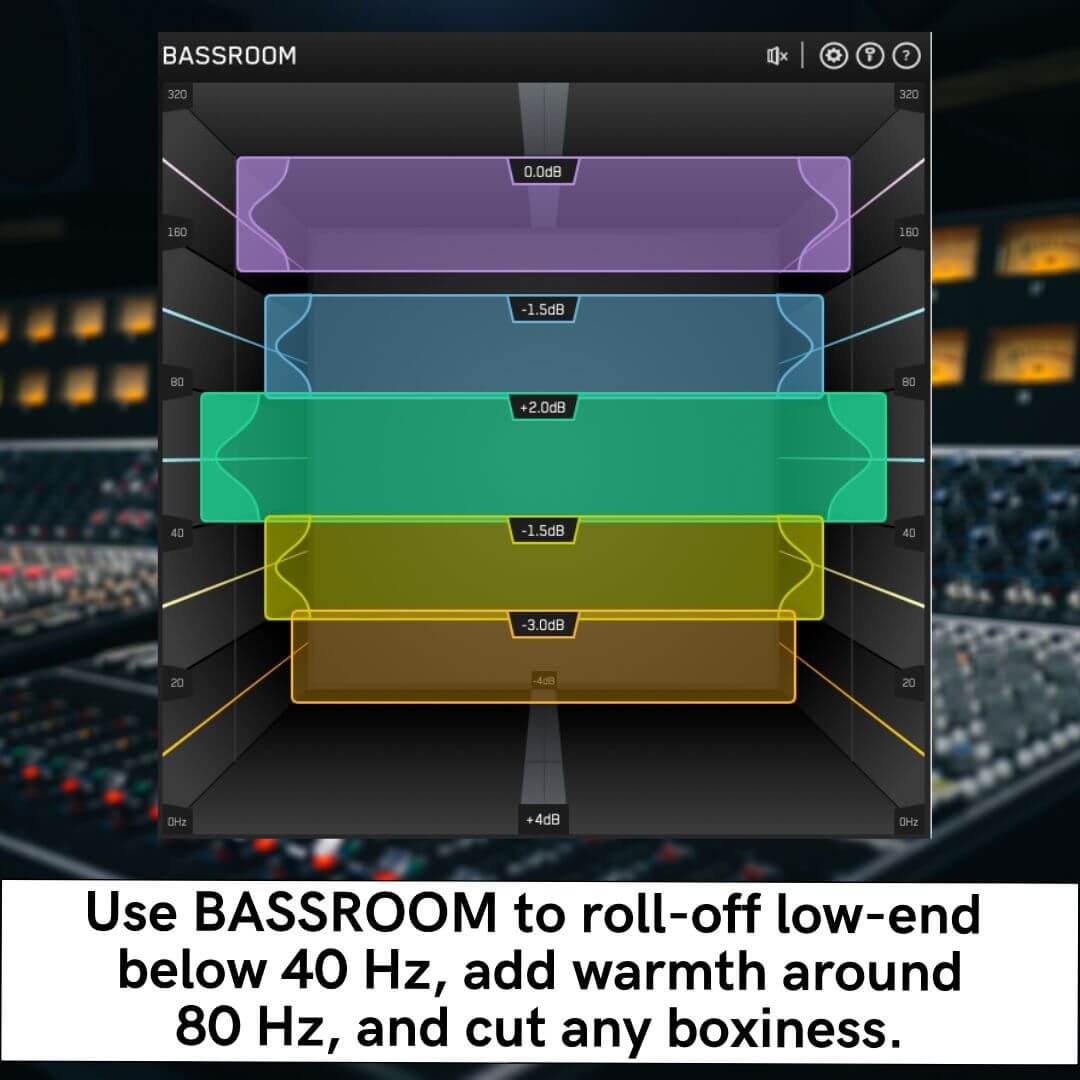
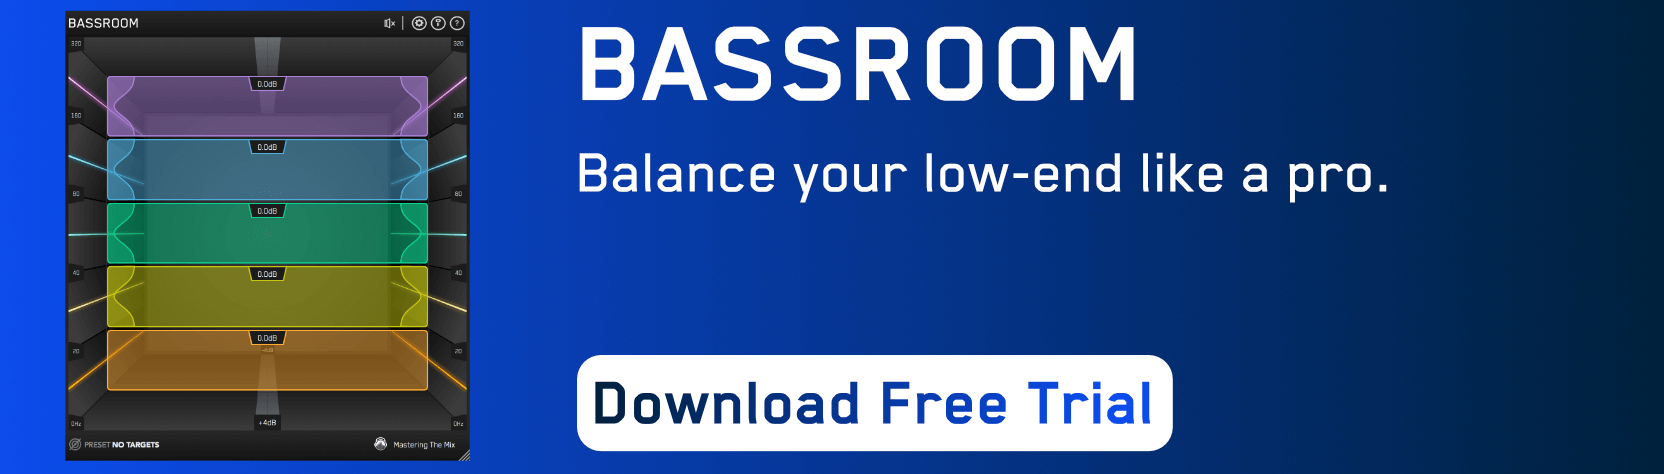
One of the keys to mastering is dialing in a powerful bottom-end. BASSROOM makes it easy to sculpt frequencies below 320 Hz using five bands with variable gain and Q control. Genre-specific EQ target suggestions take the guesswork out of mixing and point you to the perfect sound in seconds.
The first thing I do in every mix is roll-off the low-end. If the track is feeling too bass-heavy, I’ll make a gentle cut at 20 or 40 Hz with a relatively wide bell. The low cut will give me extra headroom to work with and tighten up the remaining bass frequencies.
If the track feels a little boxy, I’ll make a small cut at 160 Hz or 320 Hz, depending on the mix. This can help bring clarity to busy mixes. If you notice that the track feels weak or thin, try boosting at 320 Hz to add body. Just be careful as too much in this range can make your mix sound muddy.
To add warmth, try boosting with a wide bell at 80 Hz. Just be careful—boosting too much in this area can quickly eat up your headroom or even cause distortion.
Adding Character And Clarity To The Mix
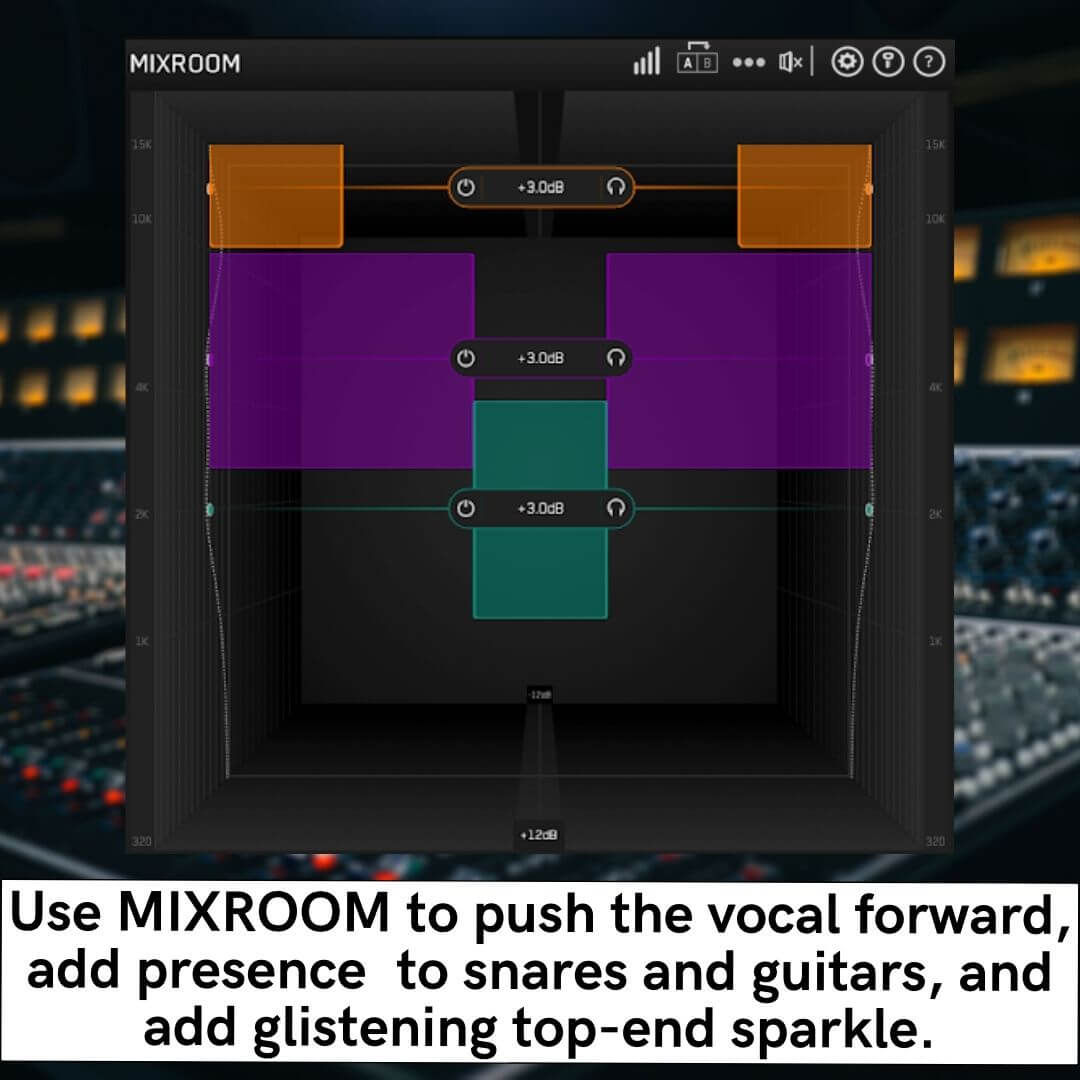
Mastering is all about achieving maximum clarity and transparency. MIXROOM makes it easy to zero in on specific frequencies, using smart EQ bands to set the perfect balance. Plus, genre and channel-specific EQ target suggestions make it easy to compare your mix to the pros.
To push the vocal forward in the mix, boost 1 - 5 kHz in the center channel by pressing the “M” on the smart band. This switches the band from processing stereo to processing the mid channel. Since the lead vocal is almost always centered in the mix, this can help bring focus to the vocal. If you feel that the vocal is too loud or in your face, try making a subtle cut in this range.
To add presence to vocals, snare drums and guitars, try boosting around 3 - 7 kHz. This can help give transients more bite and attitude. Just be careful not to boost too much or your mix can sound harsh. I like to blend this boost across the center and side channels to help create a sense of space.
Finally, I often add a bit of glistening top-end sparkle by boosting frequencies above 10 kHz with a high-shelf. This helps give high frequencies a really crisp feel without being overly crunchy or shrill.

Rules for Mastering EQ
There is a general ‘rule’ repeated by many mastering engineers that states that one shouldn't make boosts or cuts greater than 3 dB. If you find yourself wanting to make these kinds of changes, then it’s more than likely that the track needs to be re-mixed.
Another fact to consider is that a low-end boost has a secondary effect of dulling the high-end. Though the high frequencies haven't been reduced, the human ear perceives them as having less presence due to the increase in low frequencies.
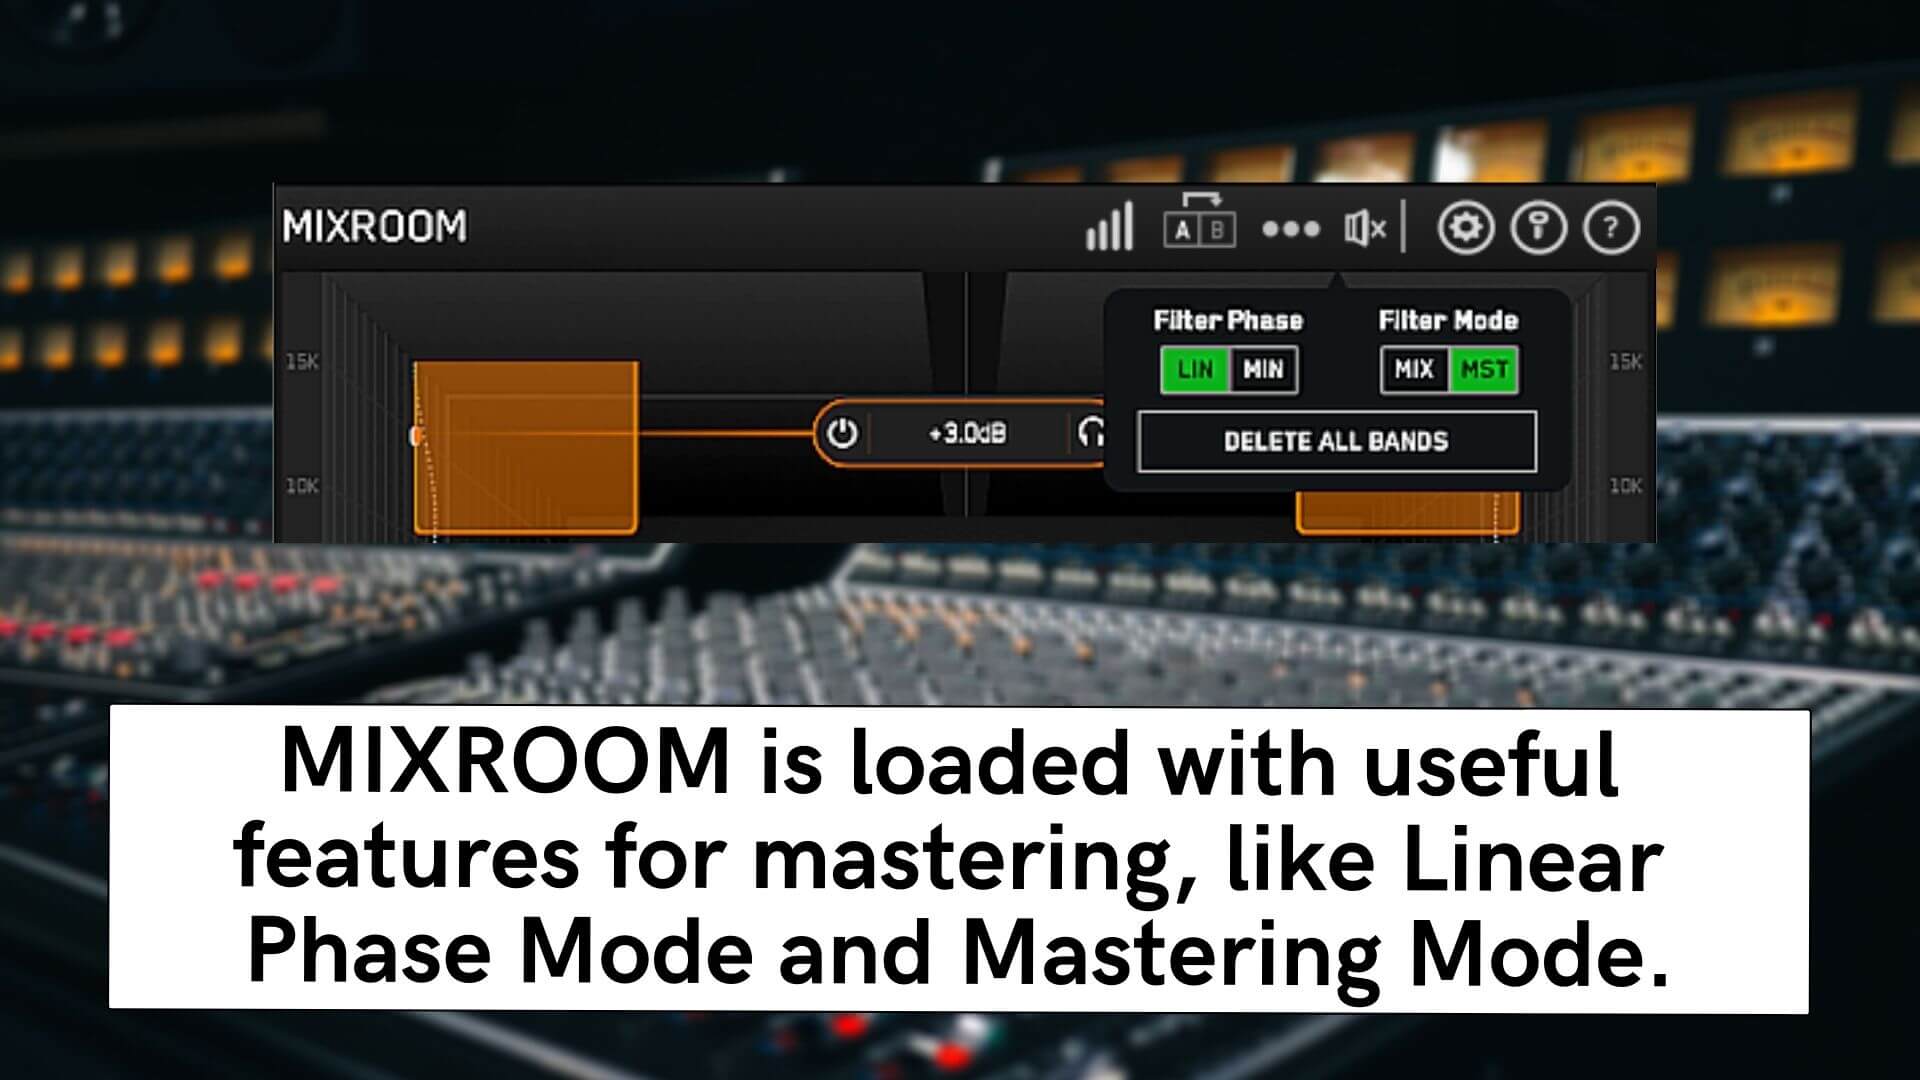
Another ‘rule’ is to keep the Q’s wide rather than pushing or cutting resonant frequencies. Thankfully, MIXROOM is loaded with useful features for mastering. Linear Phase mode helps preserve phase while mastering for pristine sound, while Master Mode limits your EQ moves to 4 dB and 1.5 Q.
Just remember, these ‘rules’ are a good starting point and more often than not I stick to them… but don’t be afraid to break the rules if it will have a positive effect on the music.
How Compression Affects Sound During Mastering
At this point, your mix should be sounding pretty good. But nothing will ruin it faster than slapping a compressor across the mix bus and destroying the delicate balance you worked so hard to create.
The compressor is often the culprit for introducing unwanted distortion into your master. It can add volume which also has an effect on the tonal balance. Louder music sounds fuller in the bass and more present in the high frequencies than a track with EXACTLY the same balance but a few decibels quieter.
Be aware that the compressor can have a flattening effect on the EQ curves of the EQs that precede it. After dialing in a compressor setting, toggle the bypass to see if it’s had any flattening effect on your tonal balance. If it has, then adjust the EQ where needed.
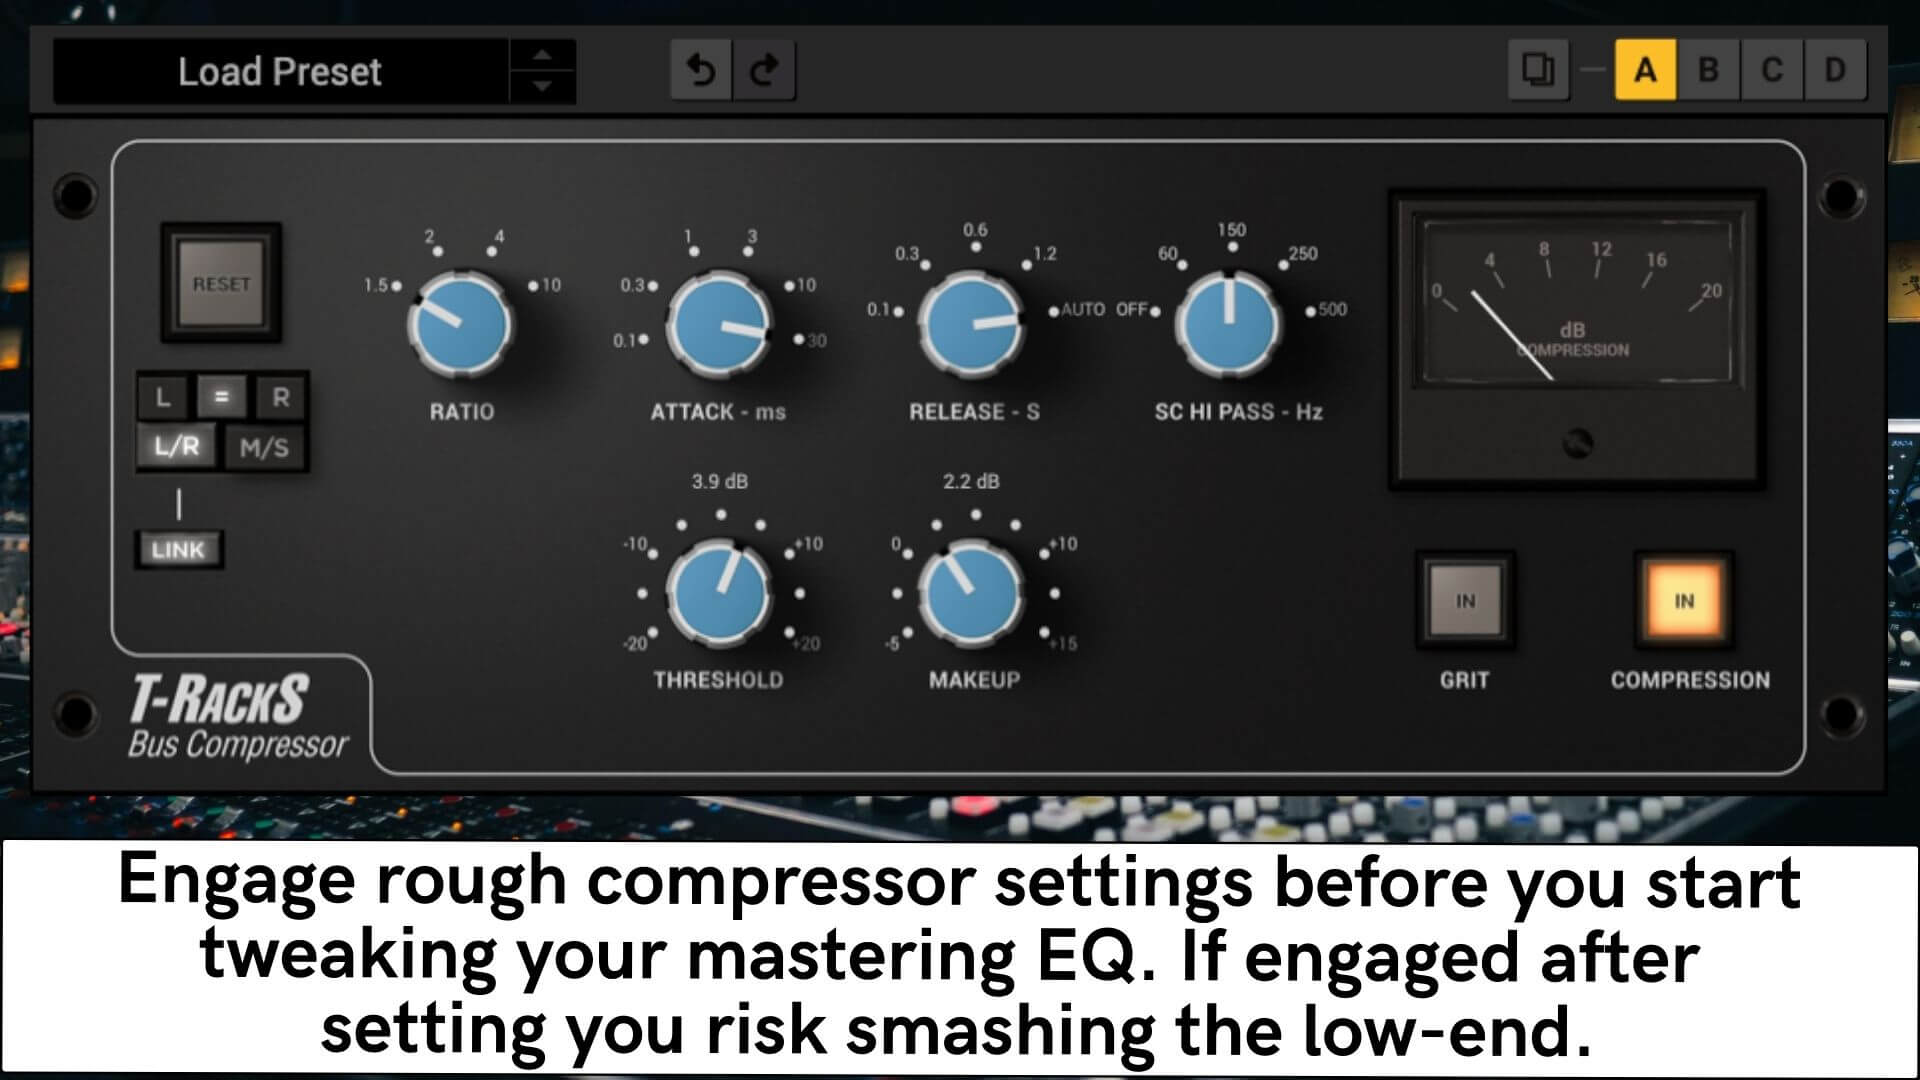
As you start to apply more compression, this flattening effect can become more pronounced. That’s why it’s so important to have the compressor engaged from the beginning, even if the settings are rough.
Try using a subtle ratio, like 1.5 or 2:1. Moderately slow attack speeds and fast release times tend to work well—although I usually prefer the auto release setting.
Check on your gain reduction periodically while mastering to make sure you’re not squeezing the mix too hard. Try to keep the needle under 3 dB. If you find that you need more gain reduction than that, it may be best to go back to the mix stage and adjust the balance.
As always, be sure to compensate for any lost gain using the makeup gain setting. Just be sure not to overcompensate and cause your mix bus to clip or peg the limiter.
Follow these steps to sculpting your sound during your next mastering session for a clear, transparent sound.
Frequently Asked Questions
How much EQ should you use when mastering?
A widely repeated guideline among mastering engineers is to avoid boosts or cuts greater than 3 dB. If you find yourself wanting bigger moves than that, it usually means the track should go back to the mix stage and be rebalanced rather than fixed in mastering.
What order should mastering plugins go in?
Load your whole mastering chain at once with subtle settings rather than adding plugins one at a time. Each plugin affects how the others respond, so a compressor added after EQ can flatten your curves, and a limiter can make earlier boosts turn harsh. Working on the full chain avoids backtracking.
How do you EQ the low end during mastering?
Start with a gentle roll-off around 20 to 40 Hz to free up headroom and tighten the bass. A small cut near 160 or 320 Hz clears boxiness, while a wide boost around 80 Hz adds warmth. Be careful, since too much low end eats headroom and can cause distortion.
How does compression affect tonal balance when mastering?
A compressor can flatten the EQ curves of any EQ before it and adds loudness, which makes a track sound fuller in the bass and brighter up top. After dialling in compression, bypass it to check whether your tonal balance shifted, then adjust your EQ to compensate.


