We hear frequencies differently at different volume levels. Less bass when it’s quiet, more bass when it’s loud.
That’s a problem. Because if your monitoring level is off, you’ll start making EQ decisions based on a lie, boosting or cutting things that don’t actually need it.
In this post, I’ll walk you through five simple steps to calibrate your speakers to the right monitoring level for your studio space.
This provides a consistent and accurate response every time you mix or master. Your ears will adapt to the level, and you’ll instinctively know when something sounds off, whether it’s your tonal balance or overall loudness.
1. Decide: Streaming Optimized, Balanced, Or Loud?
You first need to decide what digital level you want to mix to. If you’re mastering audio for streaming platforms, you might calibrate to around -14LUFS integrated. If you’re making dynamic but competitively loud music, you might choose a figure closer to -9LUFS integrated. And if you're looking to make something super loud, you could go for -6LUFS integrated.
2. Create Your Pink Noise File
You’ll need a pink noise file for the calibration. The pink noise file should match the level you chose in step 1.
The pink noise produces an equal amount of noise across the frequency spectrum. If you have an untreated room, you can restrict the pink noise to 500Hz-2kHz to minimize low-frequency standing waves or reflections.
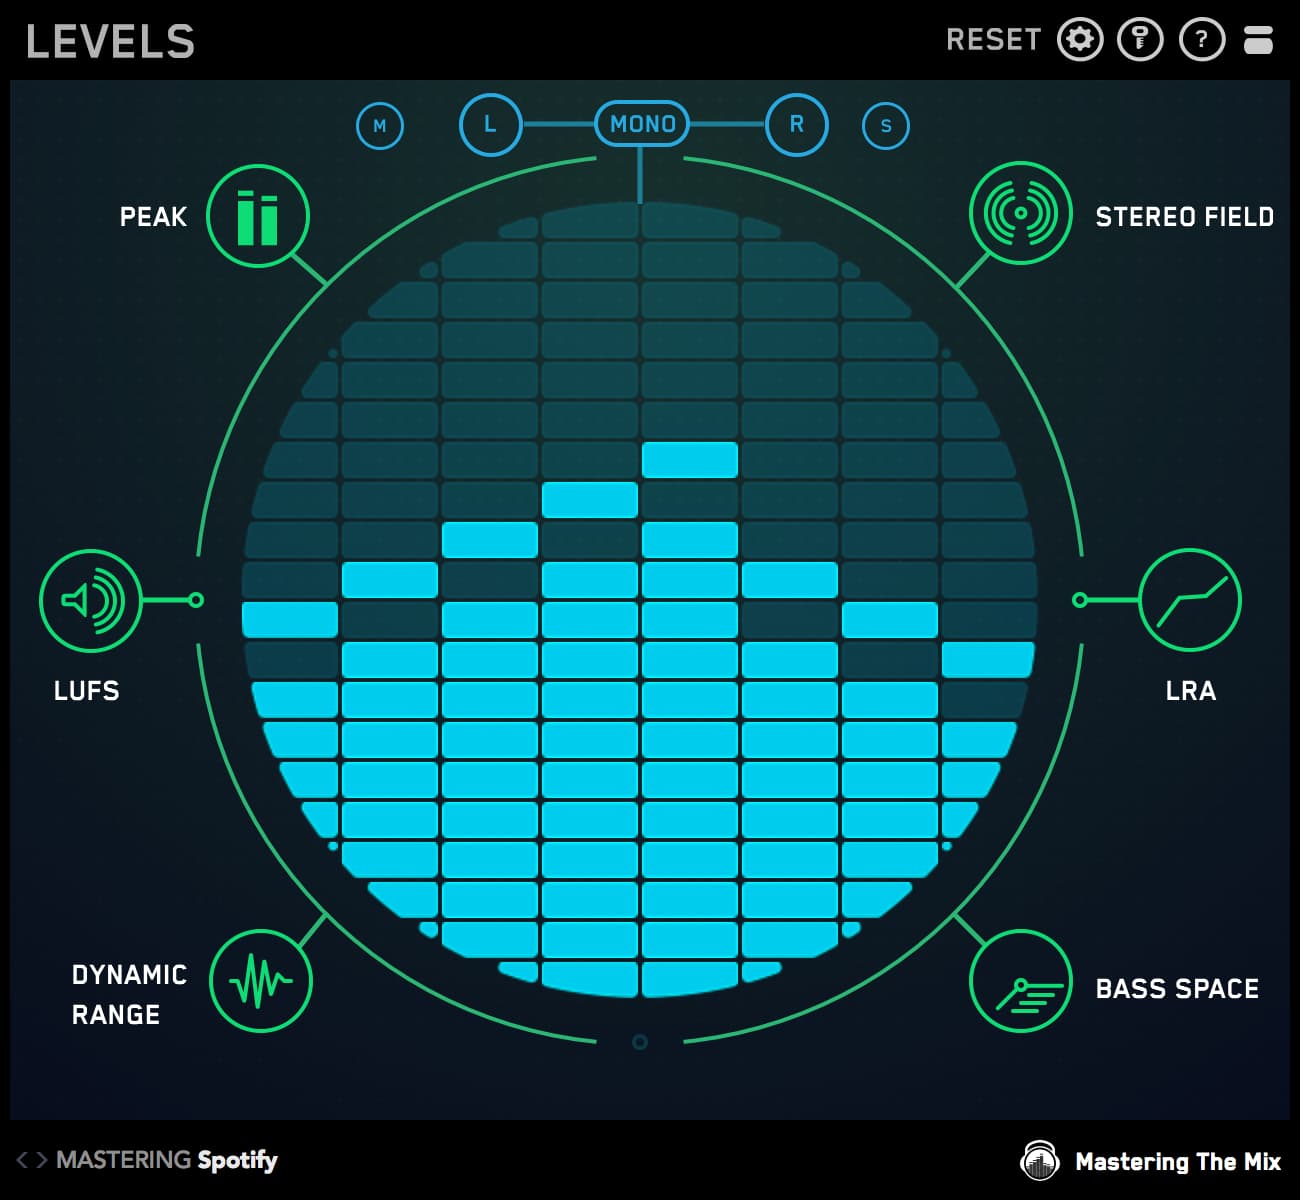
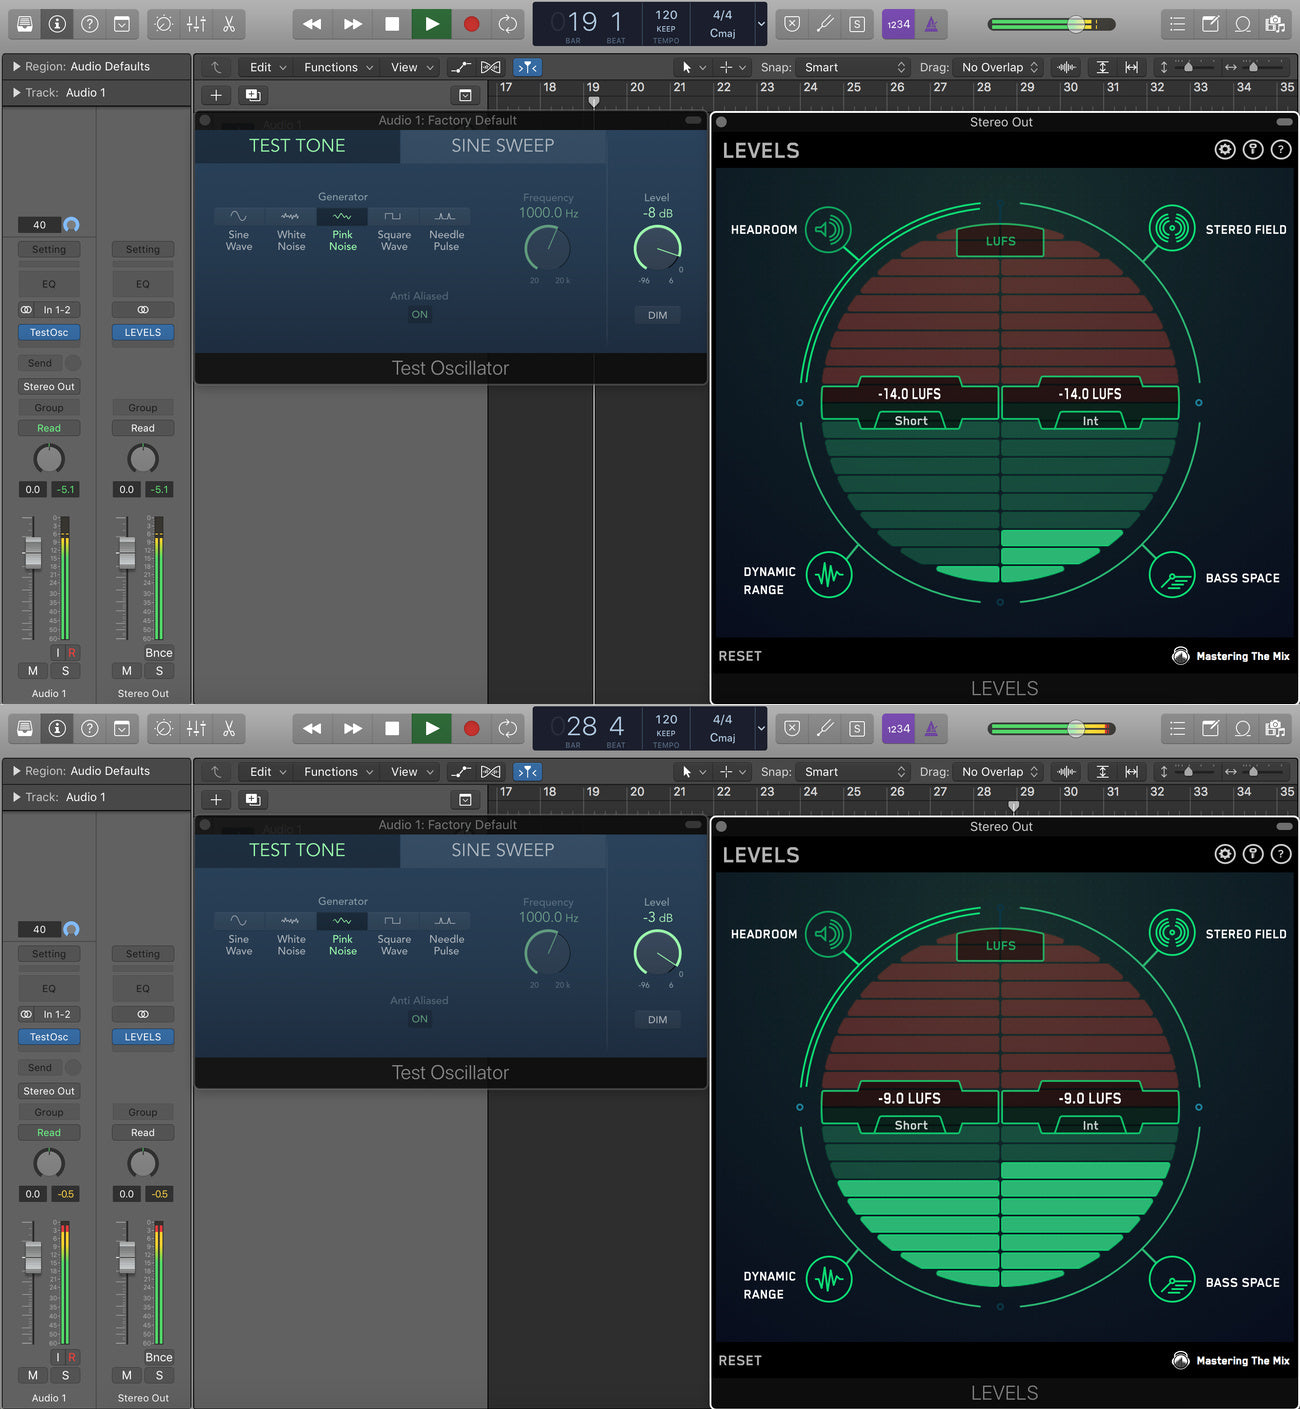
Open up a test oscillator in your DAW and select the pink noise setting. You can use LEVELS to adjust the pink noise to the ideal LUFS value of your future music projects.
In the example below, the test oscillator outputs audio at -9LUFS when the output is set to -3dB and -14LUFS when the output is set to -8dB.
Want to skip this step? I created -6, -9, and -14 LUFS integrated pink noise files that you can download here.
3. Get Your SPL Meter (free app?)
An SPL meter is now needed to measure the acoustic sound-pressure level produced by your monitors. You’ll need an SPL meter with a C-weighted filter option, which is flatter than the A-weighted response commonly used for general measurements.
The SPL meter will also need a ‘slow’ or ‘averaging’ mode. These can be picked up for around £15/$20 on Amazon. Some phone apps can also be surprisingly accurate. Some of the best free SPL meter apps are Decibel X, NIOSH Sound Level Meter, and Sound Analyzer.
4. Calculate the Perfect Monitoring Level For YOUR SPECIFIC Home Studio
Now you need to work out at what volume you want to listen to your audio in your studio. 85dB SPL used to be a common suggestion for monitoring levels, but this figure was intended for larger spaces such as a cinema. This level is close to the flatter portion of the equal loudness contours (a more accurate update of the Fletcher-Munson Curves).
It was later discovered that the method used for measuring the pink noise signal was slightly inaccurate, and the reference level for cinemas was changed to 83dB SPL.
This level would be super loud and overwhelming in most home studios.
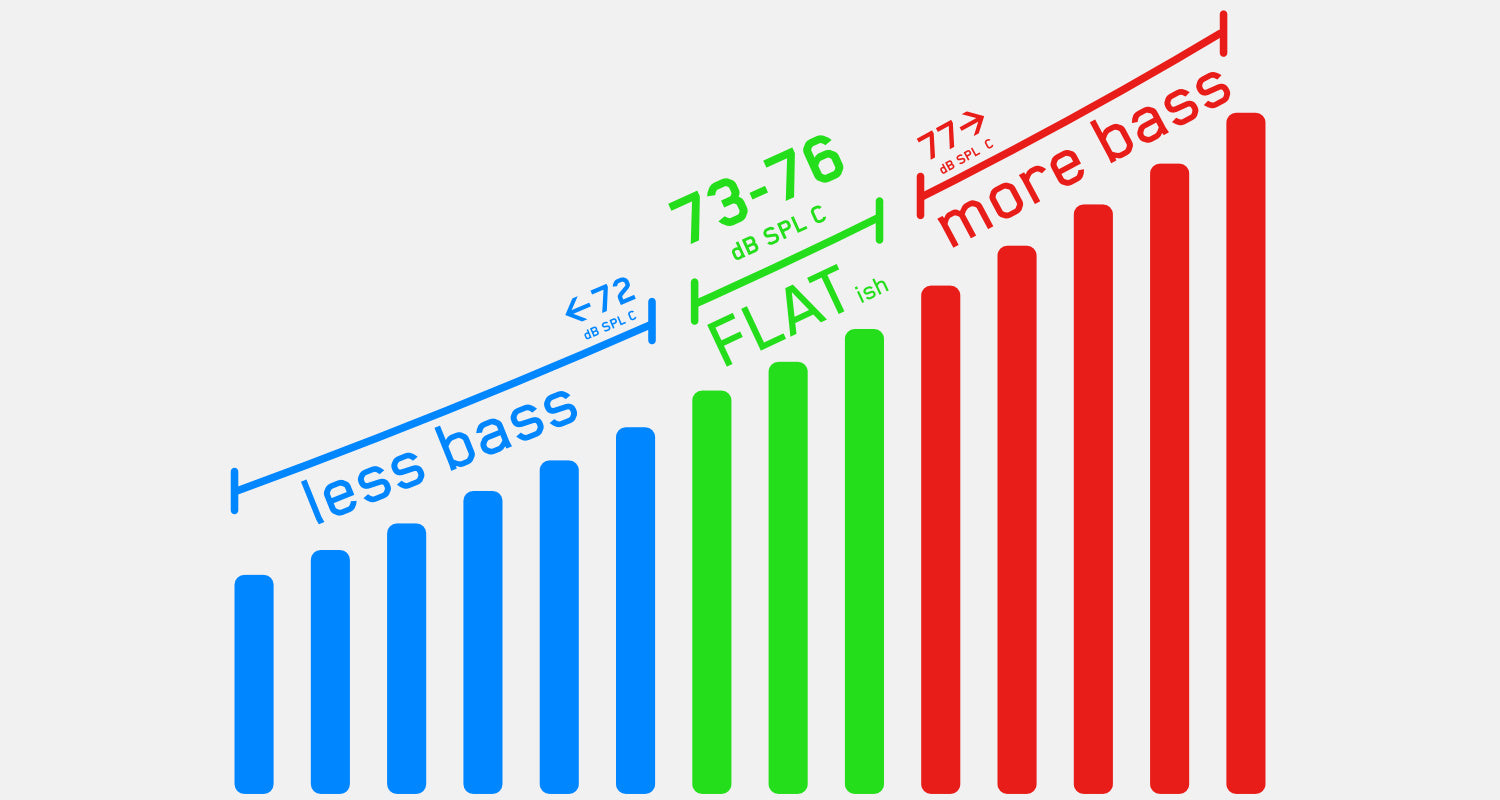
Most home studios are smaller than 142 cubic meters, so 73-76dB SPL C is a more appropriate target. Below is a table created by Sound On Sound with recommendations based on room size.
|
Room Size |
Reference Level |
|
Cubic Metres (m³) |
dB SPL (C) |
|
> 566 |
83 |
|
284 - 566 |
80 |
|
143 - 283 |
78 |
|
42 - 142 |
76 |
|
< 42 |
74 |
5. Set The Levels
Now we bring everything together, play the pink noise file, and adjust the monitors to match the ideal reference level for your studio. Let’s say you wanted to master audio to -14 LUFS and you had a small home studio between 42 and 142 m³. You would want the -14 LUFS pink noise file to sit at around 76dB SPL (C).
To take the measurement:
- Place the SPL meter in the listening position. Most SPL meters are designed to have the microphone pointed to the ceiling rather than the source. Check the instructions to be sure.
- Set your monitor volume to its lowest setting using your monitor controller or the actual volume on the monitors if you don’t have a controller. Make sure your output and master fader in your DAW are set to 0dBFS and play your pink noise audio.
- Increase the volume of your monitors until your SPL meter reads 76dB SPL (C).
- Make a note of the volume so you can quickly set the same monitor level in the future. It’s improbable that you will use this level 100% of the time. It’s always useful to hear your mix super quiet to make sure the right elements are poking through the mix. You also might want to play your music loud from time to time for fun or to impress your clients and friends.
Final Thoughts: Calibrated Monitors, Confident Mixes
Now that your monitors are calibrated to suit your room and your sonic goals, you’ve removed one of the biggest variables in mixing: inaccurate monitoring.
This isn’t just a one-time tweak; it’s a long-term upgrade to how you hear music in your space. With a consistent reference level, your ears will get smarter every session. You’ll start spotting tonal imbalances faster, nailing mix levels with more precision, and trusting your instincts instead of second-guessing them.
No more over-EQing the low end because your room makes it sound thin. No more chasing problems that aren’t really there. Just cleaner decisions, faster mixes, and tracks that translate from your studio to the club, the car, and everywhere in between.
Want to make the process even easier? Tools like LEVELS take the guesswork out of LUFS and loudness targets. Download the free trial and streamline your workflow today.


