

The vocal sounds buried. Your hand goes straight to the fader. Up two dB. Up another two. Now the vocal sits on top, but the chorus has lost its lift and the guitars sound smaller than they did five minutes ago.
The fader didn't make the vocal cut through. It just made everything else duck. Win space for the vocal and the fader can stay where it was.

There are three plugins that handle the three things blocking your vocal: resonant build-up in the vocal itself, a tonal balance that isn't carrying presence, and instruments masking the vocal's most important frequencies. RESO, MIXVAULT, and FUSER. One on the vocal, one on the bus, one on the masking culprit.
Vocal Buried. Bypass And With The Chain.
Same vocal, same instrumental, same fader level. Toggle Bypass and With Chain while it plays. The vocal moves from buried to forward without anyone touching the volume.
1Why The Fader Move Fails
Pushing the vocal fader feels like the obvious fix because for a split second it works. The vocal pops out. Then your ears adjust, the rest of the mix feels small, you compensate by pushing other channels, and the loudness war is now happening inside your own session.
A vocal isn't quiet, it's blocked. Other elements are sitting on the same frequencies the vocal needs. Synth pads in the 2–4 kHz range. Hi-hats in the 6–10 kHz range. An acoustic guitar with a peak right where the vocal's body lives. The fader adds level across all frequencies, but the masking is frequency-specific. Volume can't unblock the path. It just makes the blocked vocal louder.

Stop thinking "make the vocal louder". Start thinking "make space for the vocal to sit". Every fix below gets faster once that flip happens.
2Step One: RESO On The Vocal
Before you fight the rest of the mix, fix what the vocal is doing on its own.
Almost every recorded vocal has resonant peaks. A nasally bump around 1 kHz from the singer's resonant cavities. A boxy ring at 250–500 Hz from a less-than-perfect room. A harsh spike around 3–5 kHz that hurts on loud playback. These peaks don't just sound ugly, they're competing with the vocal's actual character. The energy that should be carrying clarity and emotion is being spent on a frequency that resonates too hard.
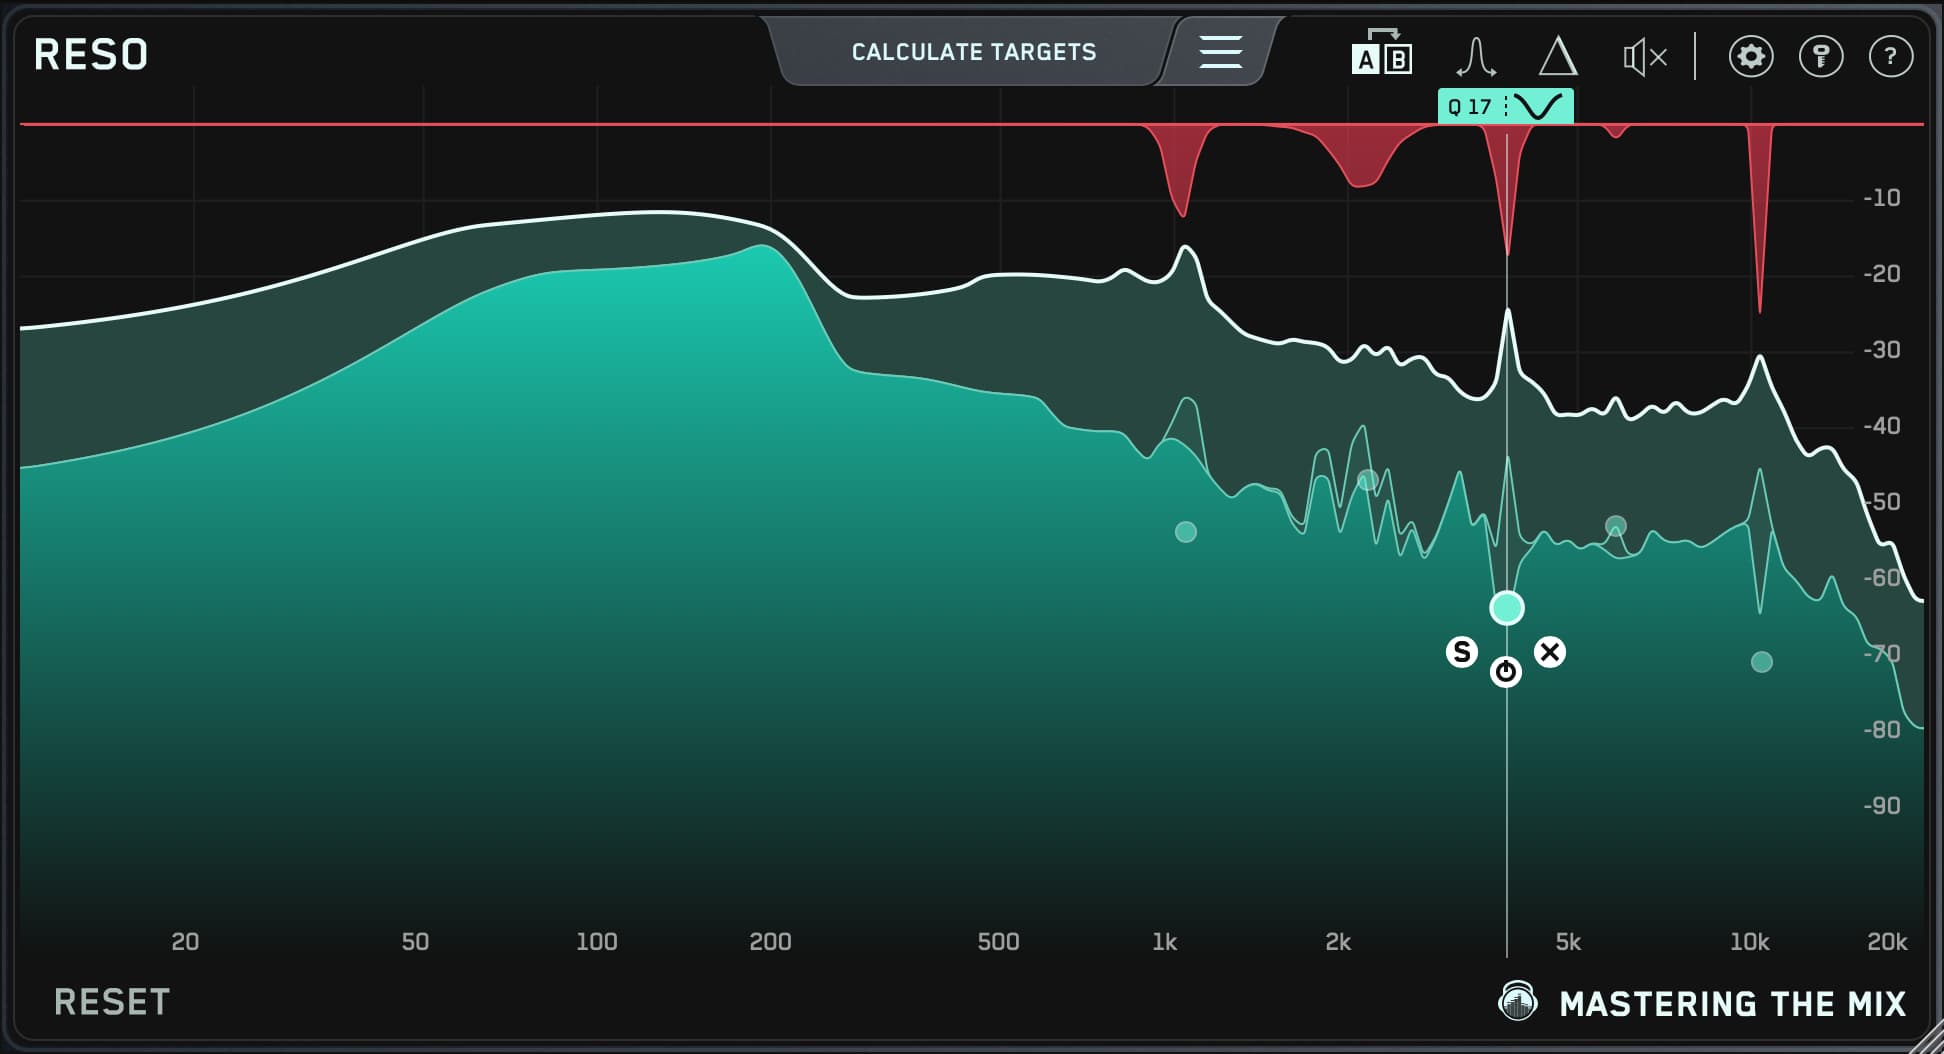
RESO is a dynamic resonance suppressor. It scans for frequencies that are sitting unusually loud relative to the rest of the signal, and applies a dynamic cut that only triggers when the resonance flares up. The rest of the time, the vocal passes through clean. That's the difference between RESO and a static EQ cut, you're only reducing the problem when the problem actually exists.

The Fastest Way To Use RESO On A Vocal
- Insert RESO on the vocal channel.
- Play the loudest, most emotive section of the vocal (a chorus line, usually).
- Click Calculate Targets. RESO will mark the most resonant frequencies.
- Click Engage Targets to bring in all the suggested nodes.
- Hit the Delta button to solo what RESO is removing. If you're hearing tone, character, or anything you'd miss, pull a node back. You only want to hear ring.
- Bypass and listen. The vocal should feel smoother, not duller.
If RESO finds a target you don't agree with, click that node and reduce its depth, or remove it. The Calculate Targets feature is a starting point, not a verdict. The ear wins.
Use the frequency sweep tool (hold control and move your mouse across the display) to manually hunt for resonances RESO didn't auto-detect. The 800 Hz to 1.5 kHz region on vocals is where boxy and nasal hide. Almost every recorded vocal has at least one resonance in there worth taming.

You haven't made the vocal louder. You've removed the energy that was masking the vocal from itself.
3Step Two: MIXVAULT On The Vocal Bus
Now that the vocal isn't fighting its own resonances, you can shape it positively. This is where MIXVAULT comes in.
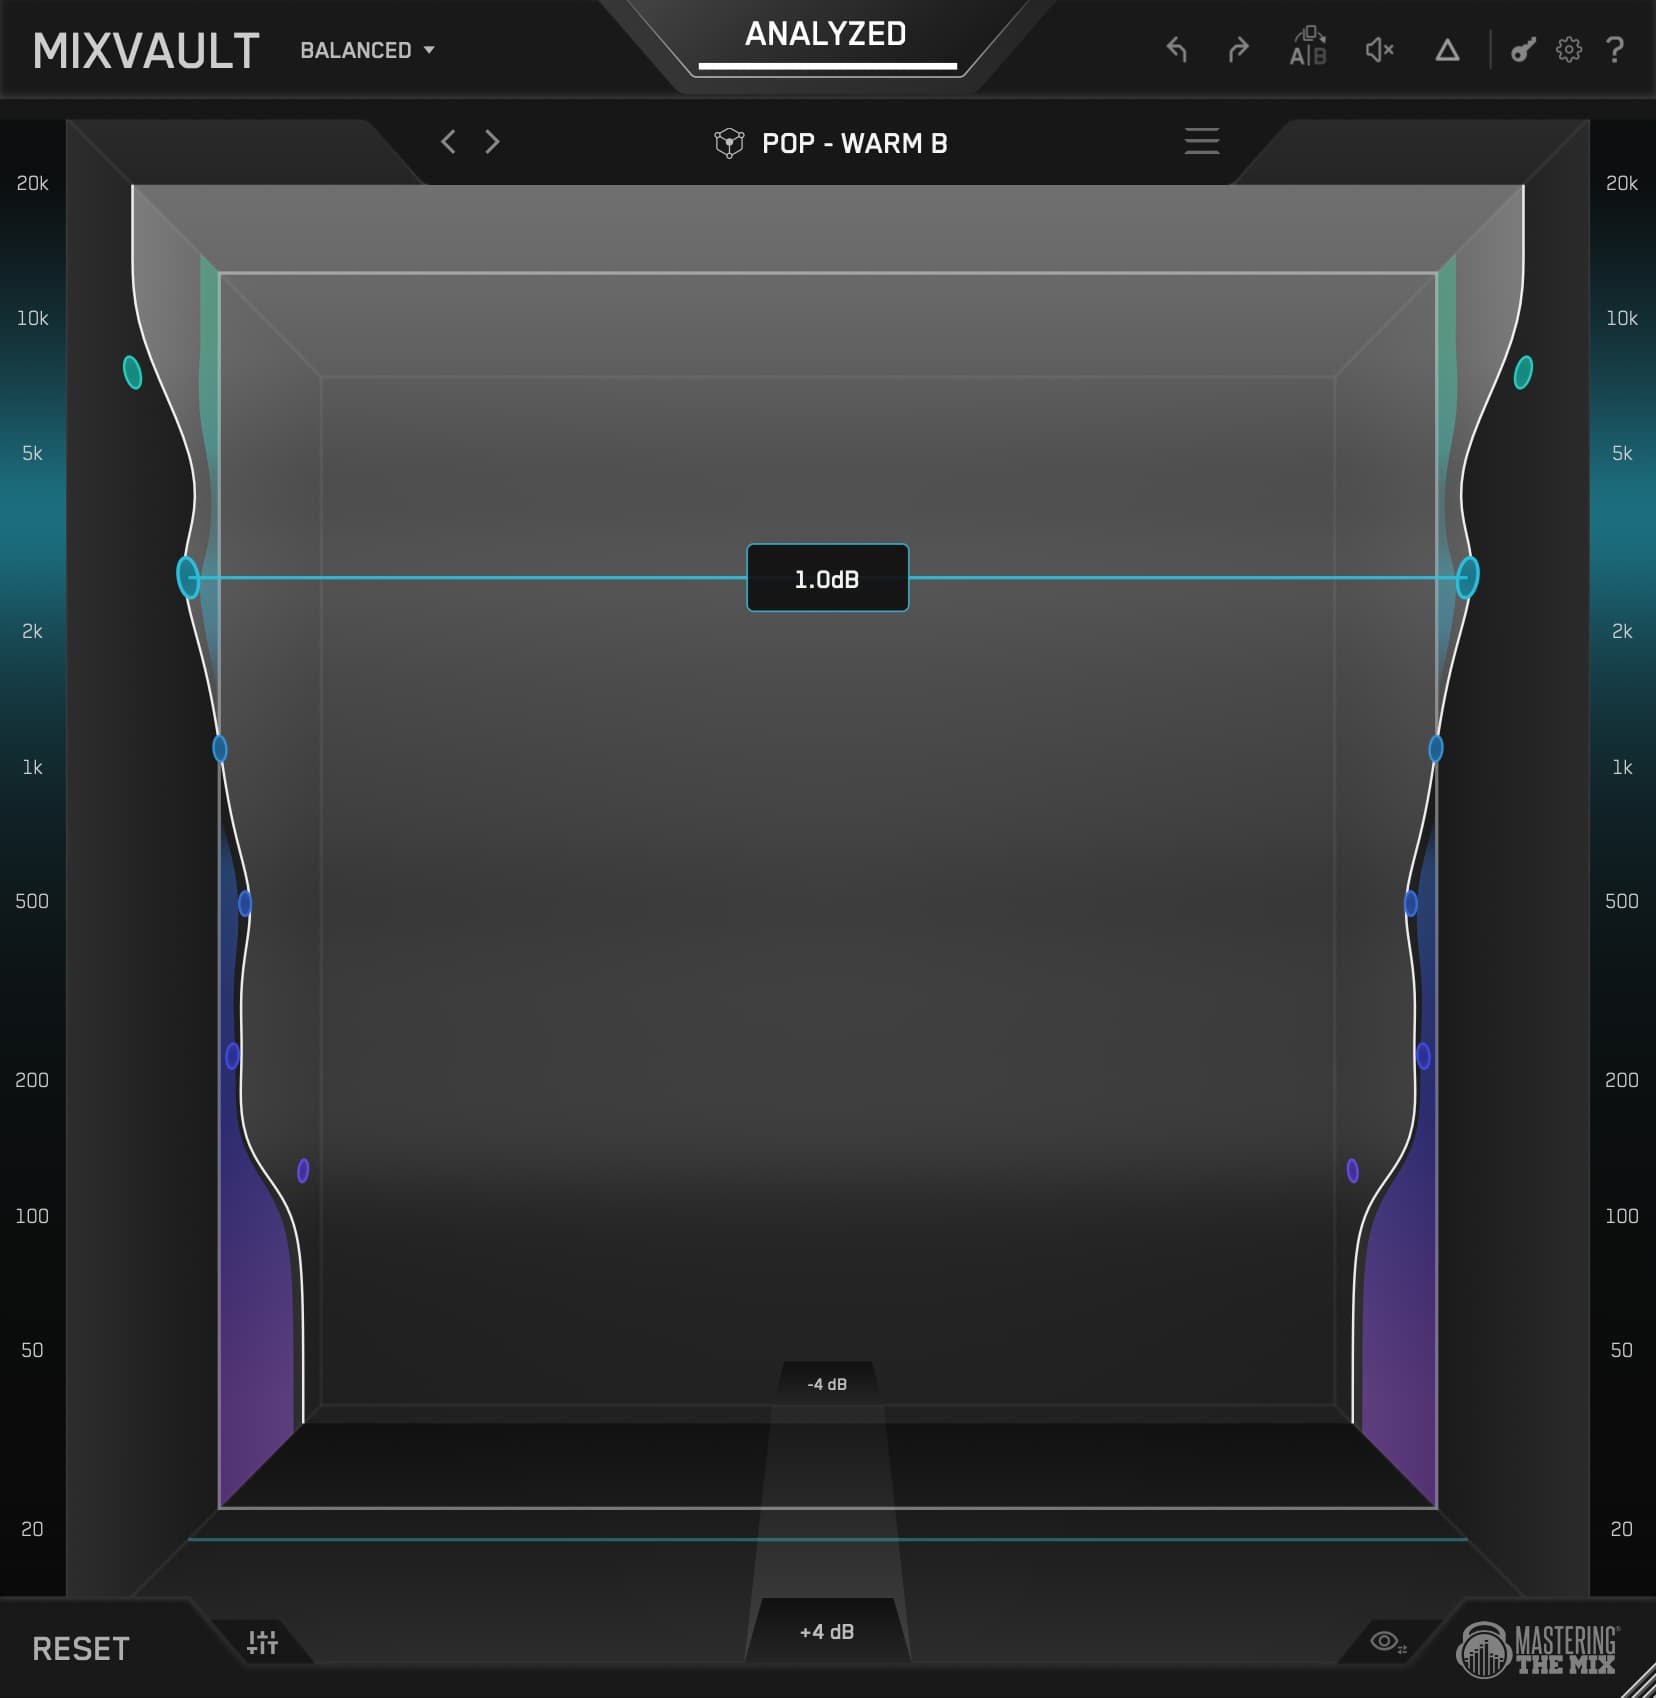
MIXVAULT is a fixed-band EQ with an immersive 3D interface. Instead of typing numbers into a parametric, you reach into the room and move frequencies. Pull a band towards you and it comes forward, brighter and more present. Push it back and it drops into the distance. The room expands and contracts as you work, so you can watch the tonal balance take shape rather than reading it off a curve.
Two things make it the right tool for a vocal bus. The bands are fixed, so the EQ is phase safe with no ringing and no transient smearing, which matters more on a vocal than on almost anything else because consonants are transients. And everything is level matched underneath, so a brighter move never fools you into thinking it's better simply because it got louder.

- Insert MIXVAULT on the vocal bus, after any compression.
- Play the loudest, busiest section of the vocal and hit ANALYZE.
- Set the source to vocals and pick your genre. MIXVAULT returns a Smart Preset built for that context rather than a generic curve.
- Step through the preset options. Pushed back reads darker and further away, pulled forward reads brighter and closer. Take the one that lands nearest to what you want.
- Choose your resolution. Balanced (6 bands) is the sweet spot for most vocal buses. Move to Detailed (9 bands) if you need to be more specific, or Broad (4 bands) if you only want big tonal moves.
- Fine-tune by hand. Pull the presence range forward until the consonants land. Push the low mids back if the vocal feels thick.
- Bypass and compare. The level is matched underneath, so the comparison is honest.

The move that wins this section is presence, not air. Pulling the 2–5 kHz range forward is what makes diction and consonants land, and that's what "cutting through" actually means to a listener. Reach for air above 10 kHz second, and use less than you think. Top end that isn't supported by presence just makes a vocal sound thin and sibilant instead of close.
- Pop and electronic vocals: Presence pulled forward, a touch of air on top, low mids around 250 Hz pushed back.
- Hip-hop: Keep the body forward so the vocal stays solid, presence moderate, less air than you think.
- Acoustic and country: Presence light, air gentle, body left alone. Warmth is the point.
- Rock: Presence pulled harder, the 400 Hz mud range pushed back, air modest.
One detail worth knowing: MIXVAULT level matches automatically once you've analysed. That's more useful than it sounds. High-end EQ moves almost always sound louder, and louder almost always sounds "better" for a second. With the level matched underneath, what you're hearing is the tonal change and nothing else.

4Step Three: FUSER On The Masking Culprit
The vocal is now clean and shaped. But there's still one instrument fighting it.
Open your session. The usual suspects: a synth pad in the 2–4 kHz range, an acoustic guitar with a peak in the vocal's body range, a piano sitting on top of every consonant. Solo the vocal and that instrument together. If they sound like one big blurry sound rather than two separate things, you've found your masking culprit. That's what FUSER handles.

FUSER analyses two tracks at once, the dominant and the submissive, and shows you exactly where they're stepping on each other. The white line is the dominant signal (the vocal), the grey line is the submissive signal (the masking instrument), and the red glow shows where they conflict in the mid channel. Click Resolve Conflicts and FUSER applies dynamic, sidechain-triggered EQ moves that only duck the instrument when and where the vocal is competing for the same frequency.
- Insert FUSER on the instrument that's masking the vocal (the guitar, the pad, the piano, whichever it is).
- Set FUSER's sidechain input to the lead vocal.
- Play the chorus.
- Click Resolve Conflicts. FUSER places dynamic nodes at the conflict points.
- Hit the Delta button (the small triangle) to listen to what FUSER is taking out. You should hear the parts of the guitar that were overlapping the vocal, and not much else.
- Adjust the depth on each node if FUSER overdid it. The conflict bands have individual mid/side, Q, attack, and release controls.
This is what separates FUSER from a normal sidechain compressor. A sidechain compressor ducks the entire signal when the vocal hits. FUSER only ducks the specific frequencies where the vocal and the instrument are competing. The bass of the guitar, the rhythm of the strum, the top-end of the pick attack, all of that stays. Only the overlapping frequencies move out of the way.
The most common masking culprit on pop vocals is a synth pad. The second most common is an acoustic guitar. The third is reverb returns. Don't forget the reverbs. A vocal's own reverb can mask the vocal itself in the 1–3 kHz range. FUSER on a vocal reverb return with the dry vocal as the sidechain is a quietly brilliant move.


Grammy Award Winner, Dua Lipa, Stormzy, Raye
"RESO effortlessly fixes harsh mixes. It's a huge time saver and works wonders on vocals."
Try RESO free →5The Order That Matters
You can run these three moves in any order, but one sequence is consistently faster than the others.
RESO first because every move downstream is easier when the vocal isn't fighting its own peaks. MIXVAULT second because shaping a cleaned vocal is faster than shaping a resonant one, and ANALYZE gives you a better Smart Preset when the resonances have already been tamed. FUSER last because by the time you reach it, you actually know what frequencies the vocal needs protected, and FUSER's conflict detection will be more accurate.
Do them in the other order and you'll keep going back to redo steps. Do them in this order and most vocals are sitting forward in ten minutes.
6How To Tell It Worked
Mute everything except the lead vocal and the instrumental. Set the vocal fader to where it was before you started. Play the chorus.
- The vocal sounds present at the same fader level it was buried at five minutes ago.
- You can hear consonants clearly without the vocal sounding harsh.
- The instrumental still has its full character, the only thing that's quieter is the part that was fighting the vocal.
- When you bypass FUSER, the vocal noticeably gets harder to hear. Bypassing RESO makes the vocal sound rougher, not louder. Bypassing MIXVAULT makes the vocal sound further away, not duller.
If you bypass all three and the vocal is suddenly buried again, you didn't push the fader. You won the space.
One last check: load the mix into REFERENCE 3 and A/B against a commercial track in the same genre. The vocal-to-instrumental balance should now be in the same ballpark without you touching a single fader.
7When To Reach For This Chain
Not every vocal needs all three plugins. Some vocals just need RESO. Some just need a FUSER move on a single guitar. The full chain comes out for these situations:
- The vocal is fully recorded, comped, tuned, and you're now mixing.
- The vocal disappears in the chorus when the instruments come in.
- The vocal sounds fine in solo but buried in context.
- You catch yourself reaching for the vocal fader more than twice in one mix.
- The track is dense (pop, modern rock, hip-hop with a busy beat, electronic with layered synths).
If the track is sparse, like a vocal over an acoustic guitar or a solo piano, you can usually skip MIXVAULT or FUSER. The sparser the instrumental, the less masking there is to fix.
(And if you find yourself running this chain on every vocal you mix, that's the sign you need it on a template.)
Stop Pushing. Start Carving.
The fader move is the most common mixing reflex, and it's almost always the wrong one. A vocal that's buried isn't a vocal that's quiet. It's a vocal that's blocked.
RESO clears the vocal of its own resonances. MIXVAULT shapes what's left so the presence range is actually carrying the diction, with the level matched underneath so you're judging tone rather than volume. FUSER moves the masking instrument out of the way only when the vocal is actually competing. Three plugins, three jobs, one outcome. The vocal cuts through and the fader stays exactly where you left it.
Try this chain on the next vocal you mix. The first time it works you'll wonder how many of your old mixes are still buried under a fader push.
Frequently Asked Questions
Why does pushing the fader fail to make a vocal cut through?
A buried vocal is not quiet, it is blocked by other elements sitting on the same frequencies. The fader adds level across all frequencies, but the masking is frequency-specific, so volume just makes the blocked vocal louder while everything else ducks and the mix shrinks.
How does RESO help a vocal before anything else?
Almost every recorded vocal has resonant peaks, like a nasal bump near 1 kHz or boxiness at 250 to 500 Hz, that waste energy. RESO is a dynamic resonance suppressor that only cuts when the resonance flares, so the vocal sounds smoother rather than duller and stops masking itself.
Why move vocal air to the sides in MIXROOM?
The centre of a mix is the most crowded part of the stereo field, holding kick, snare, bass, and lead vocal. Switching the air band above 10 kHz to sides only lets the vocal's brightness reach the listener without competing for centre real estate, so it feels more open while the centre stays clean.
How does FUSER unmask a vocal without ducking the whole instrument?
Place FUSER on the masking instrument with the vocal as the sidechain, then click Resolve Conflicts. It applies dynamic, sidechain-triggered EQ that ducks only the frequencies where the two compete, when they compete, leaving the rest of the instrument's character intact.