
To get a master ready for Spotify you need four jobs covered: a final limiter, a loudness meter, a reference track and something to check you haven't crushed the dynamics. FASTER MASTER from Mastering The Mix covers the mastering in one plugin, LEVELS checks your numbers against a Spotify preset, FabFilter Pro-L 2 is a superb final limiter if you build your own chain, and the free Youlean Loudness Meter is a solid way to read LUFS. This guide shows which plugin does which job, then walks you through the steps in order. Finish the mix first. Then use this to get the master to release level.
Use FASTER MASTER to get a balanced, level-matched master quickly, then check it in LEVELS with the Spotify preset. If you build your own chain, add a limiter such as FabFilter Pro-L 2 and a meter such as the free Youlean Loudness Meter. Spotify's guidance is about -14 LUFS integrated with a true peak no higher than -1 dBTP. If your master is louder than that, Spotify recommends a true peak of -2 dBTP. Spotify turns louder tracks down, so you don't need to master as loud as possible.
If you would rather build the chain by hand, use an EQ, a compressor, a limiter such as FabFilter Pro-L 2, and a meter. The comparison below shows which tool fits which job.
1What Spotify does to your master
Spotify uses loudness normalization. It measures how loud your track is and plays it back at a similar level to everything else. That changes what you need from your plugins.
- Louder tracks are turned down. If you push a master well past Spotify's target, it gets turned down anyway. You keep the squashed dynamics and lose the loudness advantage.
- The target is about -14 LUFS integrated. Integrated means the whole track, not the loudest second. Spotify also has Loud and Quiet playback settings, which sit around -11 and -19 LUFS.
- Peaks need headroom. Spotify converts your file to a lossy format, which can add peaks. Its guidance is -1 dBTP at most, or -2 dBTP for louder masters. That needs a true peak limiter, not a basic peak one.
- Dynamics are part of the sound. A master that is less compressed keeps its punch after normalization. So you need a way to see if you went too far.
Figures are from Spotify's own loudness normalization page for artists. Check it for the latest, as platforms can change them.
2The plugins for each job, compared
| Plugin | Job | Best for | Worth knowing | Price |
|---|---|---|---|---|
|
FASTER MASTER Mastering The Mix |
All-in-one mastering | Getting a release-ready master fast, then fine-tuning it | 10 Smart Presets from analysis, reference track profiles, and EQ, transients, compression, four-band stereo and limiting, all level matched | |
|
LEVELS Mastering The Mix |
Loudness and dynamics meter | Checking true peak, LUFS and dynamic range against a Spotify preset | Any meter that breaches the preset's threshold glows red. All green means no issues | |
|
REFERENCE 3 Mastering The Mix |
Reference and comparison | Comparing your master with a released track at matched loudness | Masterscope flags overcompression against a reference. Mix Balance suggests gain changes for vocals, drums, music and bass | |
|
EXPOSE 2 Mastering The Mix |
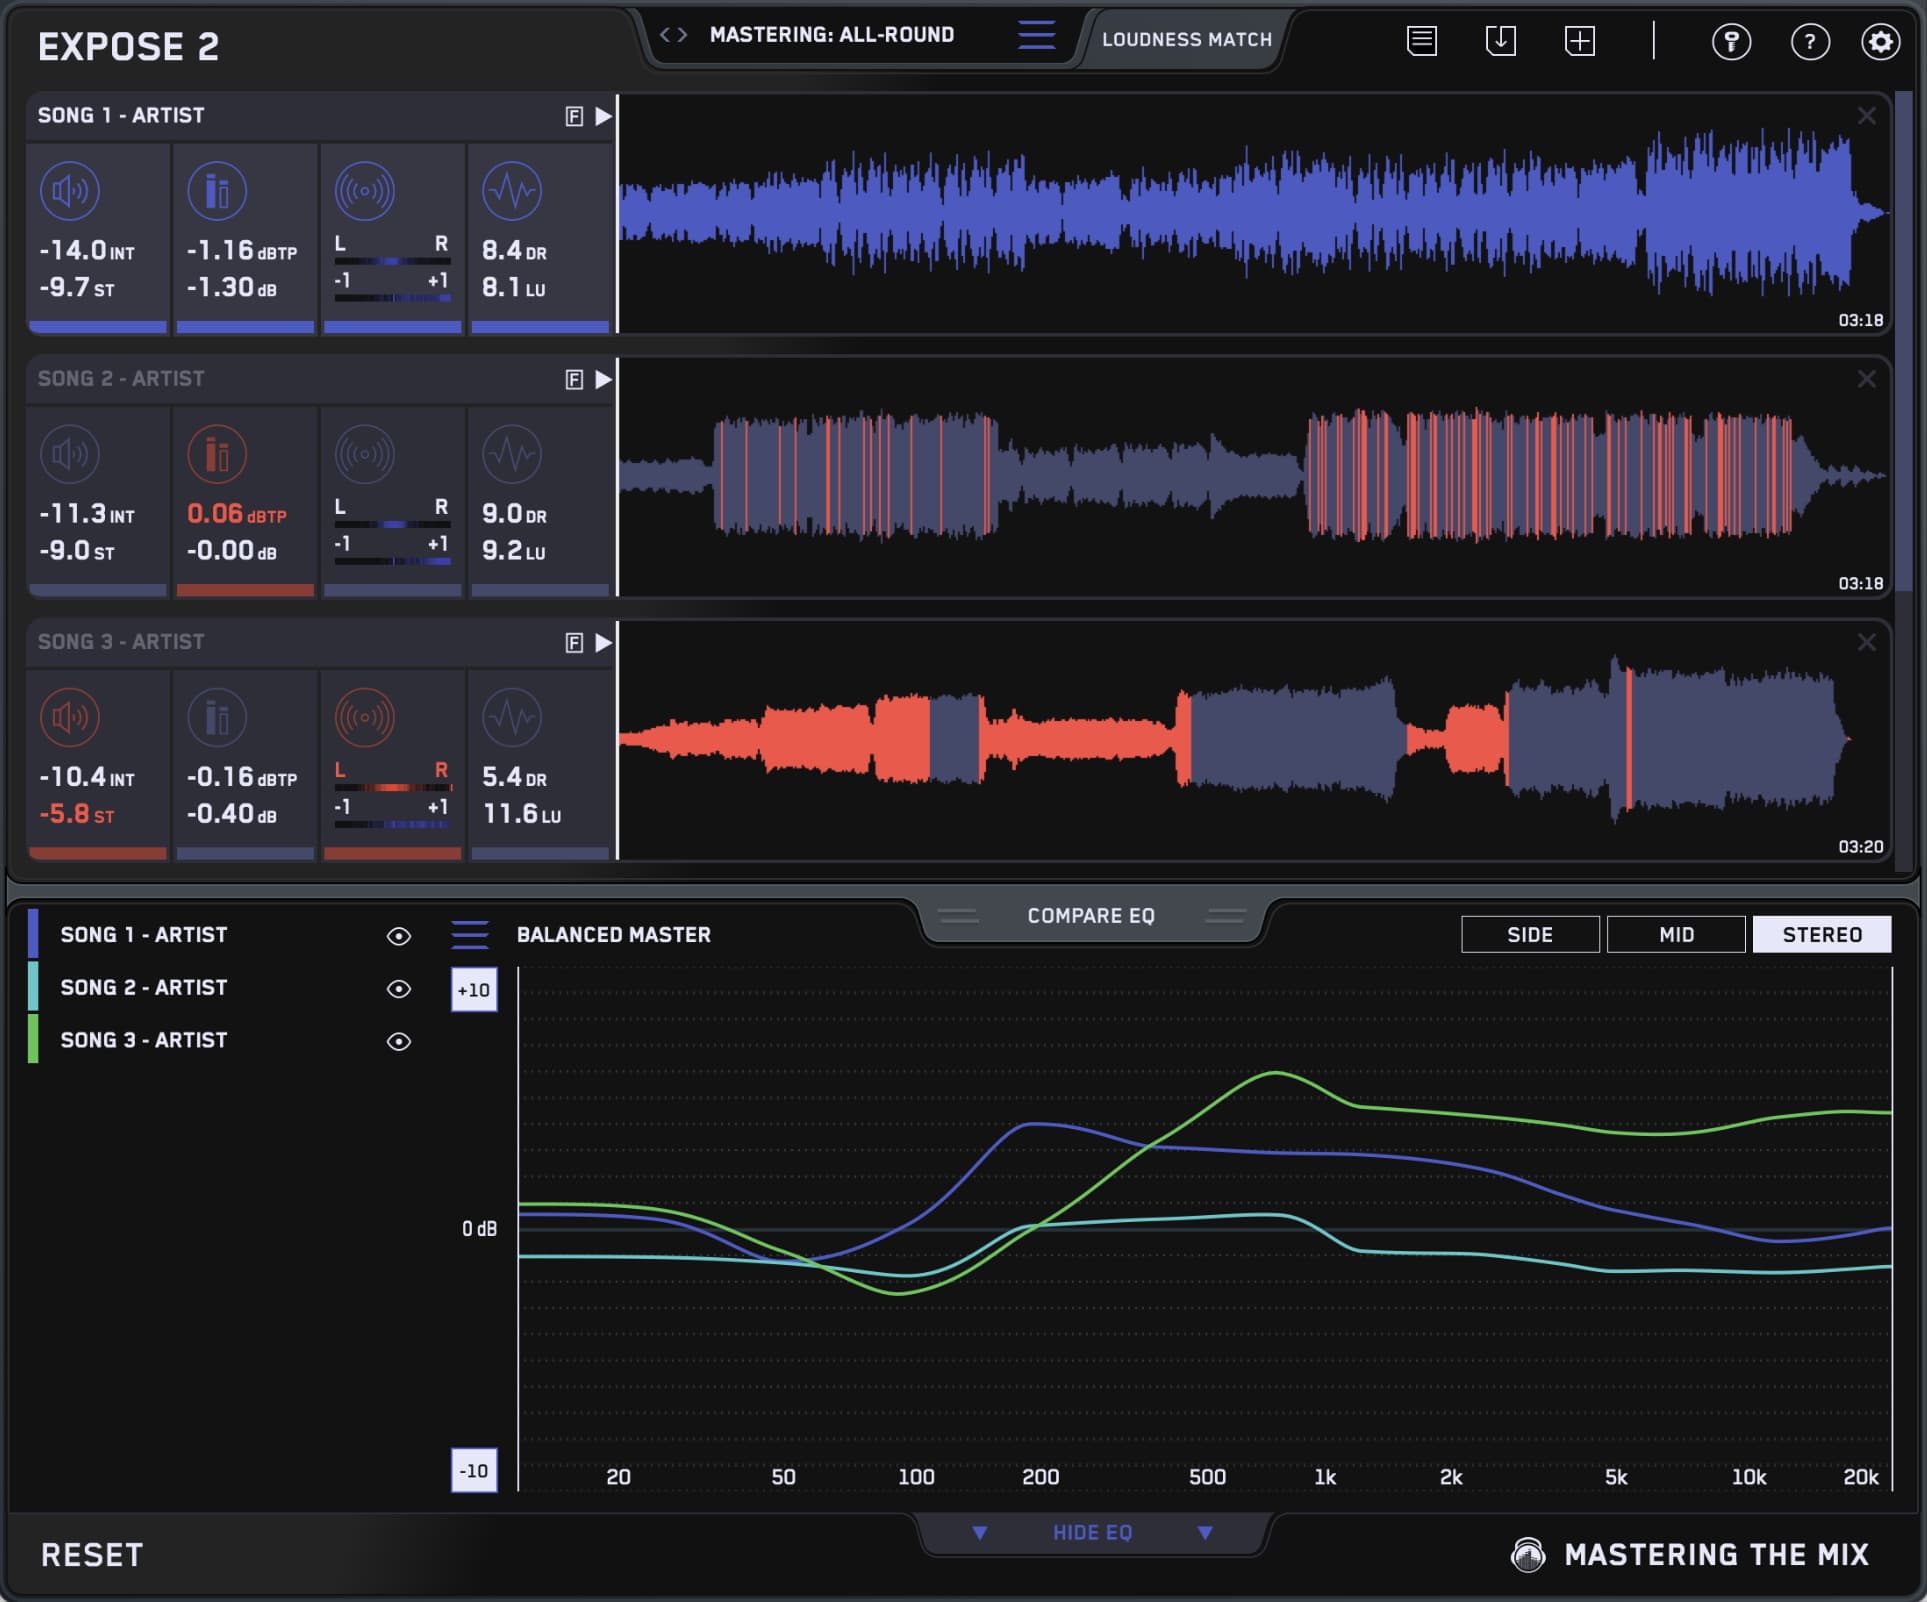
Master checker | Spotting dynamic range issues on a bounced master | Highlights problem areas on the waveform | |
| Pro-L 2 FabFilter |
Limiter | The last plugin in a hand-built chain | Eight limiting algorithms, true peak limiting and loudness metering. It only limits, so you need the rest separately | $199 |
| Pro-Q 4 FabFilter |
EQ | Precise and dynamic EQ moves | The standard for surgical EQ. You place every band yourself | $199 |
| Ozone 12 Advanced iZotope |
Modular mastering suite | Engineers who want every module and deep control | 20 modules plus Master Assistant. The most depth here, and the most to learn | $499 |
| Youlean Loudness Meter | Loudness meter | Reading LUFS and true peak | The free version covers the essentials. It measures, it doesn't process | Free |
Mastering The Mix prices are live and shown in your currency. Prices for other developers' plugins are their list prices in US dollars and change often, so check their sites.
These are all good tools. Pro-L 2 is a limiter many engineers trust, Ozone has the most depth, and Youlean is a fine free meter. Where our tools differ is that they were built to work together: FASTER MASTER makes level-matched decisions, and LEVELS tells you if the result is safe for Spotify.
3Step by step: master for Spotify
Step 1. Leave headroom on the mix
Bounce the mix with no limiter on the master bus and peaks comfortably below 0 dBFS. A few dB of headroom gives the mastering plugins room to work. Don't try to hit a loudness target at the mix stage.
Step 2. Load a reference you love
Pick a released track in your genre that sounds the way you want yours to. Compare at matched loudness, because louder always sounds better and will mislead you. REFERENCE 3 does the level matching for you.

Step 3. Fix the tone with small EQ moves
Use an EQ such as Pro-Q 4, or the EQ in FASTER MASTER, for gentle moves of a dB or two. Judge each move at the same volume as before it. If a plugin gets louder when you boost, you will think it sounds better when it doesn't.
Step 4. Control the dynamics lightly
Use gentle compression to glue the master, not to make it louder. Heavy compression is the quickest way to lose punch once Spotify normalizes your track. Keep the transients alive.
Step 5. Check the stereo image
Keep the low end centred and widen carefully above it. STEREOVAULT shows stereo width across the frequency spectrum, and FASTER MASTER has a four-band stereo section if you want it in one place.
Step 6. Limit to your target
Put a true peak limiter last. Set the ceiling to -1 dBTP, or -2 dBTP if your master is louder than -14 LUFS integrated. Raise the gain until the loudness lands where you want it, and stop as soon as the limiter changes the sound of the kick or snare.
[YOUR STORY: one short story of a master you finished for Spotify, what you set the loudness and true peak to, and what you heard on the streaming version]
Step 7. Measure, then export
Check integrated LUFS, true peak and dynamic range (next section). Then bounce a 24-bit WAV at your project's sample rate. Only dither if you are reducing the bit depth.
4How to check your numbers
Put LEVELS on the master bus and pick the Spotify preset. It reads true peak and LUFS against the target for Spotify, and any meter that goes past its threshold glows red. All green means you are inside the limits.
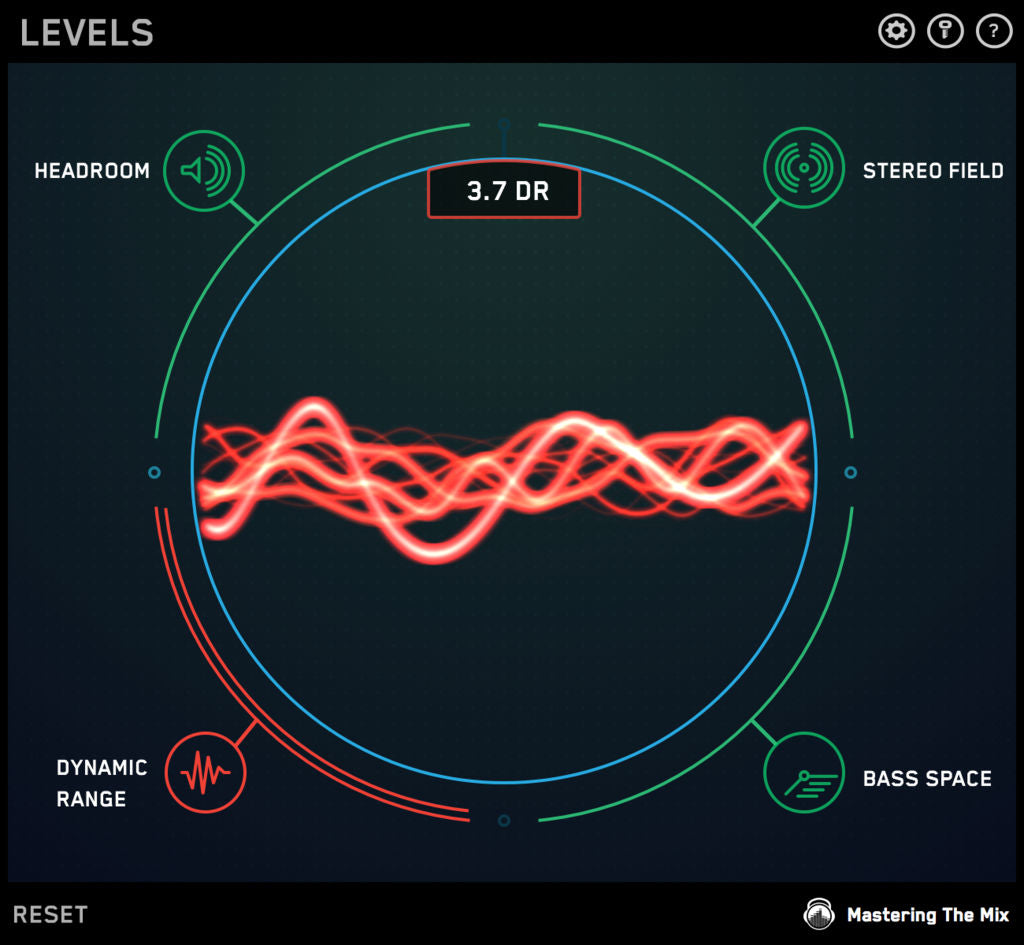
Pay attention to dynamic range as well as loudness. In LEVELS, the loudness range warning turns red when a track has been over-compressed.

If you want a second opinion on the finished file, EXPOSE 2 highlights dynamic range issues on the waveform of a bounced master. Then listen on Spotify itself. Turn on Normalize volume in the app's playback settings and compare your track with a released one.
5How loud should you master?
- Aim for about -14 LUFS integrated if you want your master to play back at the level you made it, with no turn-down from Spotify.
- You can go louder if the genre calls for it. Spotify will turn it down, so only do it if the extra density sounds better, not just louder. Drop the ceiling to -2 dBTP.
- Never go above -1 dBTP true peak. Lossy conversion can add peaks and cause distortion.
- Judge by ear at matched loudness. The number is a limit. The sound is the decision.
6Why FASTER MASTER is my starting point
FASTER MASTER analyses your track, gives you 10 tailored mastering starting points, and lets you fine-tune EQ, transients, compression, stereo width and limiting. Every move is level matched, so you hear tone, not volume. It was co-created with David Guetta and Nicky Romero. Armin van Buuren says:
"FASTER MASTER is perfect for when you need a quick, loud, and great-sounding master."
7A simple chain for Spotify
- FASTER MASTER to analyse, pick a Smart Preset and fine-tune. Or Pro-Q 4, a compressor and Pro-L 2 if you prefer building by hand.
- REFERENCE 3 to compare with a released track at matched loudness.
- LEVELS on the Spotify preset to check true peak, LUFS and dynamic range. Fix anything that glows red.
- Listen on Spotify with Normalize volume on, then export a 24-bit WAV.
8FAQ
Do I need to master to -14 LUFS for Spotify?
No. Spotify's target is about -14 LUFS integrated, but it only turns louder tracks down. Master to whatever sounds best, and keep the true peak at -1 dBTP, or -2 dBTP if the master is louder than -14 LUFS.
What true peak level should I use for Spotify?
Spotify's guidance is -1 dBTP at most, and -2 dBTP for louder masters. Use a true peak limiter, because lossy conversion can add peaks.
What is the best free plugin for checking Spotify loudness?
The free version of Youlean Loudness Meter covers LUFS and true peak. LEVELS adds a Spotify preset and dynamic range checks.
Which plugin is the best limiter for Spotify?
FabFilter Pro-L 2 is a strong choice, with true peak limiting and loudness metering. FASTER MASTER includes limiting if you want it all in one plugin.
Can one plugin master a track for Spotify?
Yes. FASTER MASTER covers EQ, transients, compression, stereo width and limiting in one window. Then check the result in LEVELS before you export.
Will a quieter master sound worse on Spotify?
Not if it has better dynamics. Normalization sets the playback level, so a less compressed master keeps its punch at the same volume as a crushed one.