You've spent weeks on a mix. The bass feels right, the vocals sit, the drums hit. Then mastering arrives, and so does a question nobody warned you about: which plugin goes where, and why does it actually matter?
Most chain-order advice doesn't help. It's either "EQ before compression, always" or it's vague "use the right tool for the right job". Not very helpful.
Here's what's actually going on. Each plugin on your master bus reacts to whatever's coming into it. Put RESO in front of your bus compressor and the compressor sees a cleaner signal. Put BASSROOM in front of the limiter and the limiter has less low-end fighting to control. EQ before compression isn't the same as EQ after. Limiting before stereo widening isn't the same as limiting after, you need to catch the peaks, so limiting has to go last. The plugins haven't changed. The signal they're seeing has.
Get the order wrong and your limiter works twice as hard, your low end goes muddy, your width collapses in mono, or your dynamics pump in places they shouldn't.
The MTM Mastering Chain
From mix to release-ready master, in five stages. Each one changes what the next can do, that's why order matters.
-
1
 Stage 1 · Cleanup
RESO
Surgical work on resonant peaks. RESO goes first because every plugin further down the chain reacts to whatever's loudest, and resonances are usually loudest.
- Sweep and tame dynamic resonances before anything else touches the master
- Free up headroom for the rest of the chain to work properly
- Stop the limiter from chasing problem notes later
-
2

 Stage 2 · Tonal shape
BASSROOM · MIXROOM
Broadband corrective and creative EQ. BASSROOM handles the low end with frequency-by-frequency targets. MIXROOM handles everything else, including any mid/side work.
- BASSROOM locks in the kick and sub balance against your reference
- MIXROOM shapes broadband tone and any mid/side moves
- Both run before the master bus compressor, never after
-
3
 Stage 3 · Master bus
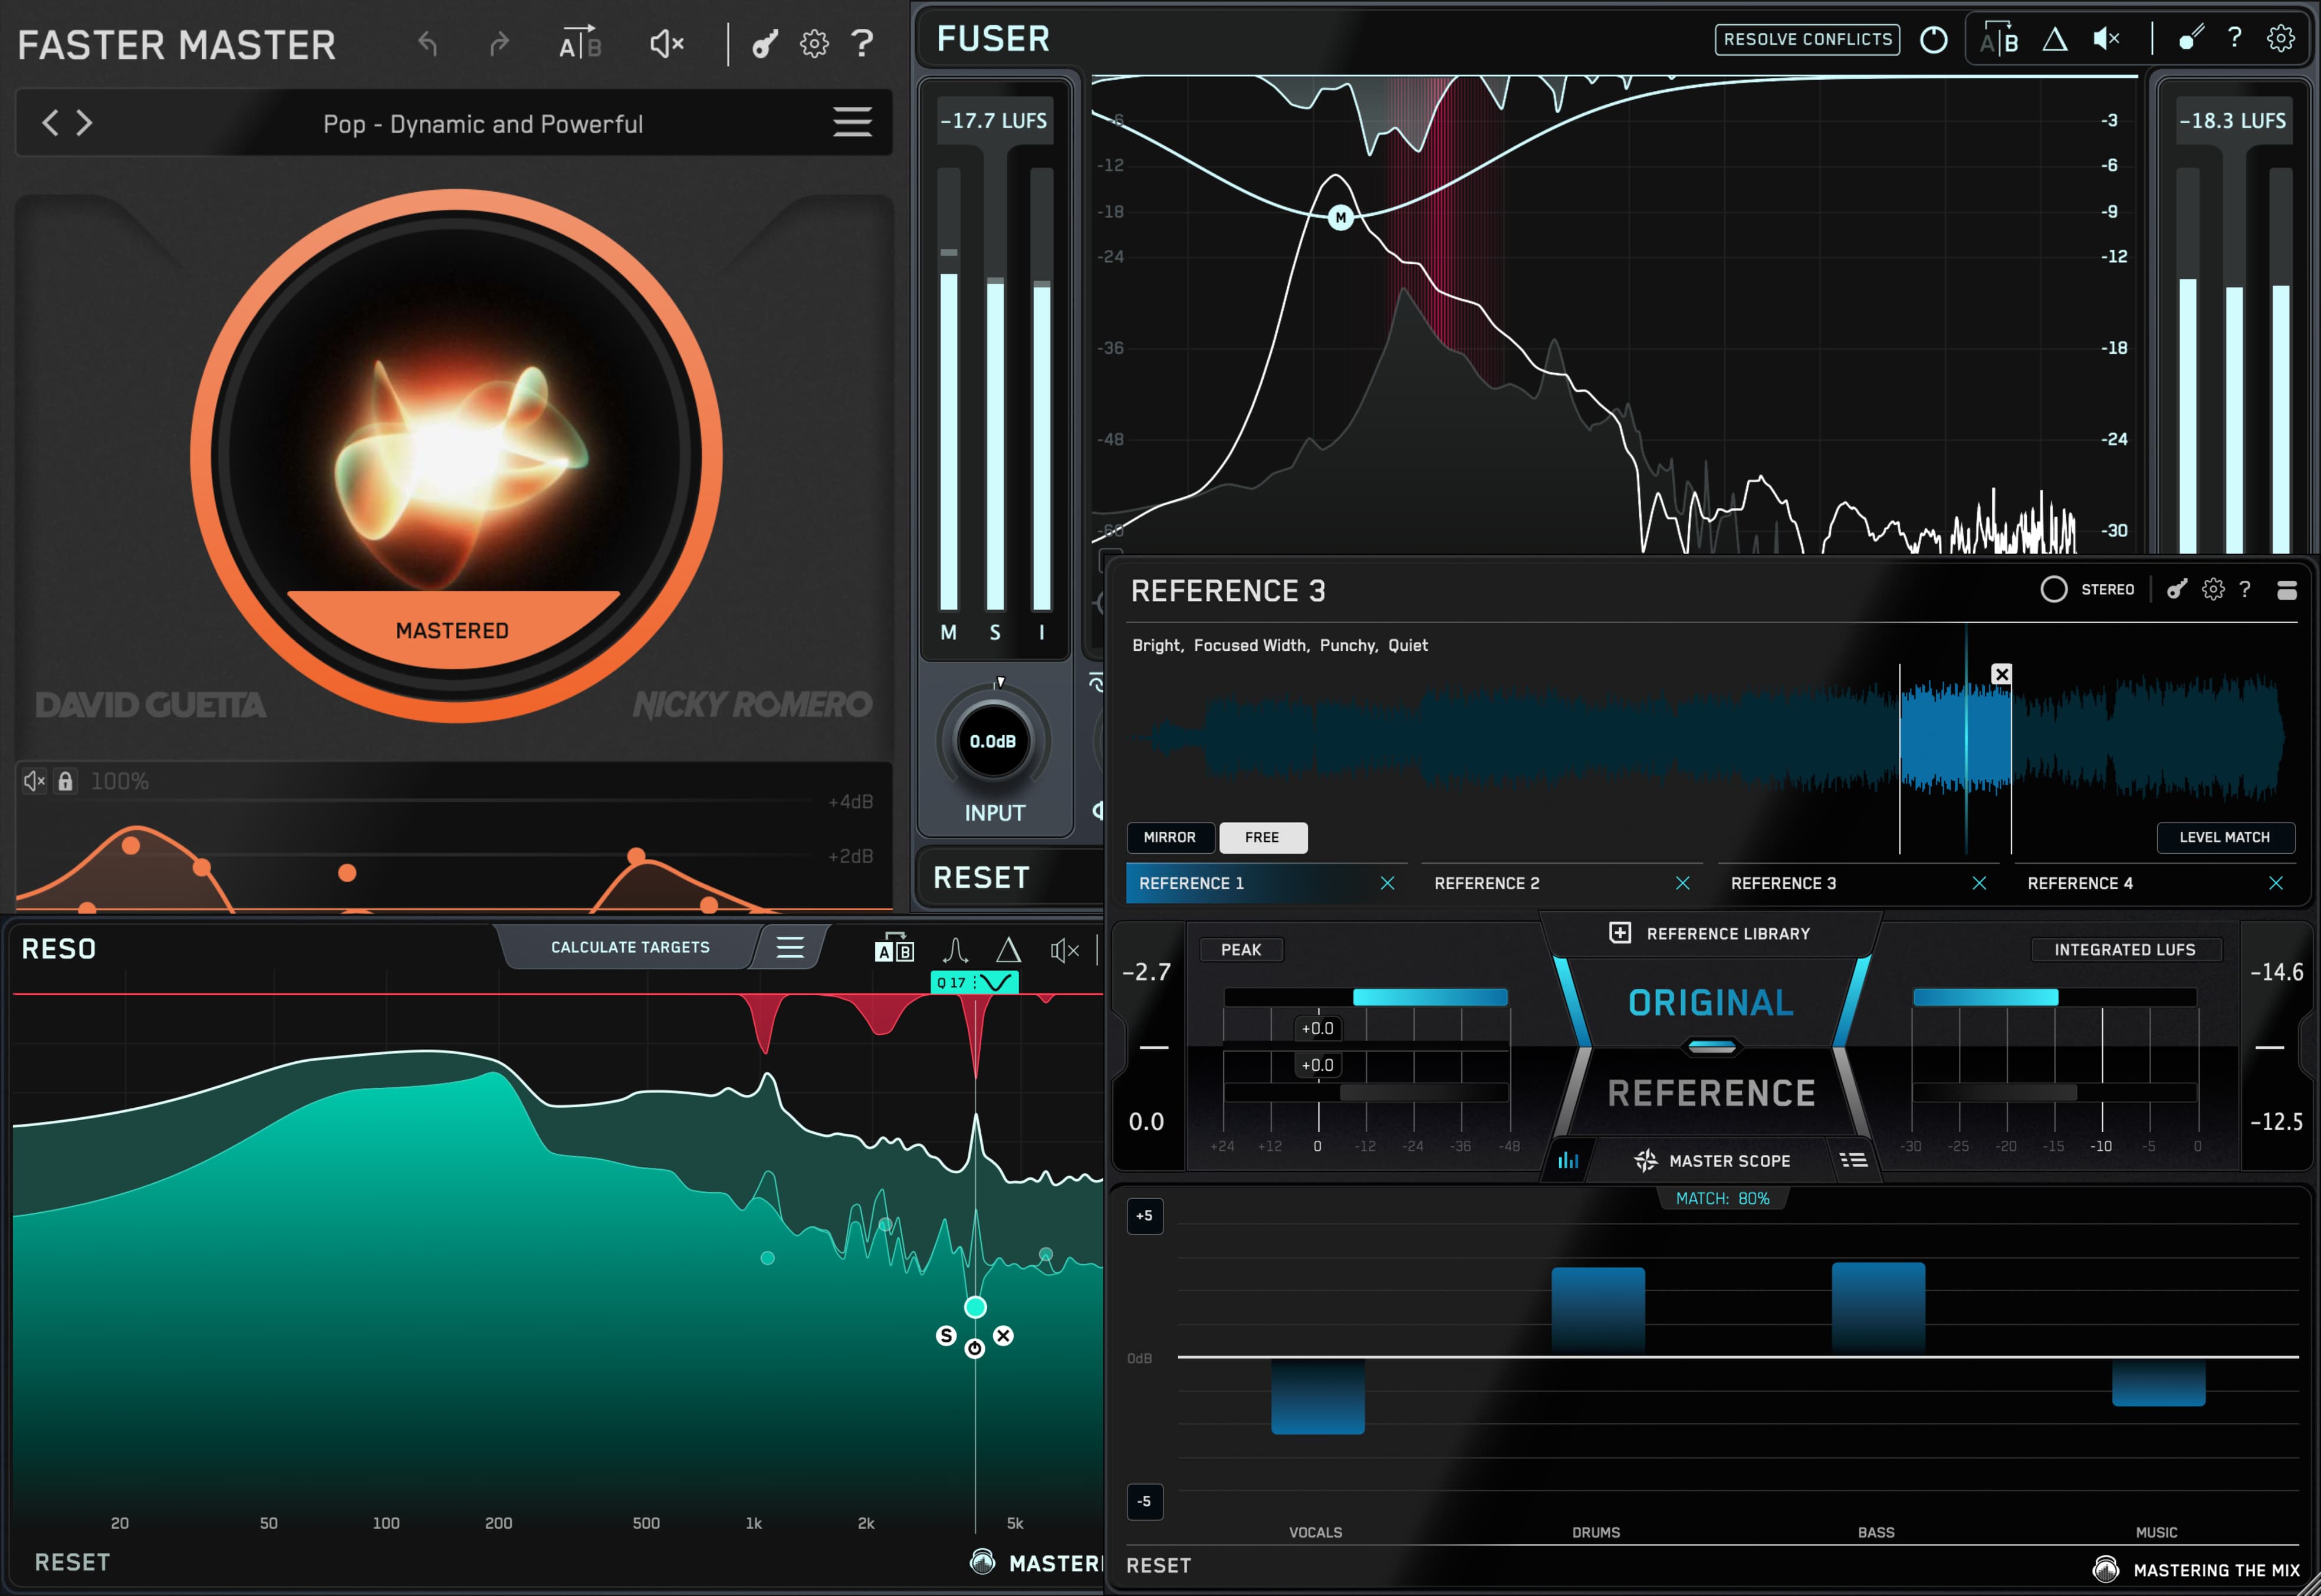
FASTER MASTER
EQ, Transients, Compression, character and final limiting, already built and ordered for you. The smart default for most tracks. Pick a preset that matches your reference and adjust by ear.
- Smart compression and saturation in one chain, in the right order
- Final limiting tuned to the genre preset you've selected
- Gets most producers most of the way home in under a minute
-
4
 Stage 4 · Truth check
REFERENCE 3
Not really a step in the chain, a check on every step in the chain. REFERENCE 3 runs in parallel from the start, A/B-ing your master against commercial references.
- Live, level-matched A/B against any track in your library
- Master Scope shows exactly what's different — tone, width, dynamics
- Mix Balance compares vocals, drums, music and bass levels separately
-
5
 Stage 5 · Release Quality Control
EXPOSE 2
Runs after you bounce. Confirms the master hits the loudness target for the platform, the true peak is safe, (if that matters to you) and the codecs won't degrade it.
- Streaming targets for Spotify, Apple Music, Tidal and YouTube
- True-peak and intersample headroom check before upload
- Codec preview the AAC and MP3 versions to catch surprises early
This post answers the question directly. Where each MTM plugin sits in a mastering chain. What changes when you move it. And three real-world chains you can copy on your next project.
1Why Chain Order Matters More Than Plugin Choice
A modest chain in the right order will beat an expensive chain in the wrong one. Every time.
Put your low-end EQ after a bus compressor and you're shaping a bass that's already been squashed. The compressor was reacting to peaks that don't exist anymore. So your +2 dB at 60 Hz move sounds bigger than it should. The limiter chases it. The kick feels late.
Move RESO from the front of the chain to the end and the resonance you wanted to control gets pushed harder by everything in front of it. Drop a mid/side EQ after the limiter and now you have stray peaks.
None of these are catastrophic on their own (maybe not putting the limiter last...) but they stack. Three small order mistakes can quietly cost you punch, weight, width and clarity all at once. And then you'll spend the next session EQ-ing your way out of a problem you accidentally made yourself.
2The Answer: FASTER MASTER
If you don't want to think about chain order at all, use FASTER MASTER. It's a full chain — EQ, transients, compression, stereo shaping, saturation, limiting — already built and ordered for you. Drop it on the master bus, pick the preset that matches your reference, and most of the work is done.

Even if you do want full control, FASTER MASTER is the place to start. Bypass it. Listen. Engage it. Listen again. Now you know what "good for this track" sounds like before you start hand-building anything. From there, a couple of small additions usually get you further than rebuilding from scratch. A touch of BASSROOM for the low end, a quick sweep with RESO to clean a problem note, and you're done.
FASTER MASTER stops being enough when the track has a structural problem its chain can't fix on its own. A resonant note in a bass line. A harsh upper mid in a vocal stack. A low-end imbalance you've inherited from the source mix. That's when you build out from FASTER MASTER, not when you replace it.
The Ultimate Guide to Mastering with FASTER MASTER is the long-form walkthrough if you want it.
3The Full-Control Chain — Five Jobs, In Order
The chain breaks into five jobs. Three of them have to be in this order on the signal path. The other two are loops that run alongside.
- Cleanup. Surgical work on resonances. RESO goes first, before anything else touches the master, because every plugin further down the chain reacts to whatever's loudest. Resonant peaks are usually loudest. Tame them first.
- Tonal shape. Broadband corrective and creative EQ. BASSROOM for the low end. MIXROOM for everything else, including mid/side work.
- Master bus. Compression, character, and final limiting. All inside FASTER MASTER, or split across separate tools if you want manual control.
- Truth check. REFERENCE 3 runs in parallel from the start. It A/Bs your master against commercial references so every decision above gets checked against reality.
- Release QC. EXPOSE 2 runs after you bounce. It's the final stoplight before upload — the platform-specific check that catches what your ears stopped hearing two hours ago.
Steps 1, 2 and 3 sit on the signal path. Steps 4 and 5 are checks you run alongside. Mix those up and you'll end up trying to "fix" things in REFERENCE 3 that should have been fixed in the chain itself.
4Where BASSROOM Sits — And What Changes If You Move It
BASSROOM goes in stage 2 after RESO, before the master bus compressor. That's it. That's the rule.

Here's why. The master bus compressor reacts to peaks. If your low end has a 60 Hz bump that BASSROOM hasn't tamed yet, every kick hit triggers the compressor harder than it should. The whole track flinches when the kick lands. And by the time you reach for a "low-end fix" EQ after the compressor, you're shaping bass that's already been squashed by a problem you could have fixed earlier in the chain.
BASSROOM after compression
reacts to peak
boosts flat signal
working hard
flat & lifeless
BASSROOM before compression
tames the peak
sees clean signal
relaxed
punchy & defined
The only real exception is when you're deliberately overdriving the limiter with the low end as a sound-design move — some hip-hop and dance masters do this on purpose. In that case a small BASSROOM correction after the limiter can retune the result. If you find yourself reaching for that move on a regular track though, the real problem is the source mix, not your chain.

3 × Grammy Winner (19 Nominations)
"BASSROOM is great. It makes it really easy to dial in your low end."
Try BASSROOM free →5RESO Before Or After Compression?
Before. Always before. The reason is simple: compression squeezes whatever's loudest, and resonances are usually loudest.

Let a 250 Hz resonance hit your bus compressor untouched and the compressor obediently flattens the peak. But it brings everything else down with it. The resonance has now joined the average loudness, quieter, but no less present. So you push the limiter to compensate. The average gets louder. The resonance is now baked permanently into the master.
Put RESO first and you stop the chain reaction before it starts. The compressor sees a clean signal. The limiter has more headroom. Your perceived loudness goes up without anything sounding harsher.
There's one situation where a second RESO instance after the compressor is worth it: when aggressive compression has lifted a quieter resonance into audible range. If you spot this, the compression is probably working too hard. Pull it back first. If the resonance still pokes through after that, then yes, a second light RESO can clean it up.
Use RESO's frequency-sweep mode to find the resonance before you start dropping nodes. Loop the loudest section, hold Control and sweep slowly. The buildup reveals itself far faster than guessing from a static spectrum.
6MIXROOM And Mid/Side
Mid/side processing is unusually sensitive to chain order. Anything after an M/S EQ that touches stereo image (limiters, wideners, saturators with stereo behaviour) interacts with the balance you just set. Build the chain wrong and you'll spend ten minutes carefully widening the sides, then watch the limiter clamp them back down again.

The right placement is simple: cleanup → broadband EQ → mid/side EQ → bus compression → limiter. MIXROOM goes after RESO, after broadband corrections, before the dynamic heavy lifting. Your M/S decisions get baked in before the limiter shapes the final image, not patched on after.
If you're using STEREOVAULT for stereo width on top of an M/S move, same rule: before the limiter, not after. The limiter should always be the last thing in your chain that touches width.
Level-match before you A/B any M/S move. Mid/side processing changes perceived loudness in sneaky ways. A tiny boost on the sides will sound like a big improvement just because the meter ticked up. Match levels and the actual quality difference becomes obvious.
7REFERENCE 3 And EXPOSE 2 — The Two That Aren't Really In The Chain
The two MTM plugins most people put in the chain wrong are the two that aren't really in the chain. REFERENCE 3 and EXPOSE 2 both do their job from outside the signal flow.
REFERENCE 3 sits on your master bus from the start, but its job is comparison, not processing. It listens to whatever your chain is producing and shows you how that signal compares to commercial references... tonal balance, stereo width, dynamics, and the balance of vocals, drums, music and bass. You don't move it around. You change your chain based on what it's telling you.
Treat REFERENCE 3 as a parallel A/B running the whole session, not a final-step check. The earlier you reference, the fewer decisions you'll have to undo later. If you want to go deeper, the post on Producing, Mixing And Mastering With REFERENCE 3 covers exactly that.
EXPOSE 2 is a standalone quality control application, it works on the bounced file. Once you've exported, it confirms the master hits the loudness target for the platform you're releasing on, that the true peak is safe (if that matters to you), that the codecs won't degrade it, and that the dynamics line up with the rest of your release. The piece on checking your final masters like a mastering engineer walks through this end-to-end.
They're not part of the signal flow. They're how you check that everything in the signal flow is doing what you wanted.

Headline DJ
"REFERENCE is my go-to plugin to A/B between reference tracks and get my mix & master where I want it to be!"
Try REFERENCE 3 free →8Three Chains To Copy
Starting points, not rules. Drop one of these on your master bus and adjust to taste.
Chain A — Electronic / bass-heavy
- RESO — sweep 40–250 Hz for resonant low-end and low-mids, drop a couple of subtle ones on the worst offenders
- BASSROOM — match the low-end target to your reference, lock in the kick/sub balance
- MIXROOM — broadband tonal balance, plus a touch of mid/side in the upper mids if it needs it
- FASTER MASTER — preset matched to your reference, then trim by ear
- REFERENCE 3 running in parallel from step 1 — check Mix Balance and tonal match before bouncing
- EXPOSE 2 on the bounced file — confirm streaming loudness, true peak, and dynamic range
Chain B — Pop / vocal-led
- RESO — focus on 1–4 kHz, where vocal and instrument resonances stack
- MIXROOM goes first this time — modest broadband EQ to set the vocal-vs-music balance
- BASSROOM — light low-end correction, usually less aggressive than electronic
- FASTER MASTER — preset matched to genre, leaning toward dynamics over maximum loudness
- REFERENCE 3 — pay attention to the vocal-vs-music balance descriptor
- EXPOSE 2 — make sure the vocal isn't the loudest thing relative to the rest of the master, codec-preview the AAC output
Chain C — Acoustic / live
- RESO — room ringing in 200–500 Hz, and the 2–4 kHz hardness band
- MIXROOM — gentle broadband tilt, often a small high-shelf plus a small low-mid scoop
- BASSROOM only if the source mix has a low-end imbalance worth correcting. Many acoustic mixes don't need it
- FASTER MASTER on a light preset — preserving dynamics is the priority
- REFERENCE 3 — match against acoustic references that share your dynamic profile, not louder genres
- EXPOSE 2 — accept a lower LUFS target if the dynamics earn it
These are starting points, not rules. Adjust the order if your track needs it. The thing that actually matters is being able to explain why each plugin sits where it does — what the next plugin in line is dealing with because of the one in front. If you can answer that, you're picking your chain on purpose. If not, you're picking it by habit.

Ranked #1 DJ by DJ Mag, a record of five times
"FASTER MASTER is perfect for when you need a quick, loud, and great-sounding master."
Try FASTER MASTER free →Small Order Mistakes Add Up
Most chain-order mistakes aren't dramatic. They're quiet. A compressor reacting to a resonance you didn't tame. A limiter chasing a kick that wasn't shaped yet. A widener flattening an M/S move you spent ten minutes on. None of them ruin a master on their own. Stack three of them and you've got the difference between a master that holds up next to your reference and one that doesn't.
If you want a smart default that handles most of this for you, FASTER MASTER is built around the right order out of the box. If you want full control, follow the five-stage chain and pick the template that matches your genre. Either way, the point is the same: every plugin sits where it sits because the next one works better with it in front.


