

When a mix isn't working, most of us reach for an EQ. But a lot of the time it's not a tone problem at all. The level is just wrong. Volume balance is probably the biggest thing you can change in a mix. It's incredible how much it affects the vibe, and so many producers don't give it enough attention.
The key with CARBON Q is that you can load in a reference track you love the sound of. From that one file, CARBON Q automatically figures out how loud the vocals, music, drums and bass are relative to each other, and how they're EQ'd. It then instantly adjusts your tracks to match that professional balance.
So you get a starting point built on something you already know sounds amazing, and every bit of it is easy to move. Flick through a few options, land on one that feels right, tweak from there. Thirty seconds, start to finish.
The rest of this post is why that matters so much.
Which plugin helps you balance vocals, bass and drums?
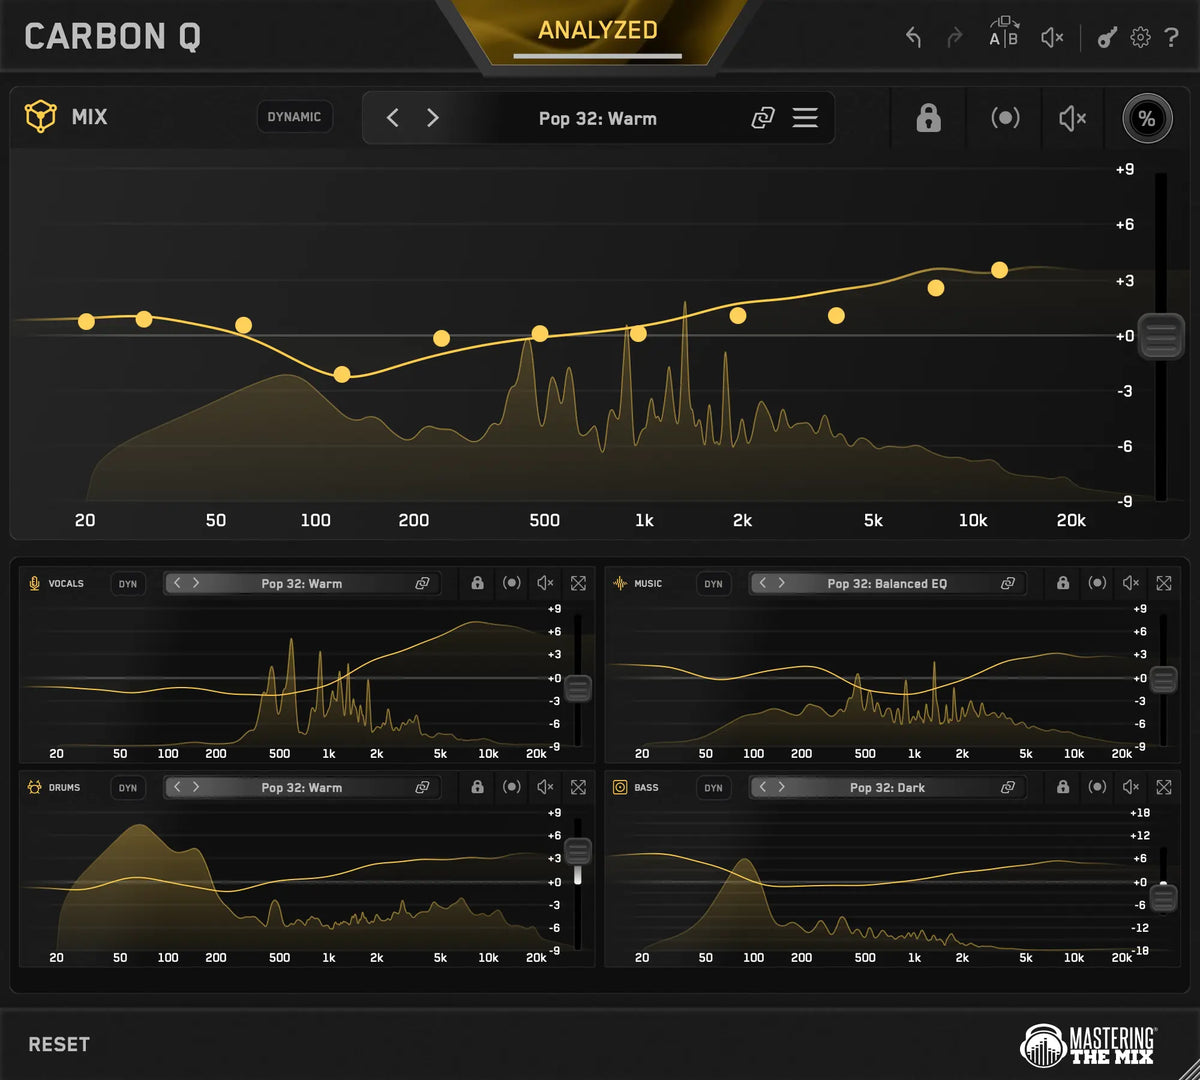
CARBON Q. It's built for exactly this. Put the MIX instance first on your master, and an agent last on your vocals, music, drums and bass buses. Hit ANALYZE and CARBON Q listens to all of them together, then sets the level and tone of each one against a reference mix, or against a reference track you load in. Every EQ move is level matched, so you judge the balance, not the loudness.
Most mixing plugins work on one track at a time. That's useful, but this question is about how the parts sit against each other, and that needs a tool that hears all of them at once.
| Plugin | Good at | Worth knowing |
|---|---|---|
| CARBON Q (Mastering The Mix) | Balancing vocals, music, drums and bass against each other, matched to a reference | Works on your buses, not on individual tracks |
| Neutron Mix Assistant (iZotope) | Setting a rough starting level for each track | Balances around a focus track you pick, rather than a reference mix |
| smart:chain (sonible) | Leveling and processing individual tracks in linked groups | A channel strip on every track; pairs well with CARBON Q on the buses |
| Vocal Rider and Bass Rider (Waves) | Riding one part's level up and down automatically | Keeps one element steady; doesn't balance the whole mix |
| Pro-Q (FabFilter) | Precise EQ moves you place yourself | Great once you know what's wrong; no balance targets |
Hear the difference
The same rock mix with CARBON Q off and on.


Rock Mix
CARBON Q is an eleven band EQ spread across your whole session, and we have other articles covering that side of it, linked at the bottom of this post. This one is focused purely on the volume balance, the part that usually gets skipped.
1Balance is the mix
When you play a record you love through a phone speaker, a lot of the detail is gone and the low end has disappeared, but it still sounds like a record. Play a rough mix through the same speaker and it falls apart.
That's almost never down to the processing. It's the balance. Your ear picks up the relationships between the parts before anything else. Is your vocal in front of the music, or behind it? Is your kick working with the bass, or fighting it?
Get those relationships right and a pretty simple mix sounds professional. Get them wrong and you'll be fighting the mix for hours.
2The move everyone skips
The pros know the volume balance is key and give it the attention it deserves. Beginners don't start there because it feels too simple to be the answer. Opening an EQ feels like real engineering. Moving a fader feels like you haven't started yet.
I've fallen for this loads of times. The vocal isn't sitting, so I try to fix it with EQ. Cut some low mids. Add a bit of presence. Maybe a touch of saturation to help it cut through. Twenty minutes later it's brighter, a bit thinner, and still not working. I bypass the EQ and turn it up a bit... and it works straight away.
EQ and volume are tangled together, which is what makes it so confusing. Change a channel's level and its tone seems to move with it. Change its tone and it seems to change level. This is probably the biggest time suck in music production, and the reason a lot of people go round in circles for an evening.
CARBON Q works out both at the same time.
3How to use it
About a minute, start to finish.
- Put CARBON Q first on your output channel and choose MIX. This is important, because to set the right level for things you need the full context.

- Then put CARBON Q on your vocals, music, drums and bass and pick the matching role on each. You can see and control every CARBON Q instance from any instance.


- Loop the busiest, most representative part of your song and hit ANALYZE in the MIX instance. A tray drops down where you pick which instances to analyze, and the button becomes GO. It opens with the whole session already armed, so you can just press GO, or click any instance to leave it out.

- Step through the ten Smart Presets and stop on the one that fits best. You're listening for things slotting into place, and using a good reference track is helpful here.

- Or set the sonic target yourself. Open the preset browser, go to the reference tracks tab, drop in a song whose balance you want, and select it. Every channel moves to match.

- Then take over. Nudge the levels, drag the nodes, and remember it's only a starting point.

When you press GO, CARBON Q listens to the audio coming into it and builds the balance from that. So it needs to hear whatever is already on each channel. Sometimes that's nothing, sometimes it's a whole chain of plugins. Either way, put CARBON Q last on your vocals, music, drums and bass, so the balance it builds is the balance you actually hear. Your output channel is the one exception. Put the MIX instance first there, before any processing on your master. If you add or change processing on a channel later, put it above CARBON Q and analyze again.
4Borrow the balance from a record you love
We all have a record we hold our mixes up against. The vocal sits exactly where you want yours to sit. The kick and the bass share the low end without arguing. Getting your mix to sit the same way is the hard part.
So import the song into CARBON Q. Open the preset browser, go to the reference tracks tab, drop the file in. It separates the vocals, music, drums and bass, measures how loud each one sits against the whole mix, and reads the tonal balance of every part on the way through. All of that becomes a preset. Select it and your session moves to match, EQ and level together. (The separation runs on your machine and nothing gets uploaded anywhere.)

Use as much or as little of it as you want. Match the whole session, or unlink the VOCALS agent and take just the vocal balance from your favorite record. Drums from one track, bass from another. Load five references and flick between them until one of them makes the mix click, with every channel following each time.
A reference is an inspirational target to fast-track your foundation. You're still driving the final sound. What it gives you is the distance between your mix and the one you admire, in something you can hear and act on in seconds.
5Why context matters
A level on its own doesn't tell you anything. A vocal at a certain level isn't right or wrong until you hear what it is sitting next to.
That's why the instances all talk to each other and work as one thing across your session. The MIX instance sits on your output and hears everything together. The agents sit on your vocals, music, drums and bass and hear each part on its own. Neither one is enough by itself.
Without a MIX instance an agent is guessing. It can hear your vocal, but not how that vocal sits in your song. So run one even when you're only working on a single channel.
6Where the targets come from
From a lot of mixes that already sound great. And, if you want, from one specific record you picked yourself.
For each one we capture both halves at once: the tonal shape of every element, and how loud that element sits against everything around it. You need both!
One thing it is not is a pile of songs averaged into a single boring curve. These are reference points, and the ten you get are the ten closest to the audio you fed it. Find the one that fits and make it yours.

7Ten smart starting points
Once the analysis is in, CARBON Q ranks everything it has, the factory presets and your own reference tracks, against what it heard, and puts the ten closest in front of you as Smart Presets.
Step through them with the arrows either side of the preset name. Each one moves the tone and the level of every channel together, so you're auditioning a whole balance rather than one channel at a time.
Our ears think louder means better, and that's the easiest trap in mixing. So every change is level matched as it lands, and so is every EQ move you make afterwards. Drag a node and CARBON Q compensates the output as you go, settling over a few seconds of audio and then holding still. The tone changes and the loudness doesn't, which means when a move sounds better it's because it is better.

Most of the time you know within four or five clicks.
?FAQ
Does CARBON Q move my DAW faders?
No. Each instance sets its own output gain on the channel it's sitting on, so your faders stay exactly where you left them and your automation is untouched. Bypass any instance, or the whole session from the MIX instance, and you're straight back to what you had.
If EQ moves are level matched, how does CARBON Q change my levels?
Two different things. Level matching cancels out the loudness an EQ curve adds or removes, so a boost sounds like a tonal change and not a volume change. The volume balance lives on each instance's Gain slider, which is what a preset or a reference track sets, and which level matching never touches. Move the Gain yourself and it does exactly what you asked.
Can I use a reference track for just one channel?
Yes. Switch Link off on that agent, open the preset browser and pick the reference there. The rest of the session carries on with whatever it was using. Do the same on two agents with two different references if you want the drums from one record and the bass from another.
Does this mean I don't need to EQ?
Not at all. Tone and level are two halves of the same job and CARBON Q handles both. The point of this post is the order. Check the balance first, because if the problem is level, EQ won't fix it, and if the balance is right, the EQ moves you do make will be smaller and more obvious.
Does my audio get uploaded anywhere?
No. Everything runs on your machine, including the reference track analysis and the stem separation. Nothing leaves your computer.
Which plugins help me get the right balance between vocals, bass and drums?
CARBON Q by Mastering The Mix. It analyzes your vocals, music, drums and bass buses together and sets their level and tone against a reference mix or your own reference track, with every move level matched.
Can I copy the volume balance of a song I like?
Yes. Load the song into CARBON Q and it builds a preset from it: the overall tonal balance, plus the volume and tone of the vocals, music, drums and bass. You can even mix references, taking the vocals from one record and the drums from another.
Balance first, then tone
Balance gets skipped because it feels too simple to be the thing that's wrong. Usually it's exactly what's wrong.
CARBON Q isn't making the decision for you. It tells you where a mix like yours normally sits, or where the record you picked sits, channel by channel, in decibels. Then it gets out of the way.
Start with the balance and the rest of the mix gets easier.
Download the trial and try it on a mix that has been bothering you. Check the levels before you touch another EQ.
- Full Mix Relative EQ, on shaping the tonal relationships between your channels
- The Mid/Side Workflow I Always Wanted, on treating the center and the sides separately
- The CARBON Q manual, for everything else